mcp-compress-router
Health Warn
- License — License: MIT
- Description — Repository has a description
- Active repo — Last push 0 days ago
- Low visibility — Only 5 GitHub stars
Code Fail
- rm -rf — Recursive force deletion command in package.json
- fs module — File system access in package.json
Permissions Pass
- Permissions — No dangerous permissions requested
No AI report is available for this listing yet.
Compress all connected MCP into a single router MCP and save up to 99% on tokens
MCP Compressing Router
![]()


Compress all connected MCP into a single router MCP and save up to 99% on tokens.
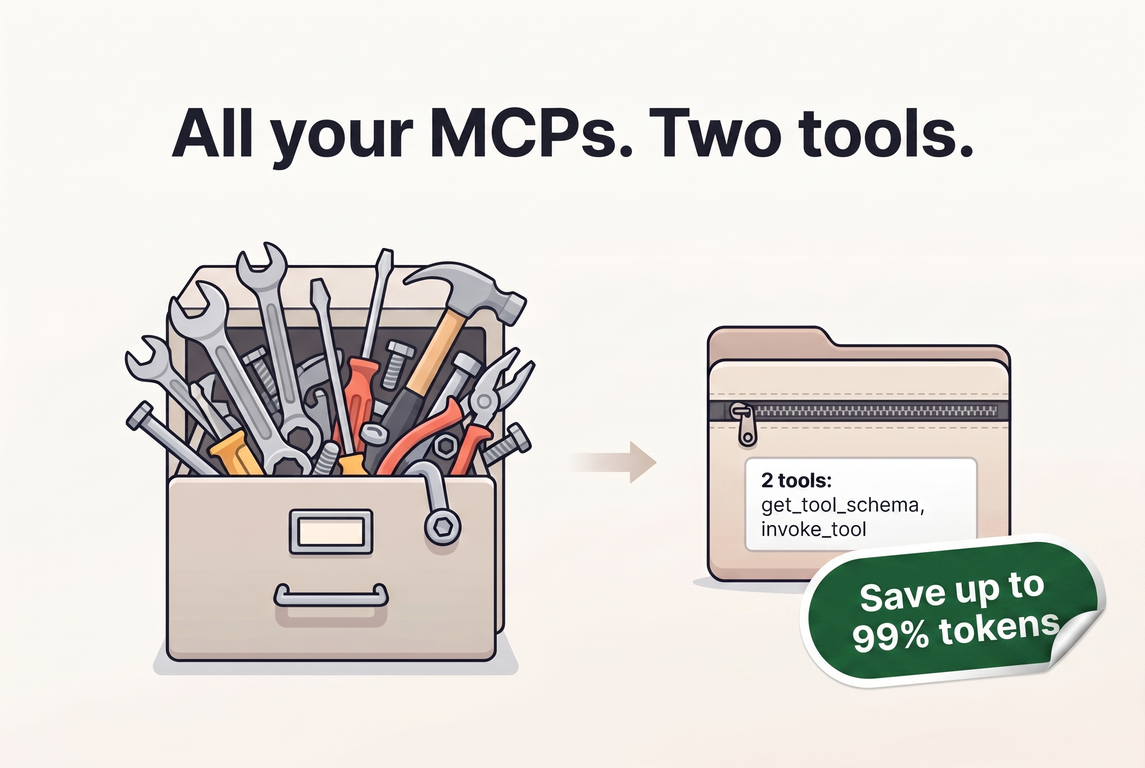
Table of Contents
- The Problem
- The Solution
- Prerequisites
- Quick Start
- Configuration
- Connecting Coding Agents
- How It Works
- Aknowledgements
The Problem
When you have multiple MCPs every request to the LLM will include ALL their
tools and descriptions, which can quickly eat up your token limit and increase
costs.
Check out this example to understand how
quickly and how large it can get. This example represents just 3 popular MCP
servers: Notion MCP, Github MCP and Pylance MCP.
The overhead that is created is about 26K tokens, but let's check how much
it actually costs you in USD. I will use Opus API pricing for calculation and
I'll assume that on average you have a 50-turn coding session (pretty
reasonable these days).
- Input:
26K tokens * $5 / 1M = $0.13 - Cache write (caching is not free):
26K tokens * $6.25 / 1M = $0.1625 - Cache read (49 turns):
26K tokens * 49 * $0.50 / 1M = $0.637
So the total overhead on an average coding session is about $0.9275.
And that's just for 3 MCPs, imagine if you had more!
The Solution
Instead of sending all the tools and descriptions every time, you can use a
single router MCP that compresses all the connected MCPs into one with just
two tools: get_tool_schema, invoke_tool.
get_tool_schema in the description only has a list of MCP servers, optional
descriptions (you can write them yourself), and a list of tool names for each
MCP server. Here is an example of how the
compressed version looks like, and it takes about 900 tokens.
If we repeat our exercise with the compressed version, the total overhead on
an average coding session will be about $0.032175 so we saved about
96.5% on costs!
This is just a basic example with just 3 MCP servers, the more MCP servers you
have, the more you save.
Prerequisites
- Node.js 24 or later — the router runs on Node.js and is launched
vianpx, so no separate install step is needed. - A coding agent that supports stdio MCP servers — this covers
virtually every modern coding agent (opencode, Claude Code, Codex,
GitHub Copilot, Cursor, etc.). The router exposes itself as a single
stdio MCP server, so any agent that can spawn a local MCP process
works.
Quick Start
The router is published on npm asmcp-compress-router.
You do not need to install it — just run it with npx:
npx mcp-compress-router@latest add playwright -- npx -y @playwright/mcp
This registers a downstream MCP server named playwright and writes it
to your config file. Repeat for every MCP server
you want to compress.
Then point your coding agent at the router:
npx mcp-compress-router@latest
When started without a subcommand, the router runs the MCP server over
stdio and exposes exactly two tools (get_tool_schema,invoke_tool) to the agent.
Configuration
The router reads its configuration from a single JSON(C) file that lists
every downstream MCP server to compress. You can edit this file by hand
or use the add / remove / get / list CLI commands.
Config File Location
By default, the config file lives in a platform-specific directory
(mcp.jsonc is preferred over mcp.json when both exist):
- Windows:
%APPDATA%\mcp-compress-router\ - macOS:
~/Library/Application Support/mcp-compress-router/ - Linux:
~/.local/share/mcp-compress-router/
You can override this with:
- The
-c, --config <path>flag on any command, or - The
MCP_COMPRESS_ROUTER_HOMEenvironment variable (points to a
directory containing the config file).
If the file does not exist when a management command runs, it is created
automatically with an empty { "mcpServers": {} } body.
A .env file in the same directory is loaded automatically at
startup, so you can keep secrets out of the config (see
Secrets and Variable Expansion).
Note on
-cand credential storage: when you override the config
path with-c /some/dir/mcp.json, bothcredentials.json(OAuth
tokens) andmcp.jsonlive in/some/dir/— i.e. next to the config
file you specified. The.envfile, however, is loaded from the
configuration directory resolved byMCP_COMPRESS_ROUTER_HOMEor the platform default, not from beside
the explicit-cpath. To co-locate.envwith a custom config, setMCP_COMPRESS_ROUTER_HOMEto the same directory.
Adding Downstream Servers
Use the add command to register a downstream MCP server.
A good description helps the LLM route requests to the correct server.
When several servers are compressed behind the router, the model sees
each server's name, its description, and a list of tool names in theget_tool_schema catalog. A clear description (e.g. "GitHub API tools
for issues, PRs, and repos") steers the model toward the right server
far better than a bare name.
stdio server (a local process):
npx mcp-compress-router@latest add github --description "GitHub API tools" \
  -- npx -y @modelcontextprotocol/server-github

# With environment variables
npx mcp-compress-router@latest add github -e GITHUB_PERSONAL_TOKEN=ghp_xxx \
  --description "GitHub API tools" \
  -- npx -y @modelcontextprotocol/server-github
HTTP server (a remote endpoint; transport auto-detected from the
URL):
npx mcp-compress-router@latest add my-http https://localhost:3100/mcp

# With a custom header
npx mcp-compress-router@latest add my-http \
  --header "Authorization: Bearer mytoken" \
  https://localhost:3100/mcp
This produces a config file that looks like:
{
  "mcpServers": {
    "github": {
      "type": "stdio",
      "command": "npx",
      "args": ["-y", "@modelcontextprotocol/server-github"],
      "env": { "GITHUB_PERSONAL_TOKEN": "ghp_xxx" },
      "description": "GitHub API tools"
    },
    "my-http": {
      "type": "http",
      "url": "https://localhost:3100/mcp",
      "headers": { "Authorization": "Bearer mytoken" }
    }
  }
}
Both .json and .jsonc (JSON with comments and trailing commas) are
supported. CLI commands write plain .json; hand-edited files may use.jsonc.
Other management commands:
npx mcp-compress-router@latest list            # list all servers + auth status
npx mcp-compress-router@latest get my-http     # show one server's config
npx mcp-compress-router@latest remove my-http  # remove a server
Per-Server Enable/Disable
Every server entry accepts an optional enabled boolean. When set tofalse, the router skips that server entirely at startup — no process
spawn, no network connection, no discovery — and it is absent from theget_tool_schema catalog. All configuration is preserved so the server
can be turned back on instantly. Omitting enabled (the default) means
enabled, keeping mcp.json clean and fully backward compatible.
Toggle it from the CLI without touching the rest of the config:
npx mcp-compress-router@latest disable github   # writes "enabled": false
npx mcp-compress-router@latest enable github    # removes the field
You can also set it at creation time:
npx mcp-compress-router@latest add archive --disabled -- npx -y server-archive
Per-Server Tool Selection
Two optional fields control which of a server's advertised tools are
exposed to the LLM. Both are arrays of glob patterns
(picomatch syntax: *, ?,{a,b}, [abc]) matched against bare tool names:
allowedTools— when present, only matching tools are exposed.
An empty array ([]) exposes no tools (handy for staging a server
while you build the list).disabledTools— removes matching tools from whatever would
otherwise be exposed. The denylist wins: a tool matching both lists
is blocked.
Filtered tools are hidden from the catalog and hard-rejected byinvoke_tool, so even an LLM that guesses a filtered name cannot
reach the downstream server.
"dangerous": {
  "type": "stdio",
  "command": "npx",
  "args": ["-y", "@some/mcp-server"],
  "allowedTools": ["list_issues", "get_pull_request"],
  "disabledTools": ["*_delete"]
}
A pattern that matches no real tool is not an error — the router logs a
warning (visible with -v) and continues. A malformed pattern is a
hard error at startup. Set filters at creation time with repeatable
flags:
npx mcp-compress-router@latest add github \
  --allowed-tools list_issues \
  --allowed-tools get_pull_request \
  -- npx -y server-github
Compression Levels
Each server's tools are listed in the get_tool_schema description at a
configurable compressionLevel. The level trades catalog compactness
for routing detail: lower levels give the LLM more information up front
(fewer get_tool_schema round-trips), while higher levels minimize the
per-request token overhead. The full JSON parameter schema is always
available via get_tool_schema regardless of the level — only the
catalog listing changes.
Four levels are supported, from most to least compact:
| Level | Tool listing format | Description shown? |
|---|---|---|
max |
toolA, toolB, toolC (comma-separated, single line) |
No |
high (default) |
toolName(arg1, arg2) (one per line) |
No |
medium |
toolName(arg1, arg2): first sentence... (one per line) |
Snippet |
low |
<tool>toolName(arg1, arg2): full description</tool> (one per line) |
Full |
Argument names are extracted from each tool's inputSchema.properties
keys in definition order. When a tool has no description, the medium
and low listings omit the description portion and show just the
signature.
Omitting compressionLevel (the default) is equivalent to high. Set
it per server in mcp.json:
"github": {
  "type": "stdio",
  "command": "npx",
  "args": ["-y", "@modelcontextprotocol/server-github"],
  "compressionLevel": "medium"
}
Or set it at creation time with the --compression-level flag:
npx mcp-compress-router@latest add github \
  --compression-level medium \
  -- npx -y @modelcontextprotocol/server-github
A good rule of thumb:
- Use
maxfor servers whose tool names are self-describing and you
want the smallest possible catalog. - Use
high(the default) for most servers — argument names are
usually enough for the LLM to pick the right tool. - Use
mediumwhen tool names alone are ambiguous and a one-line
hint helps disambiguate. - Use
lowsparingly — only when full descriptions must be visible
without aget_tool_schemacall, since it costs the most tokens.
Inspecting Tools
To see exactly which tools a server advertises — and which are[exposed] or [filtered] under your current selection — connect to
it live without starting the full router:
npx mcp-compress-router@latest tools github
This works regardless of the server's enabled state (inspecting a
disabled server is the primary way to build its allowlist). For HTTP
servers, stored OAuth credentials and oauth overrides are reused. If
the server cannot be reached or is missing required auth, the command
exits non-zero with a clear error and prints no partial list.
OAuth
HTTP servers that require OAuth are supported. When you add an HTTP
server, the router probes it for OAuth metadata and starts the login
flow automatically if OAuth is advertised. You can also trigger it
manually:
npx mcp-compress-router@latest login my-http
This opens your browser to complete the authorization-code flow. Tokens
are stored in a separate credentials.json in the same directory asmcp.json (with 0600 permissions on Unix), so you can safely
share or version-control mcp.json without exposing tokens. Addcredentials.json to your .gitignore.
By default the router uses
Dynamic Client Registration.
If your server requires a pre-registered client, add an oauth block to
the server entry (in mcp.json):
"my-http": {
  "type": "http",
  "url": "https://example.com/mcp",
  "oauth": {
    "clientId": "${MY_CLIENT_ID}",
    "clientSecret": "${MY_CLIENT_SECRET}",
    "scope": "read write"
  }
}
Only clientId is required; clientSecret and scope are optional.
Redirect URL
During login the router starts a temporary local HTTP server and uses
a loopback redirect URI (per RFC 8252):
http://localhost:<port>/mcp-compress-router/oauth-callback
<port> is chosen by the OS at login time, so there is no fixed port to
register. When a provider requires a pre-registered redirect URI,
register the loopback form without a port:
http://localhost/mcp-compress-router/oauth-callback
Most providers (GitHub included) match the scheme, host, and path and
ignore the port on localhost. If your provider demands a redirect URI
with an exact port, pin it with --port:
npx mcp-compress-router@latest login my-http --port 8765
This binds the callback server to 8765, so the redirect URI becomeshttp://localhost:8765/mcp-compress-router/oauth-callback — register
that exact URL with the provider. To reuse the same port on everylogin, persist it in the server's oauth block instead of passing the
flag each time:
"my-http": {
  "type": "http",
  "url": "https://example.com/mcp",
  "oauth": { "clientId": "${ID}", "callbackPort": 8765 }
}
--port overrides oauth.callbackPort for a single run. Pass --port 0
to force an OS-assigned port even when oauth.callbackPort is set.
GitHub MCP with OAuth (special case)
The official GitHub MCP server athttps://api.githubcopilot.com/mcp advertises OAuth but does not
support Dynamic Client Registration, so you must pre-register a GitHub
OAuth App and pass its credentials via the oauth block. GitHub also
requires that the OAuth App be installed to the repositories and
organizations you want the MCP to access.
Create a GitHub OAuth App.
Open https://github.com/settings/developers → New OAuth App (or
Register an application). Give it any name and homepage URL.Configure the callback URL.
Set the Authorization callback URL to:http://localhost/mcp-compress-router/oauth-callbackAdd the GitHub MCP server by URL.
npx mcp-compress-router@latest add github https://api.githubcopilot.com/mcpSet
oauthcredentials inmcp.json.
Copy the Client ID and generate a Client Secret, then put them in the
server entry (use variable expansion to keep secrets out of the
file):"github": { "type": "http", "url": "https://api.githubcopilot.com/mcp", "oauth": { "clientId": "${GITHUB_OAUTH_CLIENT_ID}", "clientSecret": "${GITHUB_OAUTH_CLIENT_SECRET}", "scope": "repo read:org" } }Request only the scopes the tools you need require;
repo read:org
covers the common repo and organization operations. Put the actual
values in your.envfile (see
Secrets and Variable Expansion).Run the login command.
npx mcp-compress-router@latest login githubYour browser opens to authorize. After you approve, tokens are stored
incredentials.jsonand the router can call GitHub MCP tools.
Note: if you used a GitHub App (not a classic OAuth App), the
App must be installed to the accounts/repos you want to access before
login will succeed, and its client secret is generated under General
→ Generate a new client secret.
Figma MCP with OAuth (special case)
The official Figma MCP server at https://mcp.figma.com/mcp does not
support Dynamic Client Registration through the standard MCP flow.
Instead you register an OAuth client via Figma's REST API using a
Personal Access Token, then pass the resulting credentials through theoauth block. Figma also requires the redirect URI to use a fixed
port — the port you register is reused on every login, so you must
pin it with oauth.callbackPort.
Create a Figma Personal Access Token.
Follow
https://developers.figma.com/docs/rest-api/personal-access-tokens/
to generate a PAT and export it asFIGMA_PERSONAL_ACCESS_TOKEN. It
is only used to register the MCP client in the next step.Register the MCP client via Figma's API.
The redirect URI must use127.0.0.1on a fixed port — the port
matters, it is reused on everylogin. This example uses19876:curl -X POST https://api.figma.com/v1/oauth/mcp/register \ -H "Content-Type: application/json" \ -H "X-Figma-Token: $FIGMA_PERSONAL_ACCESS_TOKEN" \ -d '{ "client_name": "Claude Code (figma)", "redirect_uris": ["http://127.0.0.1:19876/mcp-compress-router/oauth-callback"], "grant_types": ["authorization_code", "refresh_token"], "response_types": ["code"], "token_endpoint_auth_method": "none" }'Save the
client_idandclient_secretfrom the response (also note
thescopeismcp:connect):{ "client_id": "CLIENTID", "client_secret": "CLIENTSECRET", "client_name": "Claude Code (figma)", "redirect_uris": ["http://127.0.0.1:19876/mcp-compress-router/oauth-callback"], "token_endpoint_auth_method": "none", "scope": "mcp:connect" }Add the Figma MCP server by URL.
npx mcp-compress-router@latest add --transport http figma https://mcp.figma.com/mcpSet
oauthcredentials inmcp.json.
Put the client ID and secret from step 2 in the server entry, using
themcp:connectscope and the same fixed port you registered ascallbackPort:"figma": { "type": "http", "url": "https://mcp.figma.com/mcp", "oauth": { "clientId": "${FIGMA_CLIENT_ID}", "clientSecret": "${FIGMA_CLIENT_SECRET}", "scope": "mcp:connect", "callbackPort": 19876 } }Put the actual values in your
.envfile (see
Secrets and Variable Expansion).Run the login command.
npx mcp-compress-router@latest login figmaYour browser opens to authorize. After you approve, tokens are stored
incredentials.jsonand the router can call Figma MCP tools.
Other OAuth commands:
npx mcp-compress-router@latest logout my-http # remove stored credentials
For headless or CI environments, override the browser with theMCP_COMPRESS_ROUTER_BROWSER environment variable. The authorization
URL is appended as a single final argument (no shell):
MCP_COMPRESS_ROUTER_BROWSER="node /path/to/headless-browser.js" \
  npx mcp-compress-router@latest login my-http
The default login timeout is 120 seconds; override it withMCP_COMPRESS_ROUTER_LOGIN_TIMEOUT_MS.
Custom Headers
For HTTP servers that authenticate with a static API key or bearer
token instead of OAuth, use the headers field. You can set it via the
CLI or directly in mcp.json:
npx mcp-compress-router@latest add my-http \
  --header "Authorization: Bearer mytoken" \
  --header "X-Custom: value" \
  https://example.com/mcp
"my-http": {
  "type": "http",
  "url": "https://example.com/mcp",
  "headers": {
    "Authorization": "Bearer ${MY_SERVER_TOKEN}",
    "X-Custom": "value"
  }
}
Header values support
variable expansion, so you can keep
the actual token out of the config file.
Secrets and Variable Expansion
Every string field in a server entry (command, args, env,headers, url, oauth.*) is expanded against the process
environment at load time. Two syntaxes are supported:
| Syntax | Behavior |
|---|---|
${VAR} |
Replaced with the value of VAR. Throws if unset. |
${VAR:-default} |
Replaced with VAR when set and non-empty, otherwise default. |
Put your secrets in a .env file next to mcp.json:
# <config directory>/.env
GITHUB_PERSONAL_TOKEN=ghp_abc123
MY_SERVER_TOKEN=secret-token
Shell environment variables always take precedence over .env values.
Connecting Coding Agents
Once your downstream servers are configured, connect your agent to the
router the same way you would connect any other MCP server — by
pointing it at npx mcp-compress-router@latest. The examples below assume the
default config location; pass -c <path> if
you use a custom one.
Opencode
opencode mcp add mcp-compress-router -- npx -y mcp-compress-router@latest
Claude Code
claude mcp add mcp-compress-router -- npx -y mcp-compress-router@latest
Codex
codex mcp add mcp-compress-router -- npx -y mcp-compress-router@latest
GitHub Copilot (VS Code)
Add this to .vscode/mcp.json in your workspace (project-level, applies
only to that workspace), or to your user-level MCP settings which
apply across every workspace: open the Command Palette (Cmd+Shift+P) →MCP: Open User Configuration and add the same servers
block under the mcp key. Project-level and user-level entries are
merged, with project-level taking precedence.
{
  "servers": {
    "mcp-compress-router": {
      "command": "npx",
      "args": ["-y", "mcp-compress-router@latest"]
    }
  }
}
How It Works
Once connected, the agent sees exactly two tools:
get_tool_schema(server, tools)— Retrieves the JSON parameter
schema for one or more tools on a downstream MCP server. The tool's
description includes a compact listing of all servers and their
available tool names.invoke_tool(server, tool, arguments)— Forwards a tool call to
the downstream MCP server and returns the result.
The typical workflow:
- The agent reads the compact catalog from the
get_tool_schema
description and identifies which tools it needs. - It calls
get_tool_schemato learn the exact parameters. - It calls
invoke_toolto execute a tool, validated against the
cached schema.
This replaces thousands of tokens of tool listings with a compact ~900
token catalog, regardless of how many downstream servers you have.
For the full configuration and environment variable reference, see
configuration.md.
Acknowledgements
- mcp2cli — a very similar
idea of how MCP can be compressed, but to a CLI. - mcp-compressor —
also a very similar idea; the "two tools" approach was borrowed from
this project, though it only compresses a single MCP server.
Reviews (0)
Sign in to leave a review.
Leave a reviewNo results found