ragent
Health Warn
- License — License: NOASSERTION
- Description — Repository has a description
- Active repo — Last push 0 days ago
- Low visibility — Only 8 GitHub stars
Code Fail
- eval() — Dynamic code execution via eval() in internal/webui/static/js/htmx.min.js
- new Function() — Dynamic code execution via Function constructor in internal/webui/static/js/htmx.min.js
- exec() — Shell command execution in internal/webui/static/js/htmx.min.js
Permissions Pass
- Permissions — No dangerous permissions requested
No AI report is available for this listing yet.
CLI tool for building production RAG systems from Markdown, CSV, and PDF documents using hybrid search (BM25 + vector) with OpenSearch. Features MCP server, Slack bot, Web UI, multi-source ingestion (local/S3/GitHub), and multi-provider embeddings (Bedrock/Gemini).
RAGent - RAG System Builder for Markdown Documents
RAGent is a CLI tool for building a RAG (Retrieval-Augmented Generation) system from markdown documents using hybrid search capabilities (BM25 + vector search) with Amazon S3 Vectors and OpenSearch.
Table of Contents
- Features
- Slack Search Integration
- Embedding-Agnostic RAG
- Environment Variable Setup Guide
- Architecture Overview
- Prerequisites
- Required Environment Variables
- Installation
- Releases
- Commands
- Development
- Typical Workflow
- Troubleshooting
- AWS Secrets Manager Integration
- OpenSearch RAG Configuration
- Automated Setup (setup.sh)
- License
- MCP Server Integration
- Contributing
Features
- Vectorization: Convert source files (markdown, CSV, and PDF) from local directories, S3, or GitHub repositories to embeddings using Amazon Bedrock
- GitHub Data Source: Clone GitHub repositories and vectorize their markdown/CSV files with auto-generated metadata
- S3 Vector Integration: Store generated vectors in Amazon S3 Vectors
- Hybrid Search: Combined BM25 + vector search using OpenSearch
- Slack Search Integration: Blend document results with Slack conversations via an iterative enrichment pipeline
- Semantic Search: Semantic similarity search using S3 Vector Index
- Interactive RAG Chat: Chat interface with context-aware responses
- Vector Management: List vectors stored in S3
- Embedding-Agnostic RAG: Optional search path that answers directly from Slack without requiring pre-built vectors
- MCP Server: Model Context Protocol server for Claude Desktop integration
- OIDC Authentication: OpenID Connect authentication with multiple providers
- IP-based Security: IP address-based access control with configurable bypass ranges and audit logging
- Dual Transport: HTTP and Server-Sent Events (SSE) transport support
- AWS Secrets Manager Integration: Automatic secret injection as environment variable fallback
Slack Search Integration
Slack search extends every retrieval workflow by streaming recent conversations, threads, and channel timelines directly from Slack’s Web API. When SLACK_SEARCH_ENABLED=true, the following behavior is enabled automatically:
queryexposes--enable-slack-searchflag to opt in per request.chatsurfaces Slack context in addition to documents without requiring extra flags.slack-botresponds with combined document + Slack answers inside Block Kit messages.mcp-serveraddsenable_slack_searchparameter to thehybrid_searchtool.
Each Slack lookup performs iterative query refinement, merges timeline context from threads, and runs a sufficiency check before the final answer is generated. Results include permalinks so operators can pivot back to the original conversation instantly.
Slack URL Reference
You can include Slack message URLs directly in your queries. RAGent automatically detects and fetches the referenced messages, including thread replies, making them available as context for your question. This works across all commands (query, chat, slack-bot, mcp-server) regardless of whether SLACK_SEARCH_ENABLED is set.
# Fetch and analyze a specific Slack conversation
RAGent query -q "Summarize this discussion: https://your-workspace.slack.com/archives/C12345678/p1234567890123456"

# Reference multiple Slack messages
RAGent chat
> Compare these two threads: https://slack.com/.../p111 and https://slack.com/.../p222
Quick example:
# Search across documents and Slack in one command
RAGent query -q "incident timeline" --enable-slack-search
Embedding-Agnostic RAG
Slack search is intentionally embedding-agnostic: the system fetches live messages at query time instead of relying on pre-generated vectors. This provides several benefits:
- Operational cost savings: no additional vector storage or nightly re-indexing jobs are required for Slack data.
- Real-time awareness: answers incorporate messages posted seconds ago, keeping incident timelines and release notes fresh.
- Time-series preservation: the pipeline keeps message order and thread structure so analysts can replay discussions accurately.
- Seamless fallbacks: when Slack returns no hits the document-only hybrid search continues without interruption.
Slack-only output is still fused with document references, giving operators a single consolidated view while staying within compliance rules.
Environment Variable Setup Guide
RAGent integrates many services, and the required environment variables differ depending on your choices. This section provides visual flowcharts for the two main workflows: vectorization (data ingestion) and output (search & usage).
Vectorization Flow (vectorize command)
Follow this flowchart to determine which environment variables are needed for vectorization.
flowchart TD
    Start([Run vectorize]) --> AuthMethod

    %% ── Authentication method ──
    AuthMethod{{"AWS authentication method?"}}

    AuthMethod -->|"IAM Credentials"| IAMAuth["IAM Credentials
    ━━━━━━━━━━━━━━━━━━━
    AWS_REGION
    AWS_ACCESS_KEY_ID
    AWS_SECRET_ACCESS_KEY
    BEDROCK_REGION (default: us-east-1)"]

    AuthMethod -->|"Bearer Token"| BearerAuth["Bearer Token Auth
    ━━━━━━━━━━━━━━━━━━━
    BEDROCK_REGION
    * AWS_BEARER_TOKEN_BEDROCK
    ━━━━━━━━━━━━━━━━━━━
    AWS_REGION etc. not required"]

    IAMAuth --> OpenSearch
    BearerAuth --> OpenSearch

    %% ── OpenSearch (always required) ──
    OpenSearch["OpenSearch Config - BM25 Index
    ━━━━━━━━━━━━━━━━━━━
    * OPENSEARCH_ENDPOINT
    * OPENSEARCH_INDEX
    OPENSEARCH_REGION (default: us-east-1)"]

    OpenSearch --> VectorDB

    %% ── Vector DB backend selection ──
    VectorDB{{"Vector storage backend?
    VECTOR_DB_BACKEND"}}

    VectorDB -->|"s3 (default)"| S3Config["S3 Vectors Config
    ━━━━━━━━━━━━━━━━━━━
    * AWS_S3_VECTOR_BUCKET
    * AWS_S3_VECTOR_INDEX
    S3_VECTOR_REGION (default: us-east-1)"]

    VectorDB -->|sqlite| SQLiteConfig["SQLite-vec Config
    ━━━━━━━━━━━━━━━━━━━
    SQLITE_VEC_DB_PATH
    (default: ~/.ragent/vectors.db)"]

    S3Config --> DataSource
    SQLiteConfig --> DataSource

    %% ── Data source selection ──
    DataSource{{"Data source?"}}

    DataSource -->|"Local (default)"| LocalSource["Local Directory
    ━━━━━━━━━━━━━━━━━━━
    --directory ./source
    No additional env vars"]

    DataSource -->|S3 Bucket| S3Source["S3 Source Config
    ━━━━━━━━━━━━━━━━━━━
    --enable-s3 flag
    --s3-bucket bucket-name
    S3_SOURCE_REGION (default: us-east-1)"]

    DataSource -->|GitHub Repository| GitHubSource["GitHub Config
    ━━━━━━━━━━━━━━━━━━━
    --github-repos owner/repo
    GITHUB_TOKEN
    (required for private repos)"]

    DataSource -->|Multiple| MultiSource["Multiple Sources
    ━━━━━━━━━━━━━━━━━━━
    Local + S3 + GitHub can be combined"]

    LocalSource --> OCR
    S3Source --> OCR
    GitHubSource --> OCR
    MultiSource --> OCR

    %% ── OCR (PDF support) ──
    OCR{{"Process PDFs?
    OCR_PROVIDER"}}

    OCR -->|"No (default)"| NoOCR["PDFs are skipped"]
    OCR -->|bedrock| OCRBedrock["Bedrock OCR Config
    ━━━━━━━━━━━━━━━━━━━
    OCR_PROVIDER=bedrock
    OCR_MODEL (optional)
    OCR_TIMEOUT (default: 600s)
    OCR_CONCURRENCY (default: 5)"]
    OCR -->|gemini| OCRGemini["Gemini OCR Config
    ━━━━━━━━━━━━━━━━━━━
    OCR_PROVIDER=gemini
    GEMINI_API_KEY (API key auth)
    ━━━ OR ━━━
    GOOGLE_APPLICATION_CREDENTIALS
    GEMINI_GCP_PROJECT
    GEMINI_GCP_LOCATION (default: us-central1)
    ━━━━━━━━━━━━━━━━━━━
    OCR_MODEL (optional)"]

    NoOCR --> Optional
    OCRBedrock --> Optional
    OCRGemini --> Optional

    %% ── Optional settings ──
    Optional["Optional Settings
    ━━━━━━━━━━━━━━━━━━━
    VECTORIZER_CONCURRENCY (default: 10)
    VECTORIZER_RETRY_ATTEMPTS (default: 10)
    EXCLUDE_CATEGORIES"]

    Optional --> Ready([Ready to run vectorize])

    %% ── Styles ──
    style Start fill:#4CAF50,color:#fff
    style Ready fill:#4CAF50,color:#fff
    style AuthMethod fill:#FF9800,color:#fff
    style VectorDB fill:#FF9800,color:#fff
    style DataSource fill:#FF9800,color:#fff
    style OCR fill:#FF9800,color:#fff
    style IAMAuth fill:#e3f2fd
    style BearerAuth fill:#e3f2fd
    style OpenSearch fill:#e3f2fd
    style S3Config fill:#fff3e0
    style SQLiteConfig fill:#fff3e0
    style LocalSource fill:#e8f5e9
    style S3Source fill:#e8f5e9
    style GitHubSource fill:#e8f5e9
    style MultiSource fill:#e8f5e9
    style OCRBedrock fill:#fce4ec
    style OCRGemini fill:#fce4ec
    style NoOCR fill:#f5f5f5
    style Optional fill:#f3e5f5
Legend:
*= required (error if unset),default: xxx= has a default value. IAM credentials and Bearer Token (AWS_BEARER_TOKEN_BEDROCK) are mutually exclusive.
Output Flow (Search & Usage Commands)
The required environment variables depend on which command you use and which search mode you choose.
flowchart TD
    Start([Use vectorized data]) --> Command

    %% ── Command selection ──
    Command{{"Which command?"}}

    Command -->|query| QueryCmd["query
    ━━━━━━━━━━━━━━━━
    Semantic search
    Terminal output"]

    Command -->|chat| ChatCmd["chat
    ━━━━━━━━━━━━━━━━
    Interactive RAG chat
    Claude-powered answers"]

    Command -->|slack-bot| SlackBotCmd["slack-bot
    ━━━━━━━━━━━━━━━━
    Slack Bot
    Auto-respond to mentions"]

    Command -->|mcp-server| MCPCmd["mcp-server
    ━━━━━━━━━━━━━━━━
    MCP Protocol Server
    Claude Desktop integration"]

    QueryCmd --> SearchMode
    ChatCmd --> SearchMode
    SlackBotCmd --> SlackBotConfig
    MCPCmd --> MCPAuth

    %% ── Search mode (query / chat) ──
    SearchMode{{"Search mode?"}}

    SearchMode -->|"Hybrid search (default)"| HybridBase
    SearchMode -->|"--only-slack"| SlackOnly

    %% ── Hybrid search common config ──
    HybridBase["Common Config (required)
    ━━━━━━━━━━━━━━━━━━━
    AWS Auth (IAM or Bearer Token)
    BEDROCK_REGION
    * OPENSEARCH_ENDPOINT
    * OPENSEARCH_INDEX
    CHAT_MODEL (for chat command)"]

    HybridBase --> SlackSearch

    %% ── Slack search addition ──
    SlackSearch{{"Also use Slack search?
    SLACK_SEARCH_ENABLED"}}

    SlackSearch -->|"false (default)"| HybridOnly["Hybrid search only
    ━━━━━━━━━━━━━━━━━━━
    No additional env vars"]

    SlackSearch -->|true| HybridPlusSlack["Add Slack Search Config
    ━━━━━━━━━━━━━━━━━━━
    SLACK_SEARCH_ENABLED=true
    * SLACK_USER_TOKEN
    ━━━━━ Optional ━━━━━
    SLACK_SEARCH_MAX_RESULTS (default: 20)
    SLACK_SEARCH_MAX_ITERATIONS (default: 3)
    SLACK_SEARCH_TIMEOUT_SECONDS (default: 60)"]

    %% ── Slack-Only mode ──
    SlackOnly["Slack-Only Config
    ━━━━━━━━━━━━━━━━━━━
    OpenSearch not required
    ━━━━━━━━━━━━━━━━━━━
    AWS Auth (IAM or Bearer Token)
    BEDROCK_REGION
    * SLACK_USER_TOKEN
    SLACK_SEARCH_ENABLED=true"]

    %% ── Slack Bot specific config ──
    SlackBotConfig["Slack Bot Config
    ━━━━━━━━━━━━━━━━━━━
    * SLACK_BOT_TOKEN
    SLACK_APP_TOKEN (for Socket Mode)
    SLACK_RESPONSE_TIMEOUT (default: 5s)
    SLACK_ENABLE_THREADING (default: true)"]

    SlackBotConfig --> SlackBotSearch

    SlackBotSearch{{"Search mode?"}}

    SlackBotSearch -->|"Hybrid (default)"| SlackBotHybrid["Common Config (required)
    ━━━━━━━━━━━━━━━━━━━
    AWS Auth (IAM or Bearer Token)
    BEDROCK_REGION
    * OPENSEARCH_ENDPOINT
    * OPENSEARCH_INDEX"]

    SlackBotSearch -->|"--only-slack"| SlackBotOnly["Slack-Only Config
    ━━━━━━━━━━━━━━━━━━━
    OpenSearch not required
    ━━━━━━━━━━━━━━━━━━━
    AWS Auth (IAM or Bearer Token)
    BEDROCK_REGION
    * SLACK_USER_TOKEN
    SLACK_SEARCH_ENABLED=true"]

    SlackBotHybrid --> SlackBotSlackOpt
    SlackBotSlackOpt{{"Also use Slack search?"}}
    SlackBotSlackOpt -->|false| SlackBotReady([Ready to run slack-bot])
    SlackBotSlackOpt -->|true| SlackBotSlack["SLACK_SEARCH_ENABLED=true
    * SLACK_USER_TOKEN"]
    SlackBotSlack --> SlackBotReady
    SlackBotOnly --> SlackBotReady

    %% ── MCP Server auth config ──
    MCPAuth{{"Auth method?
    --auth-method"}}

    MCPAuth -->|"ip (default)"| MCPIP["IP Auth
    ━━━━━━━━━━━━━━━━━━━
    MCP_ALLOWED_IPS (default: 127.0.0.1,::1)"]

    MCPAuth -->|oidc| MCPOIDC["OIDC Auth
    ━━━━━━━━━━━━━━━━━━━
    * OIDC_ISSUER
    * OIDC_CLIENT_ID
    * OIDC_CLIENT_SECRET"]

    MCPAuth -->|both| MCPBoth["IP + OIDC both required
    ━━━━━━━━━━━━━━━━━━━
    IP auth config +
    OIDC auth config"]

    MCPAuth -->|either| MCPEither["IP or OIDC either one
    ━━━━━━━━━━━━━━━━━━━
    IP auth config or
    OIDC auth config"]

    MCPIP --> MCPServer
    MCPOIDC --> MCPServer
    MCPBoth --> MCPServer
    MCPEither --> MCPServer

    MCPServer["MCP Server Config
    ━━━━━━━━━━━━━━━━━━━
    MCP_SERVER_HOST (default: localhost)
    MCP_SERVER_PORT (default: 8080)"]

    MCPServer --> MCPSearch

    MCPSearch{{"Search mode?"}}

    MCPSearch -->|"Hybrid (default)"| MCPHybrid["Common Config (required)
    ━━━━━━━━━━━━━━━━━━━
    AWS Auth (IAM or Bearer Token)
    BEDROCK_REGION
    * OPENSEARCH_ENDPOINT
    * OPENSEARCH_INDEX"]

    MCPSearch -->|"--only-slack"| MCPSlackOnly["Slack-Only Config
    ━━━━━━━━━━━━━━━━━━━
    OpenSearch not required
    ━━━━━━━━━━━━━━━━━━━
    AWS Auth (IAM or Bearer Token)
    BEDROCK_REGION
    * SLACK_USER_TOKEN
    SLACK_SEARCH_ENABLED=true"]

    MCPHybrid --> MCPReady([Ready to run mcp-server])
    MCPSlackOnly --> MCPReady

    HybridOnly --> Ready([Ready])
    HybridPlusSlack --> Ready
    SlackOnly --> Ready

    %% ── Styles ──
    style Start fill:#4CAF50,color:#fff
    style Ready fill:#4CAF50,color:#fff
    style SlackBotReady fill:#4CAF50,color:#fff
    style MCPReady fill:#4CAF50,color:#fff

    style Command fill:#2196F3,color:#fff
    style SearchMode fill:#FF9800,color:#fff
    style SlackSearch fill:#FF9800,color:#fff
    style SlackBotSearch fill:#FF9800,color:#fff
    style SlackBotSlackOpt fill:#FF9800,color:#fff
    style MCPAuth fill:#FF9800,color:#fff
    style MCPSearch fill:#FF9800,color:#fff

    style QueryCmd fill:#e3f2fd
    style ChatCmd fill:#fce4ec
    style SlackBotCmd fill:#e8f5e9
    style MCPCmd fill:#f3e5f5

    style HybridBase fill:#e3f2fd
    style SlackBotConfig fill:#e8f5e9
    style MCPServer fill:#f3e5f5

    style HybridOnly fill:#e8f5e9
    style HybridPlusSlack fill:#fff3e0
    style SlackOnly fill:#fff3e0

    style MCPIP fill:#f3e5f5
    style MCPOIDC fill:#f3e5f5
    style MCPBoth fill:#f3e5f5
    style MCPEither fill:#f3e5f5
Architecture Overview
The diagram below highlights how document and Slack pipelines converge before the answer is generated.
graph LR
    subgraph Sources["Data Sources"]
        MD[Markdown Files]
        CSV[CSV Files]
        S3[Amazon S3 Bucket]
        GH[GitHub Repositories]
    end

    Sources -->|Vectorize| VE[Amazon S3 Vectors]
    VE --> HY[Hybrid Search Engine]
    OS[(Amazon OpenSearch)] --> HY
    SL[Slack Workspace] -->|Conversations API| SS[SlackSearch Service]
    SS --> HY
    HY --> CT[Context Builder]
    CT --> AN["Answer Generation (Claude, Bedrock Chat)"]
Detailed Architecture Diagrams
Command Overview
RAGent provides five main commands, each serving a specific purpose in the RAG workflow:
flowchart LR
    User([User])

    User -->|1| Vectorize[vectorize<br/>Markdown → Vectors]
    User -->|2| Query[query<br/>Semantic Search]
    User -->|3| Chat[chat<br/>Interactive RAG]
    User -->|4| SlackBot[slack-bot<br/>Slack Integration]
    User -->|5| MCPServer[mcp-server<br/>Claude Desktop]

    Vectorize -->|Store| S3V[(S3 Vectors)]
    Vectorize -->|Index| OS[(OpenSearch)]

    Query --> Hybrid[Hybrid Search<br/>BM25 + Vector]
    Chat --> Hybrid
    SlackBot --> Hybrid
    MCPServer --> Hybrid

    Hybrid --> S3V
    Hybrid --> OS
    Hybrid -->|Optional| Slack[(Slack API)]

    Hybrid --> Results[Search Results]
    Results --> Answer[Generated Answer<br/>via Bedrock Claude]

    style Vectorize fill:#e1f5ff
    style Query fill:#fff4e1
    style Chat fill:#ffe1f5
    style SlackBot fill:#e1ffe1
    style MCPServer fill:#f5e1ff
Hybrid Search Flow
The hybrid search engine combines BM25 keyword matching with vector similarity search:
sequenceDiagram
    participant User
    participant CLI as CLI Command
    participant Bedrock as Amazon Bedrock
    participant OS as OpenSearch
    participant Slack as Slack API
    participant Engine as Hybrid Engine

    User->>CLI: query "検索クエリ"
    CLI->>Bedrock: GenerateEmbedding(query)
    Bedrock-->>CLI: Vector[1024]

    par BM25 Search
        CLI->>OS: BM25 Search (kuromoji tokenizer)
        OS-->>CLI: BM25 Results (200 docs)
    and Vector Search
        CLI->>OS: k-NN Search (cosine similarity)
        OS-->>CLI: Vector Results (100 docs)
    end

    CLI->>Engine: Fuse Results (RRF/weighted_sum)
    Engine-->>CLI: Fused Results (top-k)

    opt Slack Search Enabled
        CLI->>Slack: search.messages(query)
        Slack-->>CLI: Slack Messages
        CLI->>Slack: conversations.history(threads)
        Slack-->>CLI: Thread Context
        CLI->>Engine: Merge Slack Context
        Engine-->>CLI: Enriched Results
    end

    CLI-->>User: Combined Results + References
Slack Bot Processing
Slack Bot listens for mentions and responds with RAG-powered answers:
sequenceDiagram
    participant Slack as Slack Workspace
    participant Bot as Slack Bot (RTM/Socket)
    participant Detector as Mention Detector
    participant Extractor as Query Extractor
    participant Hybrid as Hybrid Search
    participant SlackSearch as Slack Search Service
    participant Formatter as Block Kit Formatter

    Slack->>Bot: @ragent-bot "質問内容"
    Bot->>Detector: Detect Mention
    Detector-->>Bot: Mention Event

    Bot->>Extractor: Extract Query
    Extractor-->>Bot: Query Text

    Bot->>Hybrid: Search(query)

    par Document Search
        Hybrid->>Hybrid: BM25 + k-NN
        Hybrid-->>Bot: Document Results
    and Slack Context Search (Optional)
        Bot->>SlackSearch: SearchSlack(query, channels)
        SlackSearch->>SlackSearch: Query Refinement Loop
        SlackSearch->>Slack: search.messages API
        Slack-->>SlackSearch: Messages
        SlackSearch->>Slack: conversations.history (threads)
        Slack-->>SlackSearch: Thread Timeline
        SlackSearch->>SlackSearch: Sufficiency Check
        SlackSearch-->>Bot: Slack Context
    end

    Bot->>Formatter: Format Results (Block Kit)
    Formatter-->>Bot: Slack Blocks

    Bot->>Slack: Post Message (with Blocks)
    Slack-->>Slack: Display Answer + References
MCP Server Integration
MCP Server exposes RAGent's hybrid search to Claude Desktop and other MCP-compatible tools:
sequenceDiagram
    participant Claude as Claude Desktop
    participant MCP as MCP Server
    participant Auth as Auth Middleware
    participant Handler as Hybrid Search Handler
    participant Bedrock as Amazon Bedrock
    participant OS as OpenSearch
    participant Slack as Slack API

    Claude->>MCP: JSON-RPC Request<br/>tools/call "hybrid_search"

    MCP->>Auth: Authenticate Request

    alt IP Authentication
        Auth->>Auth: Check Client IP
    else OIDC Authentication
        Auth->>Auth: Verify JWT Token
    else Bypass Range
        Auth->>Auth: Check Bypass CIDR
    end

    Auth-->>MCP: Authentication OK

    MCP->>Handler: Handle hybrid_search(query, options)

    Handler->>Bedrock: GenerateEmbedding(query)
    Bedrock-->>Handler: Vector[1024]

    par OpenSearch BM25
        Handler->>OS: BM25 Query
        OS-->>Handler: BM25 Results
    and OpenSearch k-NN
        Handler->>OS: k-NN Query
        OS-->>Handler: Vector Results
    end

    Handler->>Handler: Fuse Results (weighted_sum/RRF)

    opt enable_slack_search=true
        Handler->>Slack: Search Messages + Threads
        Slack-->>Handler: Slack Context
        Handler->>Handler: Merge Slack Results
    end

    Handler-->>MCP: Search Results (JSON)
    MCP-->>Claude: JSON-RPC Response<br/>{results, slack_results, metadata}
Vectorization Pipeline
The vectorize command processes source documents (Markdown, CSV, and S3 objects) and stores them in dual backends:
flowchart TD
    Start([vectorize command]) --> CheckFlags{Check Flags}

    CheckFlags -->|--clear| Clear[Delete All Vectors<br/>+ Recreate Index]
    CheckFlags -->|Normal| ScanSources
    Clear --> ScanSources

    subgraph ScanSources[Scan Data Sources]
        LocalScan[Scan Local Directory<br/>./source]
        S3Scan[Scan S3 Bucket<br/>--enable-s3]
    end

    ScanSources --> Files[List Files<br/>.md, .markdown, .csv]

    Files --> Loop{For Each File<br/>Parallel Processing}

    Loop --> FileType{File Type?}

    FileType -->|Markdown| ReadMD[Read File Content]
    FileType -->|CSV| ReadCSV[Read CSV & Expand Rows<br/>Each row → 1 document]

    ReadMD --> Extract[Extract Metadata<br/>FrontMatter Parser]
    ReadCSV --> ExtractCSV[Extract Metadata<br/>CSV Column Mapping]

    Extract --> Embed[Generate Embedding<br/>Bedrock Titan v2]
    ExtractCSV --> Embed

    Embed --> Dual{Dual Backend Storage}

    Dual --> S3Store[Store to S3 Vector<br/>with Metadata]
    Dual --> OSIndex[Index to OpenSearch<br/>BM25 + k-NN fields]

    S3Store --> Stats1[Update Stats<br/>S3: Success/Fail]
    OSIndex --> Stats2[Update Stats<br/>OS: Indexed/Skipped/Retry]

    Stats1 --> Check{More Files?}
    Stats2 --> Check

    Check -->|Yes| Loop
    Check -->|No| Report[Display Statistics<br/>Success Rate, Errors]

    Report --> Follow{Follow Mode?}
    Follow -->|Yes| Wait[Wait Interval<br/>Default: 30m]
    Wait --> ScanSources
    Follow -->|No| End([Completed])

    style Start fill:#e1f5ff
    style Clear fill:#ffe1e1
    style ScanSources fill:#e8f4f8
    style Embed fill:#fff4e1
    style Dual fill:#f5e1ff
    style End fill:#e1ffe1
Prerequisites
Prepare Source Documents
Before using RAGent, you need to prepare source documents in a source/ directory. These documents should contain the content you want to make searchable through the RAG system.
Supported file types:
- Markdown (.md, .markdown): Each file becomes one document
- CSV (.csv): Each row becomes one document (header row required)
- PDF (.pdf): Each page becomes one document (requires
OCR_PROVIDER=bedrockorOCR_PROVIDER=gemini)
# Create source directory
mkdir source

# Place your files in this directory
cp /path/to/your/documents/*.md source/
cp /path/to/your/data/*.csv source/
For CSV files, you can optionally provide a configuration file to specify column mappings:
# Copy example configuration
cp csv-config.yaml.example csv-config.yaml

# Run with CSV configuration
RAGent vectorize --csv-config csv-config.yaml
CSV Configuration Options
The csv-config.yaml supports the following options:
header_row (Header Row Position):
Use this option when your CSV file has metadata or summary rows before the actual header row.
When header_row is specified, that row is used as the column headers, and all preceding rows are skipped.
csv:
  files:
    - pattern: "sample.csv"
      header_row: 7  # Row 7 is the header (1-indexed)
                     # Rows 1-6 are skipped, data starts from row 8
      content:
        columns: ["task", "category"]
      metadata:
        title: "task"
        category: "category"
- If
header_rowis not specified, the default is1(first row is the header) - Row numbers are 1-indexed
For exporting notes from Kibela, use the separate export tool available in the export/ directory.
Required Environment Variables
Create a .env file in the project root and configure the following environment variables:
# AWS Configuration
AWS_REGION=your_aws_region
AWS_ACCESS_KEY_ID=your_access_key
AWS_SECRET_ACCESS_KEY=your_secret_key

# S3 Vector Configuration
S3_VECTOR_INDEX_NAME=your_vector_index_name
S3_BUCKET_NAME=your_s3_bucket_name
S3_VECTOR_REGION=us-east-1           # AWS region for S3 Vector bucket
S3_SOURCE_REGION=ap-northeast-1      # AWS region for source S3 bucket (--enable-s3)

# Vector DB Backend Selection
VECTOR_DB_BACKEND=s3            # Backend type: "s3" (Amazon S3 Vectors) or "sqlite" (local sqlite-vec) (default: s3)
SQLITE_VEC_DB_PATH=~/.ragent/vectors.db  # Path to sqlite-vec DB file (used when VECTOR_DB_BACKEND=sqlite)

# OpenSearch Configuration (for Hybrid RAG)
OPENSEARCH_ENDPOINT=your_opensearch_endpoint
OPENSEARCH_INDEX=your_opensearch_index
OPENSEARCH_REGION=us-east-1  # default

# GitHub Configuration (optional)
GITHUB_TOKEN=ghp_your_github_token  # Required for private repositories

# Chat Configuration
CHAT_MODEL=anthropic.claude-3-5-sonnet-20240620-v1:0  # default
EXCLUDE_CATEGORIES=Personal,Daily  # Categories to exclude from search

# MCP Server Configuration
MCP_SERVER_HOST=localhost
MCP_SERVER_PORT=8080
MCP_IP_AUTH_ENABLED=true
MCP_ALLOWED_IPS=127.0.0.1,::1  # Comma-separated list

# MCP Bypass Configuration (optional)
MCP_BYPASS_IP_RANGE=10.0.0.0/8,172.16.0.0/12  # Comma-separated CIDR ranges
MCP_BYPASS_VERBOSE_LOG=false
MCP_BYPASS_AUDIT_LOG=true
MCP_TRUSTED_PROXIES=192.168.1.1,10.0.0.1  # Trusted proxy IPs for X-Forwarded-For

# OIDC Authentication (optional)
OIDC_ISSUER=https://accounts.google.com  # Your OIDC provider URL
OIDC_CLIENT_ID=your_client_id
OIDC_CLIENT_SECRET=your_client_secret

# Slack Bot Configuration
SLACK_BOT_TOKEN=xoxb-your-bot-token
SLACK_USER_TOKEN=xoxp-your-user-token-with-search-read
SLACK_RESPONSE_TIMEOUT=5s
SLACK_MAX_RESULTS=5
SLACK_ENABLE_THREADING=false
SLACK_THREAD_CONTEXT_ENABLED=true
SLACK_THREAD_CONTEXT_MAX_MESSAGES=10

# Slack Search Configuration
SLACK_SEARCH_ENABLED=false                     # Enable Slack search pipeline (set true to activate)
SLACK_SEARCH_MAX_RESULTS=20                    # Max Slack messages retrieved per query (1-100)
SLACK_SEARCH_MAX_RETRIES=5                     # Retry count for Slack API rate limits (0-10)
SLACK_SEARCH_CONTEXT_WINDOW_MINUTES=30         # Time window (minutes) of surrounding message context
SLACK_SEARCH_MAX_ITERATIONS=5                  # Iterative refinements performed when answers insufficient
SLACK_SEARCH_MAX_CONTEXT_MESSAGES=100          # Max messages assembled into enriched context
SLACK_SEARCH_TIMEOUT_SECONDS=5                 # Slack API request timeout in seconds (1-60)

# OpenTelemetry Configuration (optional)
OTEL_ENABLED=false
OTEL_SERVICE_NAME=ragent
OTEL_EXPORTER_OTLP_ENDPOINT=http://localhost:4318
OTEL_EXPORTER_OTLP_PROTOCOL=http/protobuf
OTEL_RESOURCE_ATTRIBUTES=service.namespace=ragent,environment=dev
OTEL_TRACES_SAMPLER=always_on
OTEL_TRACES_SAMPLER_ARG=1.0

# OCR Configuration (for PDF vectorization)
OCR_PROVIDER=bedrock                                    # OCR provider ("bedrock" or "gemini"; omit to skip PDFs)
OCR_MODEL=anthropic.claude-3-5-sonnet-20241022-v2:0    # Model for OCR (Bedrock model ID or Gemini model name)
OCR_TIMEOUT=120s                                        # OCR request timeout (default: 120s)

# Embedding Configuration
EMBEDDING_PROVIDER=bedrock                              # Embedding provider ("bedrock" [default] or "gemini")
EMBEDDING_MODEL=                                        # Embedding model ID (optional; defaults to provider's default)
EMBEDDING_DIMENSION=                                    # Output vector dimension (optional; overrides model default)

# Gemini Configuration (OCR_PROVIDER=gemini and/or EMBEDDING_PROVIDER=gemini)
# Option 1: API key authentication
GEMINI_API_KEY=your_gemini_api_key                      # Google AI Studio API key
# Option 2: Application Default Credentials (GOOGLE_APPLICATION_CREDENTIALS)
GEMINI_GCP_PROJECT=your_gcp_project_id                  # GCP project ID for Vertex AI
GEMINI_GCP_LOCATION=us-central1                         # GCP region for Vertex AI (default: us-central1)

# AWS Secrets Manager Configuration (optional)
SECRET_MANAGER_SECRET_ID=ragent/app              # Secret ID in AWS Secrets Manager (omit to disable)
SECRET_MANAGER_REGION=us-east-1                  # AWS region for Secrets Manager (default: us-east-1)
Gemini Embedding Configuration
To use Gemini for embeddings instead of Amazon Bedrock, set EMBEDDING_PROVIDER=gemini. Two authentication methods are supported:
# Use Gemini for embeddings (with API Key)
export EMBEDDING_PROVIDER=gemini
export EMBEDDING_MODEL=text-embedding-004
export GEMINI_API_KEY=your-api-key

# Use Gemini for embeddings (with Vertex AI)
export EMBEDDING_PROVIDER=gemini
export GEMINI_GCP_PROJECT=your-project
export GEMINI_GCP_LOCATION=us-central1
When EMBEDDING_MODEL is omitted, Gemini defaults to text-embedding-004 (768 dimensions). Bedrock defaults to amazon.titan-embed-text-v2:0 (1024 dimensions).
Models such as gemini-embedding-2-preview support configurable output dimensions. Set EMBEDDING_DIMENSION to match your vector store index — for example EMBEDDING_DIMENSION=1024 for an OpenSearch index created with 1024 dimensions. When omitted, the model's default dimension is used.
Slack search requires SLACK_SEARCH_ENABLED=true, a valid SLACK_BOT_TOKEN, and a user token SLACK_USER_TOKEN that includes scopes such as search:read, channels:history, groups:history, and other conversation history scopes relevant to the channels you query. The search-specific knobs let you tune throughput and cost per workspace without touching the core document pipeline.
MCP Bypass Configuration (Optional)
MCP_BYPASS_IP_RANGE: Comma-separated CIDR ranges that skip authentication for trusted networks.MCP_BYPASS_VERBOSE_LOG: Enables detailed logging for bypass decisions to aid troubleshooting.MCP_BYPASS_AUDIT_LOG: Emits JSON audit entries for bypassed requests (enabled by default for compliance).MCP_TRUSTED_PROXIES: Comma-separated list of proxy IPs whoseX-Forwarded-Forheaders are trusted during bypass checks.
AWS Secrets Manager Integration
RAGent supports AWS Secrets Manager as a fallback for environment variables. When configured, secrets stored in Secrets Manager are automatically injected as environment variables at startup — but only for keys that are not already set. This means existing environment variables always take priority and are never overwritten.
How It Works
- On startup, RAGent checks for the
SECRET_MANAGER_SECRET_IDenvironment variable. - If set, it fetches the secret from AWS Secrets Manager (the secret must be stored as a JSON key-value pair).
- For each key in the JSON, if the corresponding environment variable is not already set, the value is injected.
- If the environment variable is already set (via
.env, shell export, etc.), the Secrets Manager value is ignored.
This design allows you to:
- Store sensitive credentials (API keys, tokens) centrally in Secrets Manager
- Override any secret locally by setting the environment variable directly
- Use the same secret across multiple deployment environments
Configuration
| Environment Variable | Description | Default |
|---|---|---|
SECRET_MANAGER_SECRET_ID |
Secret ID or ARN in AWS Secrets Manager | (not set — feature disabled) |
SECRET_MANAGER_REGION |
AWS region for Secrets Manager | us-east-1 |
Registering Secrets
Store your secrets as a JSON object in AWS Secrets Manager. Each key should match the environment variable name used by RAGent.
Using AWS CLI:
# Create a new secret
aws secretsmanager create-secret \
  --name "ragent/app" \
  --description "RAGent application secrets" \
  --secret-string '{
    "SLACK_BOT_TOKEN": "xoxb-your-bot-token",
    "SLACK_USER_TOKEN": "xoxp-your-user-token",
    "OIDC_CLIENT_SECRET": "your-oidc-secret",
    "GITHUB_TOKEN": "ghp_your-github-token",
    "GEMINI_API_KEY": "your-gemini-api-key"
  }' \
  --region us-east-1

# Update an existing secret
aws secretsmanager put-secret-value \
  --secret-id "ragent/app" \
  --secret-string '{
    "SLACK_BOT_TOKEN": "xoxb-new-token",
    "SLACK_USER_TOKEN": "xoxp-new-token",
    "OIDC_CLIENT_SECRET": "new-secret",
    "GITHUB_TOKEN": "ghp_new-token",
    "GEMINI_API_KEY": "new-api-key"
  }' \
  --region us-east-1
Using AWS Console:
- Open the AWS Secrets Manager Console
- Click Store a new secret
- Select Other type of secret
- Choose Plaintext and enter a JSON object with key-value pairs
- Name the secret (e.g.,
ragent/app) and complete the wizard
IAM Permissions
The IAM role or user running RAGent needs the following permissions:
{
  "Version": "2012-10-17",
  "Statement": [
    {
      "Effect": "Allow",
      "Action": [
        "secretsmanager:GetSecretValue",
        "secretsmanager:DescribeSecret"
      ],
      "Resource": "arn:aws:secretsmanager:<region>:<account-id>:secret:ragent/app-*"
    }
  ]
}
Usage Example
# Set only the Secrets Manager config — all other secrets are fetched automatically
export SECRET_MANAGER_SECRET_ID=ragent/app
export SECRET_MANAGER_REGION=us-east-1

# Non-secret config still set via environment / .env
export OPENSEARCH_ENDPOINT=https://your-opensearch-endpoint
export OPENSEARCH_INDEX=your-index

# Start RAGent — SLACK_BOT_TOKEN, GITHUB_TOKEN, etc. are loaded from Secrets Manager
RAGent slack-bot
# Override a specific secret locally (takes priority over Secrets Manager)
export SECRET_MANAGER_SECRET_ID=ragent/app
export SLACK_BOT_TOKEN=xoxb-local-override-token  # This value wins

RAGent slack-bot  # Uses the local SLACK_BOT_TOKEN, other secrets from SM
Note: Only string values in the JSON are injected. Non-string values (objects, arrays, numbers, booleans, null) are silently skipped.
OpenTelemetry Observability
RAGent exposes distributed traces and usage metrics through the OpenTelemetry (OTel) Go SDK. Traces are emitted for Slack Bot message handling, MCP tool calls, and the shared hybrid search service, while counters and histograms capture request rates, error rates, and response times.
Enable OTel
Set the following environment variables (see .env.example for defaults):
OTEL_ENABLED:trueto enable tracing and metrics (defaults tofalse).OTEL_SERVICE_NAME: Logical service name (ragentby default).OTEL_RESOURCE_ATTRIBUTES: Comma-separatedkey=valuepairs such asservice.namespace=ragent,environment=dev.OTEL_EXPORTER_OTLP_ENDPOINT: OTLP endpoint URL (including scheme).OTEL_EXPORTER_OTLP_PROTOCOL:http/protobuf(default) orgrpc.OTEL_TRACES_SAMPLER,OTEL_TRACES_SAMPLER_ARG: Configure sampling strategy (always_on,traceidratio, etc.).
When OTEL_ENABLED=false, RAGent registers no-op providers and carries no runtime overhead.
Example: Jaeger (local development)
# 1. Start Jaeger all-in-one
docker run --rm -it -p 4318:4318 -p 16686:16686 jaegertracing/all-in-one:1.58

# 2. Enable OTel before running RAGent
export OTEL_ENABLED=true
export OTEL_EXPORTER_OTLP_ENDPOINT=http://localhost:4318
export OTEL_EXPORTER_OTLP_PROTOCOL=http/protobuf

# 3. Run the Slack bot (or any other command)
go run main.go slack-bot
# Visit http://localhost:16686 to explore spans
Example: Prometheus via OpenTelemetry Collector
Use the OTel Collector to convert OTLP metrics into Prometheus format:
# collector.yaml
receivers:
  otlp:
    protocols:
      http:
        endpoint: 0.0.0.0:4318
exporters:
  prometheus:
    endpoint: 0.0.0.0:9464
service:
  pipelines:
    metrics:
      receivers: [otlp]
      exporters: [prometheus]
otelcol --config collector.yaml
export OTEL_ENABLED=true
export OTEL_EXPORTER_OTLP_ENDPOINT=http://localhost:4318
go run main.go mcp-server
# Scrape metrics at http://localhost:9464/metrics
Example: AWS X-Ray with ADOT Collector
# 1. Run the AWS Distro for OpenTelemetry collector
docker run --rm -it -p 4317:4317 public.ecr.aws/aws-observability/aws-otel-collector:latest

# 2. Configure RAGent to send spans over gRPC
export OTEL_ENABLED=true
export OTEL_EXPORTER_OTLP_ENDPOINT=http://localhost:4317
export OTEL_EXPORTER_OTLP_PROTOCOL=grpc
export OTEL_TRACES_SAMPLER=traceidratio
export OTEL_TRACES_SAMPLER_ARG=0.2
Metrics & Span Names
- Spans
slackbot.process_messagemcpserver.hybrid_searchsearch.hybrid
- Metrics
ragent.slack.requests.total,ragent.slack.errors.total,ragent.slack.response_timeragent.mcp.requests.total,ragent.mcp.errors.total,ragent.mcp.response_time
Attach additional attributes such as channel type, authentication method, tool name, and result totals for fine-grained analysis.
Grafana Dashboard
RAGent includes a pre-configured Grafana dashboard template for visualizing OpenTelemetry metrics. The dashboard provides comprehensive monitoring of Slack Bot and MCP Server operations.
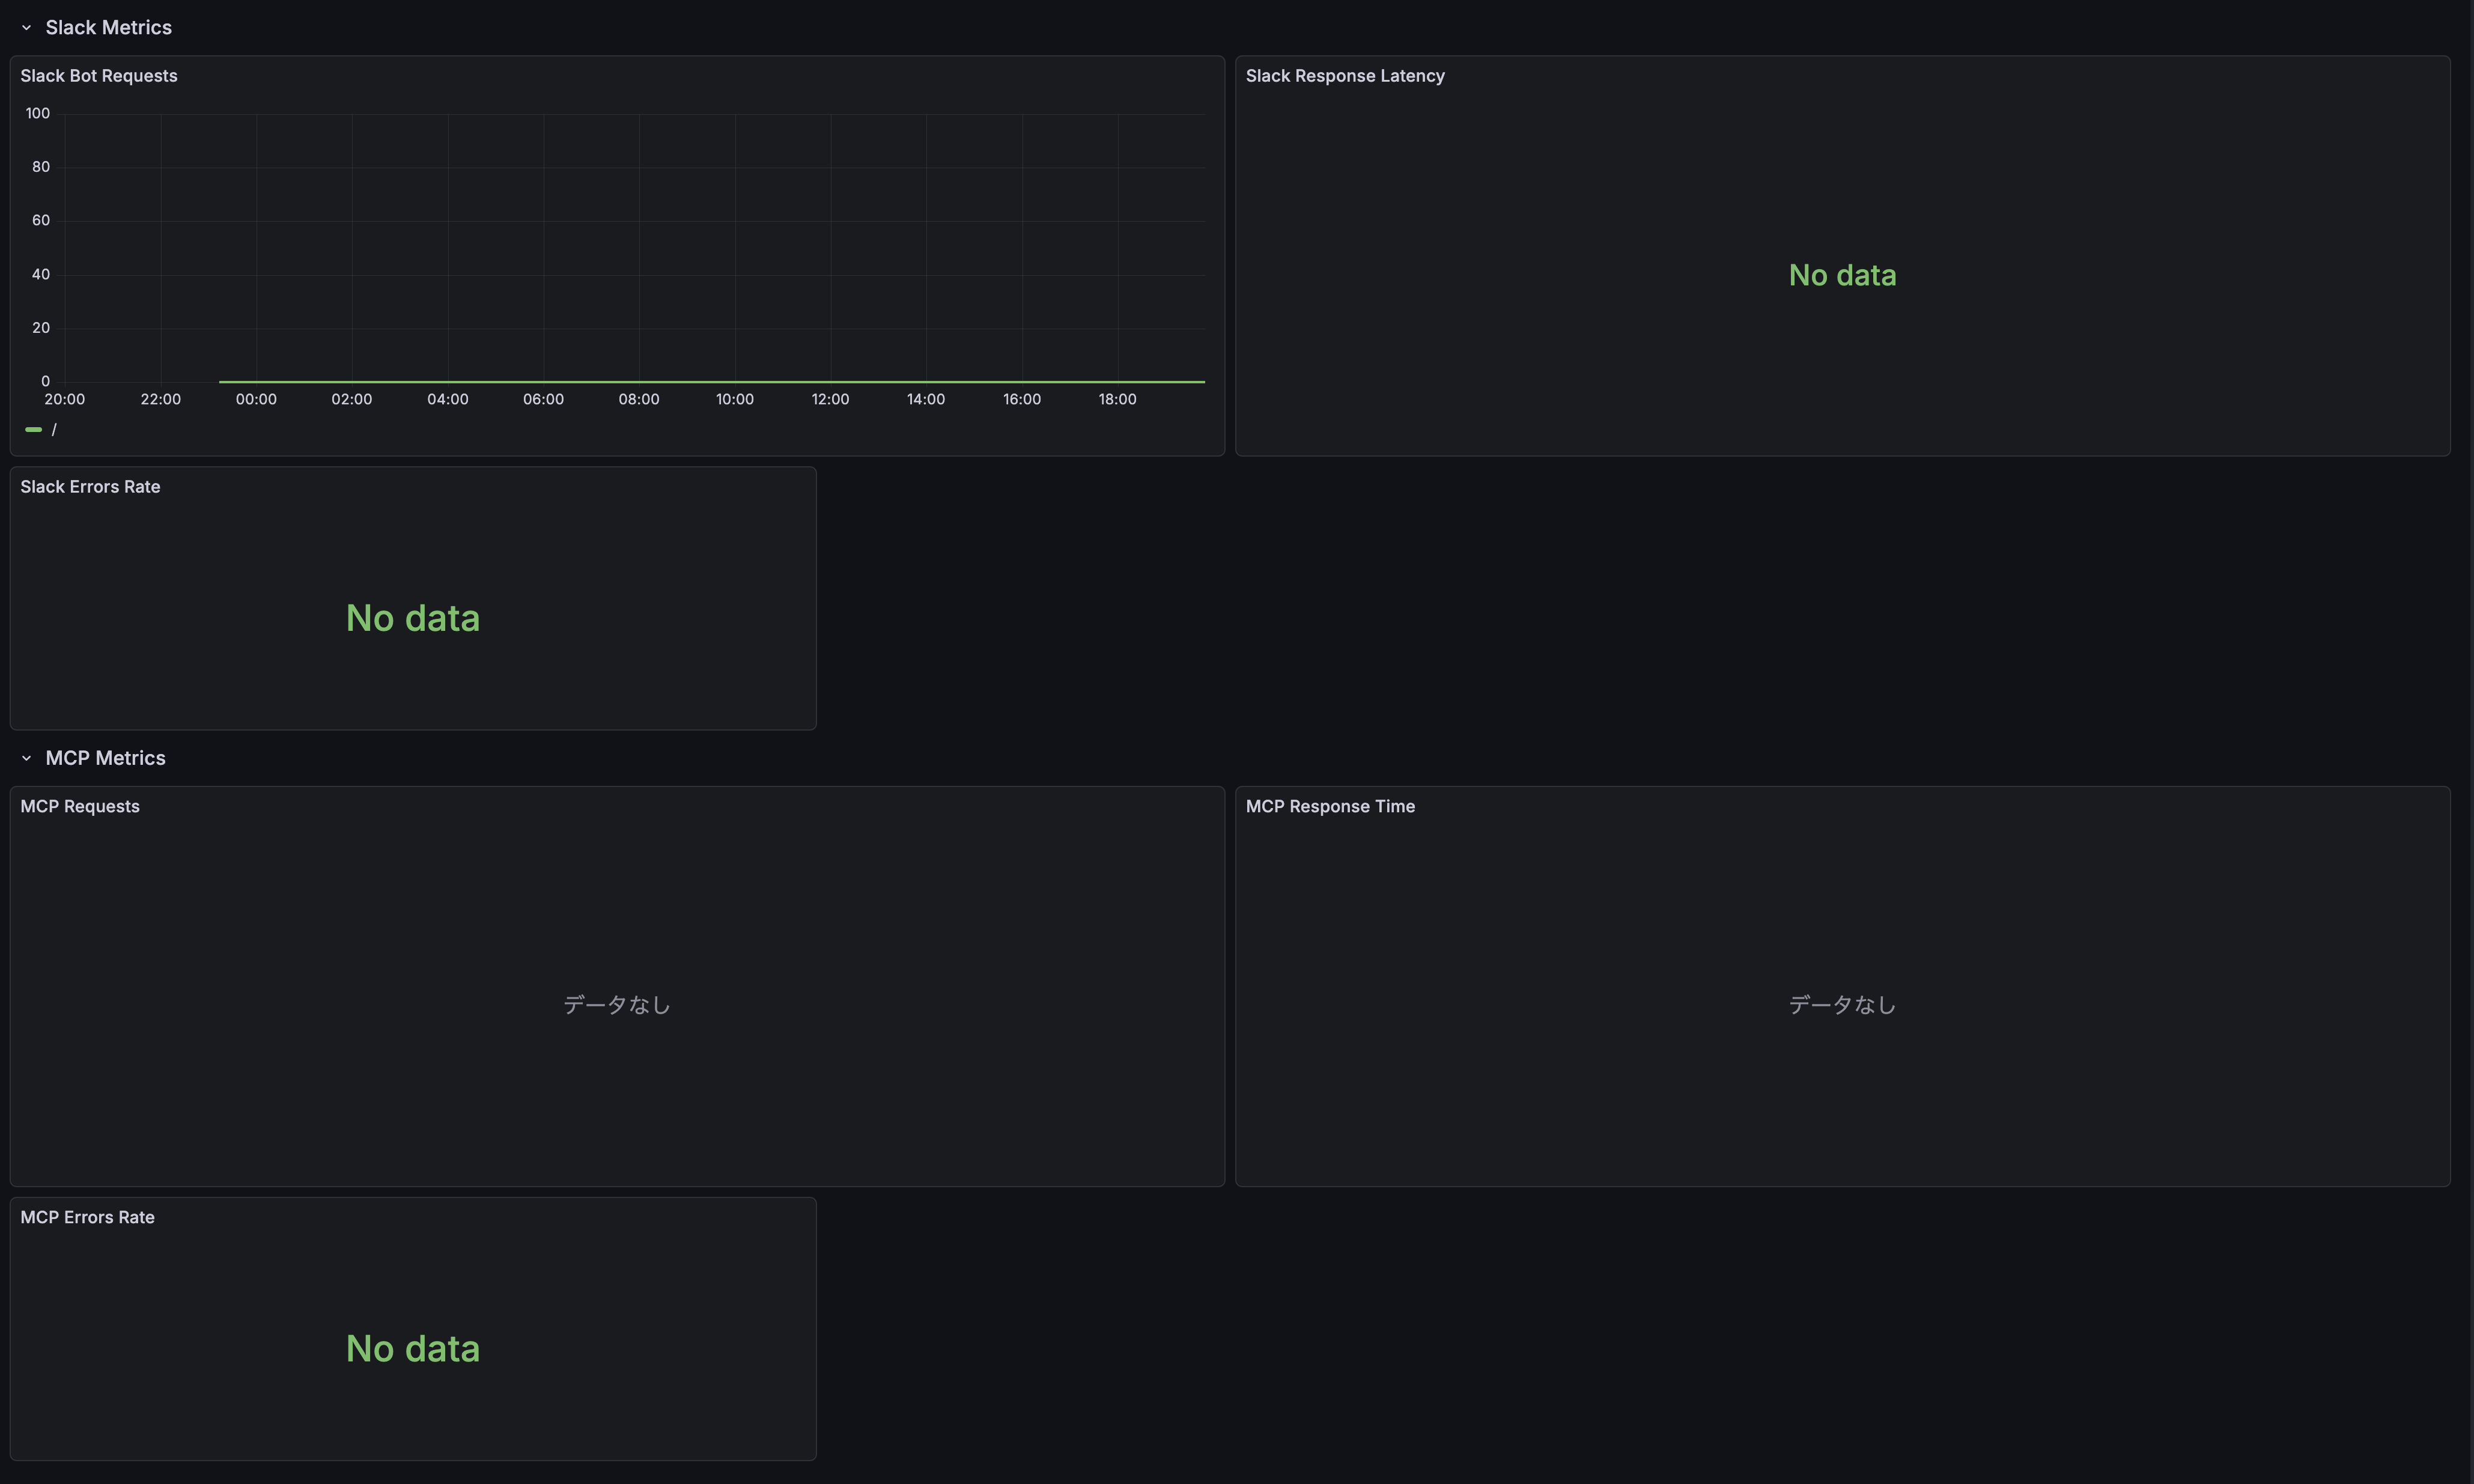
Dashboard Panels:
- Slack Metrics
- Slack Bot Requests (time series)
- Slack Response Latency (histogram)
- Slack Errors Rate (gauge)
- MCP Metrics
- MCP Requests (time series)
- MCP Response Time (histogram)
- MCP Errors Rate (gauge)
Setup Instructions:
Enable OpenTelemetry in RAGent:
export OTEL_ENABLED=true
export OTEL_EXPORTER_OTLP_ENDPOINT=http://localhost:4318
Configure OTel Collector to export metrics to Prometheus (see example above)
Import the dashboard template into Grafana:
# Using Grafana API
curl -X POST http://localhost:3000/api/dashboards/import \
  -H "Content-Type: application/json" \
  -d @assets/grafana.json

# Or manually import via Grafana UI
# Dashboard > Import > Upload JSON file > Select assets/grafana.json
Configure Prometheus data source in Grafana pointing to your metrics endpoint
The dashboard will automatically start displaying metrics once RAGent begins processing requests.
Installation
Prerequisites
- Go 1.25.0 or higher
- direnv (recommended)
Build
# Clone the repository
git clone https://github.com/ca-srg/ragent.git
cd RAGent

# Install dependencies
go mod download

# Build
go build -o RAGent

# Add executable to PATH (optional)
mv RAGent /usr/local/bin/
Releases
Prebuilt binaries are published on GitHub Releases for Linux (amd64, arm64).
- Releases page: https://github.com/ca-srg/ragent/releases
Create a Release (maintainers)
Use semantic versioning (MAJOR.MINOR.PATCH) and push a tag to trigger the pipeline:
# Example: v1.0.0
git tag v1.0.0
git push origin v1.0.0
This triggers the GitHub Actions workflow which builds archives via GoReleaser and publishes them to the release.
Download Binaries
From the Releases page, download the archive for your platform:
- Linux amd64:
ragent_<VERSION>_linux_amd64.tar.gz - Linux arm64:
ragent_<VERSION>_linux_arm64.tar.gz
Extract and place the binary on your PATH:
tar -xzf ragent_<VERSION>_linux_amd64.tar.gz
sudo mv ragent /usr/local/bin/
Verify Checksums
Each release includes a SHA256 checksum file.
# Linux
sha256sum -c checksums_<VERSION>.txt

# macOS (if verifying from macOS)
shasum -a 256 -c checksums_<VERSION>.txt
All entries should report OK. If a mismatch occurs, re-download the artifact.
Vector DB Backend Selection
RAGent supports two vector storage backends, selectable via the VECTOR_DB_BACKEND environment variable.
Amazon S3 Vectors (default, VECTOR_DB_BACKEND=s3)
VECTOR_DB_BACKEND=s3
AWS_S3_VECTOR_BUCKET=your-bucket
AWS_S3_VECTOR_INDEX=your-index
S3_VECTOR_REGION=us-east-1
Suitable for production deployments and large-scale document sets on AWS infrastructure.
sqlite-vec (local, VECTOR_DB_BACKEND=sqlite)
VECTOR_DB_BACKEND=sqlite
SQLITE_VEC_DB_PATH=./vectors.db
Suitable for local development and small-to-medium deployments without AWS dependencies.
Limitations:
- Single writer (WAL mode is enabled automatically)
- Maximum 8,192 dimensions per embedding
- Vector similarity search always uses OpenSearch (sqlite-vec stores vectors only)
Example:
# Vectorize with sqlite-vec backend
VECTOR_DB_BACKEND=sqlite SQLITE_VEC_DB_PATH=./vectors.db \
  OPENSEARCH_ENDPOINT=https://... OPENSEARCH_INDEX=ragent \
  RAGent vectorize

# List stored vectors
VECTOR_DB_BACKEND=sqlite SQLITE_VEC_DB_PATH=./vectors.db \
  OPENSEARCH_ENDPOINT=https://... OPENSEARCH_INDEX=ragent \
  RAGent list
Note: OpenSearch is required regardless of the vector backend selection.
Commands
1. vectorize - Vectorization and S3 Storage
Read source files (markdown and CSV), extract metadata, generate embeddings using Amazon Bedrock, and store them in Amazon S3 Vectors.
RAGent vectorize
Options:
-d, --directory: Directory containing source files to process (default:./source)--dry-run: Display processing details without making actual API calls-c, --concurrency: Number of concurrent processes (0 = use default value from config file)--csv-config: Path to CSV configuration YAML file (for column mapping)--enable-s3: Enable S3 source file fetching--s3-bucket: S3 bucket name for source files (required when--enable-s3is set)--s3-prefix: S3 prefix (directory) to scan (optional, defaults to bucket root)--s3-vector-region: AWS region for S3 Vector bucket (overrides S3_VECTOR_REGION, default: us-east-1)--s3-source-region: AWS region for source S3 bucket (overrides S3_SOURCE_REGION, default: us-east-1)--github-repos: Comma-separated list of GitHub repositories to clone and vectorize (format:owner/repo)
S3 Source Examples:
# S3 only (with prefix)
RAGent vectorize --enable-s3 --s3-bucket my-docs-bucket --s3-prefix source/

# S3 only (flat structure)
RAGent vectorize --enable-s3 --s3-bucket my-docs-bucket

# Local + S3 combined
RAGent vectorize --directory ./local-docs --enable-s3 --s3-bucket my-docs-bucket --s3-prefix remote/

# Dry run with S3 source
RAGent vectorize --enable-s3 --s3-bucket my-docs-bucket --dry-run
GitHub Source Examples:
# Clone and vectorize a single GitHub repository
RAGent vectorize --github-repos "owner/repo"

# Multiple repositories
RAGent vectorize --github-repos "org/repo1,org/repo2"

# Combined with local source
RAGent vectorize --directory ./local-docs --github-repos "owner/repo"

# Dry run with GitHub source
RAGent vectorize --github-repos "owner/repo" --dry-run

# Follow mode with GitHub repos (re-clones on each cycle)
RAGent vectorize --follow --github-repos "owner/repo"
For private repositories, set the GITHUB_TOKEN environment variable.
Metadata is auto-generated from the repository structure: owner name as author, repository name as source, parent directory as category, and a GitHub URL as reference.
For detailed documentation on the GitHub data source feature, see doc/github.md.
Features:
- Recursive scanning of markdown and CSV files
- Automatic metadata extraction
- CSV row expansion (each row becomes a document)
- Automatic column detection for CSV files (or explicit configuration)
- Embedding generation using Amazon Titan Text Embedding v2
- Safe storage to S3 Vectors
- High-speed processing through concurrency
- PDF page extraction via OCR (each page becomes a document, requires
OCR_PROVIDER=bedrockorOCR_PROVIDER=gemini)
2. query - Semantic Search
Execute semantic similarity search against S3 Vector Index.
# Basic search
RAGent query -q "machine learning algorithms"

# Search with detailed options
RAGent query --query "API documentation" --top-k 5 --json

# Search with metadata filter
RAGent query -q "error handling" --filter '{"category":"programming"}'
Options:
-q, --query: Search query text (required)-k, --top-k: Number of similar results to return (default: 10)-j, --json: Output results in JSON format-f, --filter: JSON metadata filter (e.g.,'{"category":"docs"}')--enable-slack-search: Include Slack conversations alongside document results when Slack search is enabled
Usage Examples:
# Search technical documentation
RAGent query -q "Docker container configuration" --top-k 3

# Search within specific category
RAGent query -q "authentication" --filter '{"type":"security"}' --json

# Get more results
RAGent query -q "database optimization" --top-k 20

# Merge Slack context for incident reviews
RAGent query -q "on-call handoff" --enable-slack-search

# Reference a specific Slack message by URL (automatically fetched)
RAGent query -q "What was discussed in https://your-workspace.slack.com/archives/C12345678/p1234567890123456"
URL-Aware Search
RAGent inspects each query for HTTP/HTTPS URLs. When a URL is present, it first performs an exact term query on the reference field before running the usual hybrid search pipeline.
- Successful URL matches return immediately with
search_methodset to"url_exact_match"and include the URL-only results. - If the term query fails or returns no hits, the engine falls back to the hybrid search flow and records the fallback reason (
term_query_errororterm_query_no_results). - CLI
--jsonoutput, Slack bot responses, and MCP tool results exposesearch_method,url_detected, andfallback_reasonso callers can inspect how the result was produced.
RAGent query --json -q "https://example.com/doc のタイトルを教えて"
Example JSON response fragment:
{
  "search_method": "url_exact_match",
  "url_detected": true,
  "fallback_reason": "",
  "results": [
    { "title": "Example Doc", "reference": "https://example.com/doc" }
  ]
}
If a URL is not detected or the exact match misses, search_method falls back to "hybrid_search" with the usual fused BM25/vector results.
3. list - List Vectors
Display a list of vectors stored in S3 Vector Index.
# Display all vectors
RAGent list

# Filter by prefix
RAGent list --prefix "docs/"
Options:
-p, --prefix: Prefix to filter vector keys
Features:
- Display stored vector keys
- Filtering by prefix
- Check vector database contents
4. chat - Interactive RAG Chat
Start an interactive chat session using hybrid search (OpenSearch BM25 + vector search) for context retrieval and Amazon Bedrock (Claude) for generating responses.
# Start interactive chat with default settings
RAGent chat

# Chat with custom context size
RAGent chat --context-size 10

# Chat with custom weight balance for hybrid search
RAGent chat --bm25-weight 0.7 --vector-weight 0.3

# Chat with custom system prompt
RAGent chat --system "You are a helpful assistant specialized in documentation."

# Chat with Slack context enabled via environment flag
SLACK_SEARCH_ENABLED=true RAGent chat

# Reference Slack messages by URL in your questions
# (URLs are automatically detected and messages fetched)
RAGent chat
> What does this Slack discussion mean? https://your-workspace.slack.com/archives/C12345678/p1234567890123456
Options:
-c, --context-size: Number of context documents to retrieve (default: 5)-i, --interactive: Run in interactive mode (default: true)-s, --system: System prompt for the chat-b, --bm25-weight: Weight for BM25 scoring in hybrid search (0-1, default: 0.5)-v, --vector-weight: Weight for vector scoring in hybrid search (0-1, default: 0.5)--use-japanese-nlp: Use Japanese NLP optimization for OpenSearch (default: true)
When SLACK_SEARCH_ENABLED=true, chat sessions automatically pull in recent Slack conversations, show live progress for each refinement iteration, and append permalinks under the final answer.
Features:
- Hybrid search combining BM25 and vector similarity
- Context-aware responses using retrieved documents
- Conversation history management
- Reference citations with source links
- Japanese language optimization
Chat Commands:
exitorquit: End the chat sessionclear: Clear conversation historyhelp: Show available commands
5. slack-bot - Slack Bot for RAG Search
Start a Slack Bot that listens for mentions and answers with RAG results.
RAGent slack-bot
Requirements:
- Set
SLACK_BOT_TOKENin your environment (see.env.example). - Invite the bot user to the target Slack channel.
- Optionally enable threading with
SLACK_ENABLE_THREADING=true. - Thread context: enable contextual search with
SLACK_THREAD_CONTEXT_ENABLED=true(default) and control history depth viaSLACK_THREAD_CONTEXT_MAX_MESSAGES(default10messages). - Slack search: set
SLACK_SEARCH_ENABLED=trueto blend Slack conversations into every answer. UseSLACK_SEARCH_MAX_RESULTS,SLACK_SEARCH_MAX_CONTEXT_MESSAGES, andSLACK_SEARCH_MAX_ITERATIONSto tune throughput per workspace. - Requires OpenSearch configuration (
OPENSEARCH_ENDPOINT,OPENSEARCH_INDEX,OPENSEARCH_REGION). Slack Bot does not use S3 Vector fallback.
Details: see docs/slack-bot.md.
When enabled, the bot delivers a Block Kit section labelled Conversations from Slack with permalinks for each hit so responders can jump straight into the thread.
6. mcp-server - MCP Server for Claude Desktop Integration (New)
Start an MCP (Model Context Protocol) server that provides hybrid search capabilities to Claude Desktop and other MCP-compatible tools.
# Start with OIDC authentication only
RAGent mcp-server --auth-method oidc

# Allow either IP or OIDC authentication (recommended for development)
RAGent mcp-server --auth-method either

# Require both IP and OIDC authentication (highest security)
RAGent mcp-server --auth-method both

# IP authentication only (default)
RAGent mcp-server --auth-method ip
The hybrid_search MCP tool accepts two new parameters when the server is launched with SLACK_SEARCH_ENABLED=true:
enable_slack_search(boolean, defaultfalse): opt in per request from your MCP client.
Responses include a slack_results array with message metadata and permalinks so downstream tools can render conversation context alongside document references.
Authentication Methods:
ip: Traditional IP address-based authentication onlyoidc: OpenID Connect authentication onlyboth: Requires both IP and OIDC authenticationeither: Allows either IP or OIDC authentication
Bypass Authentication:
For CI/CD environments and internal services, you can configure bypass IP ranges that skip authentication:
# Bypass authentication for specific IP ranges
RAGent mcp-server --bypass-ip-range "10.0.0.0/8" --bypass-ip-range "172.16.0.0/12"

# Enable audit logging for bypass access
RAGent mcp-server --bypass-ip-range "10.10.0.0/16" --bypass-audit-log

# Verbose logging for troubleshooting
RAGent mcp-server --bypass-ip-range "10.0.0.0/8" --bypass-verbose-log

# Configure trusted proxies for X-Forwarded-For
RAGent mcp-server --bypass-ip-range "10.0.0.0/8" --trusted-proxies "192.168.1.1"
Supported OIDC Providers:
- Google Workspace (
https://accounts.google.com) - Microsoft Azure AD/Entra ID (
https://login.microsoftonline.com/{tenant}/v2.0) - Okta (
https://{domain}.okta.com) - Keycloak (
https://{server}/realms/{realm}) - Custom OAuth2 providers
Features:
- JSON-RPC 2.0 compliant MCP protocol
- Hybrid search tool:
ragent-hybrid_search - Multiple authentication methods
- Claude Desktop integration
- SSE and HTTP transport support
- Browser-based authentication flow
Requirements:
- OpenSearch configuration is required for MCP server functionality
- For OIDC: Configure your OAuth2 application and set environment variables
- For IP auth: Configure allowed IP addresses or ranges
Usage with Claude Desktop:
After authentication, add the server to Claude Desktop using the provided command:
claude mcp add --transport sse ragent https://your-server.example.com/sse --header "Authorization: Bearer <JWT>"
Details: see doc/mcp-server.md and doc/oidc-authentication.md.
7. webui - Web UI for Vectorization Monitoring (New)
Start a web-based user interface for monitoring and controlling the vectorization process. The Web UI provides real-time progress tracking, file browsing, and processing history.
# Start with default settings (localhost:8081)
RAGent webui

# Specify custom host and port
RAGent webui --host 0.0.0.0 --port 8080

# Specify source directory
RAGent webui --directory ./docs
Options:
--host: Host address to bind (default:localhost)--port: Port number to listen on (default:8081)-d, --directory: Source directory for vectorization (default:./source)
Features:
- Dashboard: Real-time vectorization progress with start/stop controls
- File Browser: Browse and search source files (Markdown, CSV)
- Processing History: View past vectorization runs with success/failure stats
- Follow Mode: Enable/disable scheduled vectorization with configurable intervals
- SSE Updates: Live updates via Server-Sent Events without page refresh
- Cross-Process Status Sharing: Monitor external
vectorize --followprocesses via Unix Socket IPC
Cross-Process Status Sharing:
When a vectorize --follow process is running separately, the Web UI can detect and display its status in real-time. This is achieved through Unix Socket-based IPC (Inter-Process Communication).
# Terminal 1: Start vectorize in follow mode (runs IPC server)
RAGent vectorize --follow --interval 5m

# Terminal 2: Start webui (connects as IPC client)
RAGent webui

# The dashboard will show "running" status from the external process
The IPC mechanism uses JSON-RPC 2.0 over Unix Socket:
- Socket location:
$XDG_RUNTIME_DIR/ragent/ragent.sockor/tmp/ragent-{uid}/ragent.sock - Exclusive locking prevents multiple vectorize instances from running simultaneously
- Stale socket cleanup handles crashed processes gracefully
Dashboard Controls:
- Start/Stop vectorization manually
- Toggle follow mode (scheduler) for periodic vectorization
- View current progress, elapsed time, and estimated remaining time
- Monitor recent errors with file paths and error details
API Endpoints:
| Method | Path | Description |
|---|---|---|
| GET | / |
Dashboard page |
| GET | /files |
File browser page |
| GET | /history |
Processing history page |
| POST | /api/vectorize/start |
Start vectorization |
| POST | /api/vectorize/stop |
Stop vectorization |
| GET | /api/status |
Get current status (includes external process status) |
| GET | /api/files |
List files (with search) |
| POST | /api/scheduler/toggle |
Toggle scheduler |
| GET | /sse/progress |
SSE progress stream |
| GET | /sse/events |
SSE events stream |
Usage Example:
# Start the Web UI
RAGent webui --port 8081 --directory ./source

# Open in browser
open http://localhost:8081

# The dashboard will show:
# - Current vectorization status
# - Start/Stop controls
# - Progress bar during processing
# - Recent errors
# - Follow mode toggle
Technical Stack:
- Go templates with HTMX for dynamic updates
- Server-Sent Events (SSE) for real-time progress
- Unix Socket IPC for cross-process communication
- No external JavaScript frameworks required
- Responsive CSS design
Development
Build Commands
# Format code
go fmt ./...

# Tidy dependencies
go mod tidy

# Run tests (if configured)
go test ./...

# Development execution
go run main.go [command]
Project Structure
RAGent/
├── main.go                 # Entry point
├── cmd/                    # CLI command definitions
│   ├── root.go            # Root command and common settings
│   ├── query.go           # query command
│   ├── list.go            # list command
│   ├── chat.go            # chat command
│   ├── slack.go           # slack-bot command
│   ├── mcp-server.go      # mcp-server command
│   ├── webui.go           # webui command
│   └── vectorize.go       # vectorize command
├── internal/              # Internal libraries
│   ├── pkg/              # Shared infrastructure (feature-agnostic)
│   │   ├── config/       # Config struct (91 fields)
│   │   ├── embedding/    # Embedding generation
│   │   │   └── bedrock/  # Amazon Bedrock client
│   │   ├── opensearch/   # OpenSearch client and queries
│   │   ├── slacksearch/  # Slack search service
│   │   ├── search/       # HybridSearchService
│   │   ├── s3vector/     # S3 Vector client
│   │   ├── metrics/      # Metrics collection
│   │   ├── observability/ # OpenTelemetry
│   │   └── ipc/          # Inter-process communication
│   ├── ingestion/        # vectorize/list/recreate-index slice
│   │   ├── csv/
│   │   ├── hashstore/
│   │   ├── metadata/
│   │   ├── scanner/
│   │   ├── spreadsheet/
│   │   └── vectorizer/
│   ├── query/            # query/chat slice
│   │   └── filter/
│   ├── slackbot/         # slack-bot slice
│   ├── mcpserver/        # mcp-server slice
│   └── webui/            # webui slice
├── source/               # Source documents (markdown and CSV, prepare before use)
├── export/               # Separate export tool for Kibela
├── doc/                  # Project documentation
│   ├── github.md         # GitHub data source guide
│   ├── mcp-server.md     # MCP Server setup guide
│   ├── oidc-authentication.md # OIDC authentication guide
│   ├── filter-configuration.md # Filter configuration guide
│   ├── s3-vector.md      # S3 Vector integration notes
│   └── score.md          # RAGスコアの基礎解説
├── .envrc                # direnv configuration
├── .env                  # Environment variables file
└── CLAUDE.md            # Claude Code configuration
Dependencies
Core Libraries
- github.com/spf13/cobra: CLI framework
- github.com/joho/godotenv: Environment variable loader
- github.com/aws/aws-sdk-go-v2: AWS SDK v2
- S3 service
- S3 Vectors
- Bedrock Runtime (Titan Embeddings)
- gopkg.in/yaml.v3: YAML processing
AWS Related Libraries
github.com/aws/aws-sdk-go-v2/config: AWS configuration managementgithub.com/aws/aws-sdk-go-v2/service/s3: S3 operationsgithub.com/aws/aws-sdk-go-v2/service/s3vectors: S3 Vector operationsgithub.com/aws/aws-sdk-go-v2/service/bedrockruntime: Bedrock Runtime operations
MCP Integration
github.com/modelcontextprotocol/go-sdk: Official MCP SDK v0.4.0github.com/coreos/go-oidc: OpenID Connect implementation- JSON-RPC 2.0 protocol support
- Multiple authentication providers
Typical Workflow
Initial Setup
# Set environment variables
cp .env.example .env
# Edit .env file
Prepare Source Documents
# Create source directory if not exists
mkdir -p source

# Place your files in the directory (markdown and/or CSV)
cp /path/to/docs/*.md source/
cp /path/to/data/*.csv source/

# For CSV files, optionally configure column mapping:
cp csv-config.yaml.example csv-config.yaml
# Edit csv-config.yaml to specify columns

# Or use the export tool for Kibela notes:
cd export
go build -o RAGent-export
./RAGent-export
cd ..
Vectorization and S3 Storage
# Verify with dry run
RAGent vectorize --dry-run

# Execute actual vectorization
RAGent vectorize

# Vectorize with CSV configuration
RAGent vectorize --csv-config csv-config.yaml

# Continuously vectorize using follow mode (default 30m interval)
RAGent vectorize --follow

# Customize the follow mode interval (e.g., every 15 minutes)
RAGent vectorize --follow --interval 15m
Note:
--followcannot be combined with--dry-runor--clear.Check Vector Data
RAGent listExecute Semantic Search
RAGent query -q "content to search"Start MCP Server (for Claude Desktop)
# Configure OIDC provider (optional)
export OIDC_ISSUER="https://accounts.google.com"
export OIDC_CLIENT_ID="your-client-id"

# Start MCP server
RAGent mcp-server --auth-method either

# Visit http://localhost:8080/login to authenticate
# Follow instructions to add to Claude Desktop
Troubleshooting
Common Errors
Environment variables not set
Error: required environment variable not set→ Check if
.envfile is properly configuredConfiguration error
Error: configuration not found or invalid→ Check configuration and authentication settings
AWS authentication error
Error: AWS credentials not found→ Check if AWS credentials are properly configured
S3 Vector Index not found
Error: vector index not found→ Verify S3 Vector Index is created
MCP Server authentication error
Error: IP address not allowed: 192.168.1.100→ Add IP to MCP_ALLOWED_IPS or use --auth-method oidc
OIDC authentication error
Error: OIDC provider discovery failed→ Check OIDC_ISSUER URL and network connectivity
Slack token missing or invalid
Slack search unavailable: SLACK_BOT_TOKEN not configured→ Ensure
SLACK_SEARCH_ENABLED=trueandSLACK_BOT_TOKENbelongs to the same workspace you are querying.Slack rate limit (HTTP 429)
slack search failed: rate_limited→ Respect the
Retry-Afterheader, increaseSLACK_SEARCH_MAX_RETRIES, or reduceSLACK_SEARCH_MAX_RESULTS.Bot not invited to channel
slack search failed: not_in_channel→ Invite the bot user to the channels you want to search.
Secrets Manager access denied
failed to get secret value from Secrets Manager: AccessDeniedException→ Ensure the IAM role has
secretsmanager:GetSecretValuepermission for the target secret ARN.Secrets Manager secret not found
failed to get secret value from Secrets Manager: ResourceNotFoundException→ Verify that
SECRET_MANAGER_SECRET_IDmatches an existing secret name/ARN andSECRET_MANAGER_REGIONis correct.
Debugging Methods
# Execute with detailed logs
RAGent vectorize --dry-run

# Check environment variables
env | grep AWS

# Test MCP server connectivity
curl -X POST -H "Content-Type: application/json" \
  -d '{"jsonrpc":"2.0","method":"tools/list","id":"test"}' \
  http://localhost:8080/mcp
OpenSearch RAG Configuration
Role Mapping for AWS OpenSearch
When using AWS OpenSearch with IAM authentication, you need to configure role mapping to allow your IAM role to access the OpenSearch cluster.
Check Current Role Mapping
curl -u "master_user:master_pass" -X GET \
  "https://your-opensearch-endpoint/_plugins/_security/api/rolesmapping/all_access"
Map IAM Role to OpenSearch Role
curl -u "master_user:master_pass" -X PUT \
  "https://your-opensearch-endpoint/_plugins/_security/api/rolesmapping/all_access" \
  -H "Content-Type: application/json" \
  -d '{
    "backend_roles": ["arn:aws:iam::123456789012:role/your-iam-role"],
    "hosts": [],
    "users": []
  }'
Create Custom Role for RAG Operations
# Create a custom role with necessary permissions
curl -u "master_user:master_pass" -X PUT \
  "https://your-opensearch-endpoint/_plugins/_security/api/roles/RAGent_role" \
  -H "Content-Type: application/json" \
  -d '{
    "cluster_permissions": [
      "cluster:monitor/health",
      "indices:data/read/search"
    ],
    "index_permissions": [{
      "index_patterns": ["RAGent-*"],
      "allowed_actions": [
        "indices:data/read/search",
        "indices:data/read/get",
        "indices:data/write/index",
        "indices:data/write/bulk",
        "indices:admin/create",
        "indices:admin/mapping/put"
      ]
    }]
  }'

# Map IAM role to the custom role
curl -u "master_user:master_pass" -X PUT \
  "https://your-opensearch-endpoint/_plugins/_security/api/rolesmapping/RAGent_role" \
  -H "Content-Type: application/json" \
  -d '{
    "backend_roles": ["arn:aws:iam::123456789012:role/your-iam-role"],
    "hosts": [],
    "users": []
  }'
Hybrid Search Configuration
For optimal RAG performance, configure hybrid search with appropriate weights:
- General search: BM25 weight: 0.5, Vector weight: 0.5
- Keyword-focused: BM25 weight: 0.7, Vector weight: 0.3
- Semantic-focused: BM25 weight: 0.3, Vector weight: 0.7
Recommended Settings for Japanese Documents
- BM25 Operator: "or" (default)
- BM25 Minimum Should Match: "2" or "70%" for precision
- Use Japanese NLP: true (enables kuromoji tokenizer)
Automated Setup (setup.sh)
Use the interactive setup.sh to configure AWS OpenSearch security, create/mapping roles, create the target index, and grant IAM permissions for Bedrock and S3 Vectors. This script drives AWS CLI and signs OpenSearch Security API calls with SigV4.
Prerequisites
- AWS CLI v2 configured (credentials/profile with permission to update the domain and IAM)
- OpenSearch domain reachable (either VPC endpoint directly, or local port‑forward to
https://localhost:9200with Host/SNI set to the VPC endpoint)
Run
bash setup.sh
What it asks
- AWS Account ID, OpenSearch domain/region, endpoint usage (direct vs. localhost:9200), IAM role ARNs (RAG runtime, optional master/admin), index name, S3 Vectors bucket/index/region, Bedrock region and model IDs.
What it does
- Updates the domain access policy to allow specified IAM roles
- (Optional) Sets AdvancedSecurity MasterUserARN
- Creates/updates OpenSearch role
kibela_rag_rolewith cluster health + CRUD/bulk on * and maps backend_roles to your IAM roles - Creates the index if missing with Japanese analyzers and
knn_vector(1024, lucene, cosinesimil) - (Optional) Temporarily maps
all_accessto the RAG role for troubleshooting - Adds IAM inline policies to the RAG role for Bedrock InvokeModel and S3 Vectors bucket/index operations
Notes
- If you use local port‑forwarding, the script sets the Host header to the VPC endpoint so SigV4 validation works against
https://localhost:9200. - The
all_accessmapping is optional and intended for short‑term troubleshooting; remove it after verification.
License
For license information, please refer to the LICENSE file in the repository.
MCP Server Integration
Claude Desktop Configuration
After setting up the MCP server and completing authentication, add the server to your Claude Desktop configuration:
{
  "mcpServers": {
    "ragent": {
      "command": "curl",
      "args": [
        "-X", "POST",
        "-H", "Content-Type: application/json",
        "-H", "Authorization: Bearer YOUR_JWT_TOKEN",
        "-d", "@-",
        "http://localhost:8080/mcp"
      ],
      "env": {}
    }
  }
}
SSE clients (e.g., claude mcp add --transport sse ...) must target the dedicated /sse endpoint instead of /mcp.
Available MCP Tools
- ragent-hybrid_search: Execute hybrid search using BM25 and vector search
- Parameters:
query,max_results,bm25_weight,vector_weight,use_japanese_nlp - Returns: Structured search results with fused scores (hybrid BM25/vector) and references
- Score reference: see doc/score.md for how the fused score is calculated and interpreted
- Parameters:
Authentication Flow
- Start MCP server:
RAGent mcp-server --auth-method oidc - Visit authentication URL:
http://localhost:8080/login - Complete OAuth2 flow with your identity provider
- Copy the provided Claude Desktop configuration
- Add configuration to Claude Desktop settings

Contributing
We welcome contributions to the project. Feel free to submit issues and pull requests.
Reviews (0)
Sign in to leave a review.
Leave a reviewNo results found