deepsteve
Health Warn
- License — License: MIT
- Description — Repository has a description
- Active repo — Last push 0 days ago
- Low visibility — Only 9 GitHub stars
Code Fail
- network request — Outbound network request in agent-watcher.js
- process.env — Environment variable access in engines/node-pty.js
- child_process — Shell command execution capability in engines/tmux.js
- process.env — Environment variable access in engines/tmux.js
- fs module — File system access in mcp-server.js
Permissions Pass
- Permissions — No dangerous permissions requested
No AI report is available for this listing yet.
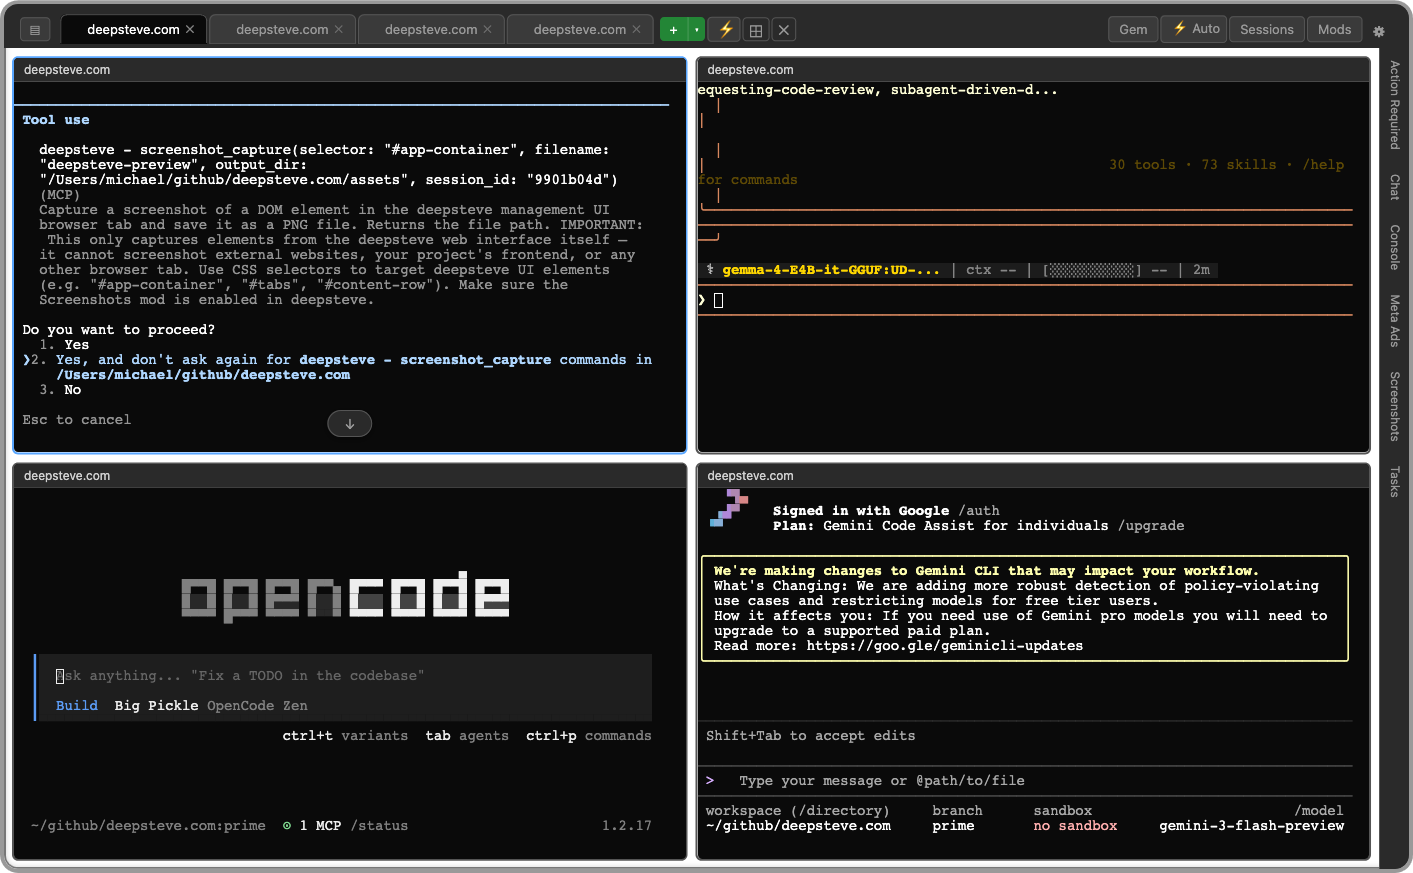
A hackable, open-source multi-terminal for running AI coding agents in your browser.
![]()
deepsteve
Run multiple AI agent sessions side-by-side in your browser, each with full terminal capabilities and persistent conversation history. Supports Claude Code with experimental support for Hermes, OpenCode, and Gemini.
Requires macOS. deepsteve uses macOS LaunchAgents for daemon management and macOS-specific paths for logs and state.
Security notice: DeepSteve has no authentication, no CORS restrictions, and no WebSocket origin checking. It is designed for localhost use only. Do not expose it to a network or the public internet.
Terminal Engines
deepsteve currently uses node-pty to run agent sessions (Claude Code, OpenCode, Gemini) as child processes on a Node server, connected to the browser via WebSocket. tmux support is currently being implemented as an alternative backend — running sessions inside tmux panes instead of node-pty, enabling native session persistence and detach/reattach without the Node process staying alive.
Features
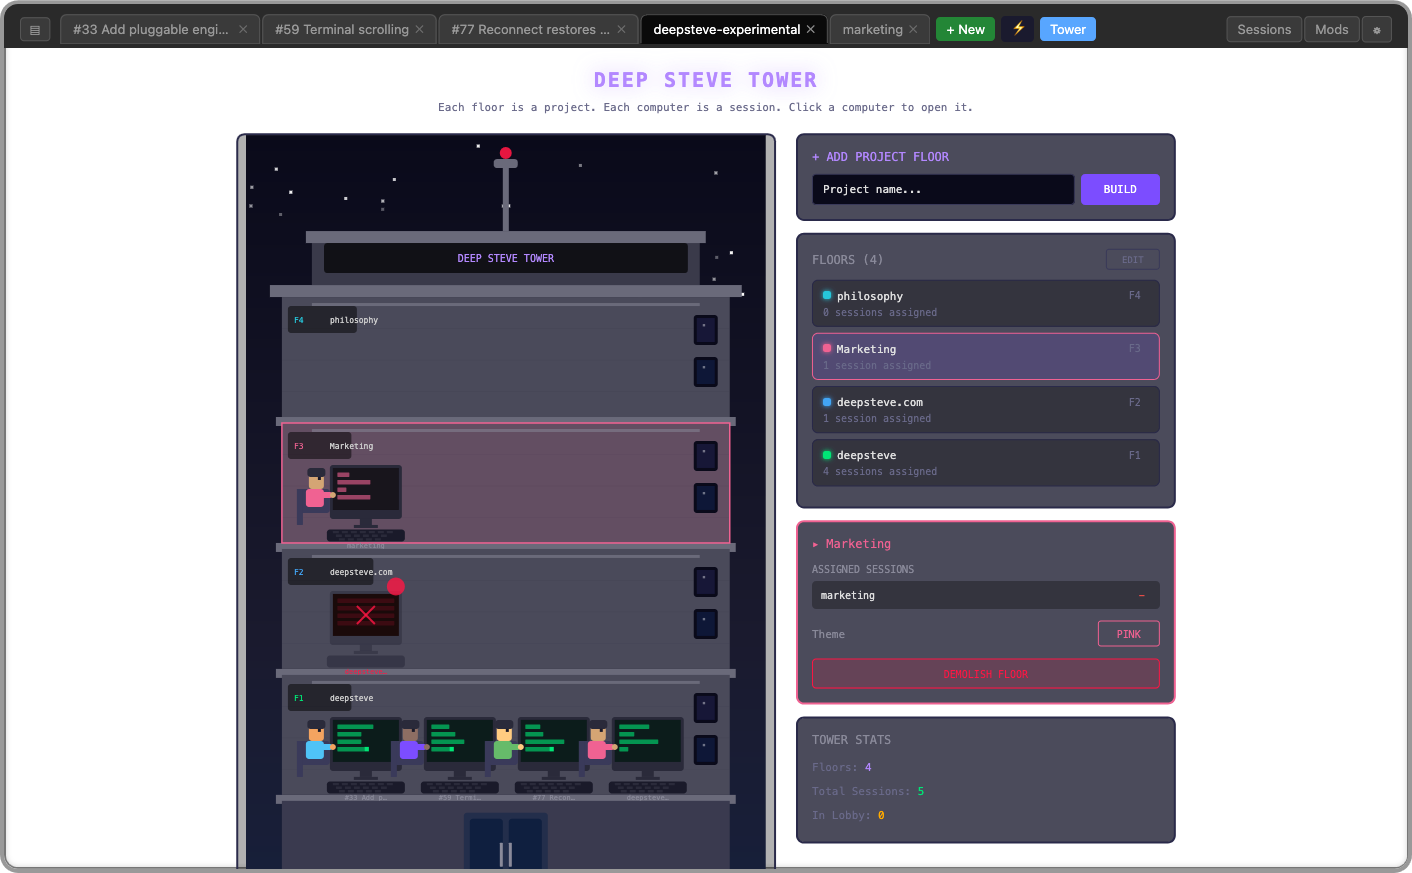
- Multiple sessions - Open as many Claude Code, OpenCode, or Gemini instances as you need in separate tabs
- Real terminal emulation - PTY support via xterm.js.
- Session persistence - Conversations survive server restarts and page refreshes
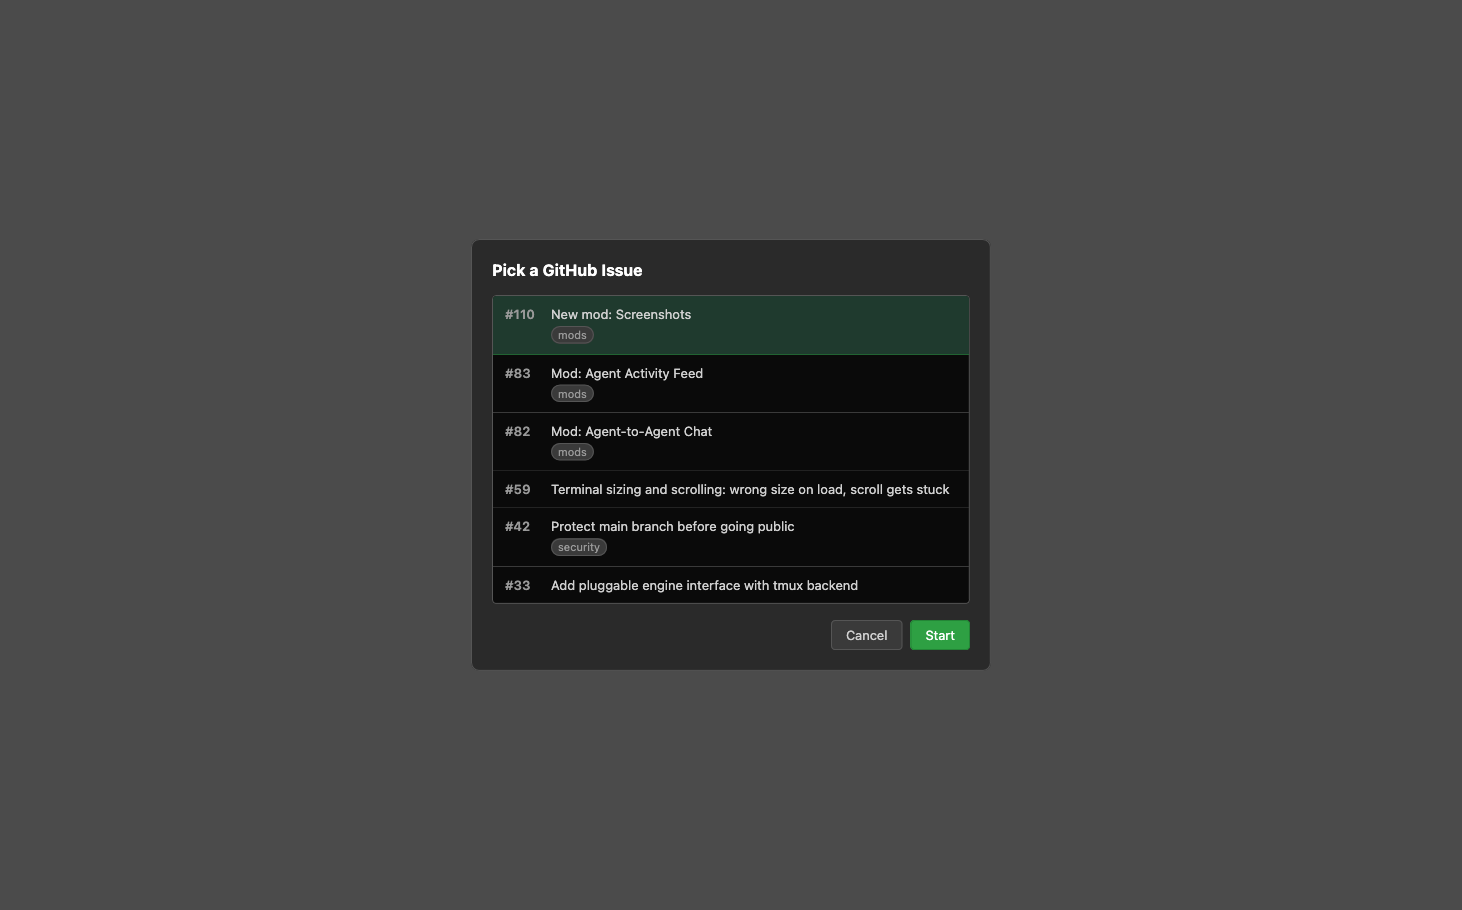
- GitHub issue picker - Pick an issue from any repo and launch a session with a worktree and prompt
- Agent coordination - MCP tools let sessions chat, share tasks, and coordinate work
- Runs as a daemon - Always available in the background on your Mac
- Themes - Customize the UI with CSS files in
~/.deepsteve/themes/ - Mods - Extend deepsteve with mods for task tracking, agent chat, browser reflection (yes, deepsteve can see itself), or create your own
Quick Install
curl -fsSL deepsteve.com/install.sh | bash
Requirements
- macOS
- Node.js
- Claude Code, OpenCode, or Gemini CLI installed
Installation (from source)
If you've cloned the repo:
./release.sh   # generates install.sh from source files
./install.sh   # installs to ~/.deepsteve/
install.sh is gitignored — it's generated by release.sh, which embeds all source files as heredocs. You must run release.sh first.
Usage
Open http://localhost:3000 in your browser.
- Click + to create a new Claude Code session in any directory
- Click the GitHub icon to pick an issue — deepsteve creates a worktree and starts a session with the issue as a prompt
- Right-click a tab to rename it
- Use Shift+Enter for multi-line input
Command Palette
Press ⌘K to open the command palette for quick keyboard-driven access to tabs, settings, and custom commands.
- Type to filter, arrow keys to navigate, Enter to execute
- Built-in commands: New Tab, Close Tab, Settings, Mods, Next/Previous Tab
- Switch between open tabs by name
- Customize the shortcut in Settings → Keyboard
Custom Commands
Drop executable scripts into ~/.deepsteve/commands/ and they appear automatically in the palette:
cat > ~/.deepsteve/commands/hello.sh << 'EOF'
#!/bin/bash
echo "Hello from DeepSteve!"
EOF
chmod +x ~/.deepsteve/commands/hello.sh
The command name is derived from the filename (hyphens → spaces, title-cased). For custom names, add a JSON sidecar file alongside the script:
// ~/.deepsteve/commands/hello.json
{ "name": "Say Hello", "description": "Prints a friendly greeting" }
Scripts receive environment variables: DEEPSTEVE_SESSION_ID (active tab's shell ID), DEEPSTEVE_CWD (that tab's working directory), DEEPSTEVE_TAB_NAME, DEEPSTEVE_WORKTREE, DEEPSTEVE_WINDOW_ID, and DEEPSTEVE_API_URL.
Themes
Customize the UI with CSS theme files. See the Themes Guide for details.
Mods
Extend deepsteve with visual mods — alternative views, panels, and MCP tools for your sessions. See the Mods Guide for details.
Managing the Daemon
./restart.sh            # restart (browser tabs silently reconnect)
./restart.sh --refresh  # restart + force browser reload

tail -f ~/Library/Logs/deepsteve.log   # view logs
launchctl list | grep deepsteve        # check status
Security
- Binds to
localhost:3000only — not accessible from the network - No authentication — anyone with local access to the machine can use it
- Each session runs Claude Code with the permissions of the user who installed deepsteve
Running on Meta Quest (WebXR)
WebXR requires a secure context (HTTPS). DeepSteve has built-in HTTPS support for this:
- Start the server with HTTPS enabled, bound to all interfaces:
cd ~/.deepsteve && node server.js --bind 0.0.0.0 --https
Navigate to
https://<your-laptop-ip>:3443on the Quest browser. The server logs will show the exact URL to use.On first connect you'll see a certificate warning — accept it to proceed. (Install mkcert on your laptop for locally-trusted certificates with no warnings.)
Certificates are auto-generated at startup and stored in ~/.deepsteve/certs/. They regenerate automatically when your LAN IP changes.
Contributing
Bug reports and feature requests are welcome on GitHub Issues. Pull requests are welcome.
Uninstall
~/.deepsteve/uninstall.sh
Reviews (0)
Sign in to leave a review.
Leave a reviewNo results found