proto
Health Warn
- License — License: MIT
- Description — Repository has a description
- Active repo — Last push 0 days ago
- Low visibility — Only 6 GitHub stars
Code Pass
- Code scan — Scanned 12 files during light audit, no dangerous patterns found
Permissions Pass
- Permissions — No dangerous permissions requested
No AI report is available for this listing yet.
Prototo: the AI-native prototyping tool for designers. Describe a screen, see it render as a real native iOS app. No canvas, no IDE, no code. Works with Claude Code and Codex.
Prototo
██████╗ ██████╗  ██████╗ ████████╗ ██████╗ ████████╗ ██████╗
██╔══██╗██╔══██╗██╔═══██╗╚══██╔══╝██╔═══██╗╚══██╔══╝██╔═══██╗
██████╔╝██████╔╝██║   ██║   ██║   ██║   ██║   ██║   ██║   ██║
██╔═══╝ ██╔══██╗██║   ██║   ██║   ██║   ██║   ██║   ██║   ██║
██║     ██║  ██║╚██████╔╝   ██║   ╚██████╔╝   ██║   ╚██████╔╝
╚═╝     ╚═╝  ╚═╝ ╚═════╝    ╚═╝    ╚═════╝    ╚═╝    ╚═════╝
Describe a screen. Watch your prototype run natively on iPhone.
Designers describe what they want; native iOS UI appears in the Simulator, with Apple's real Liquid Glass on iOS 26+. No canvas. No IDE. No engineering.
prototo.app · create-proto on npm · @sherizan/proto-cli on npm



Demo
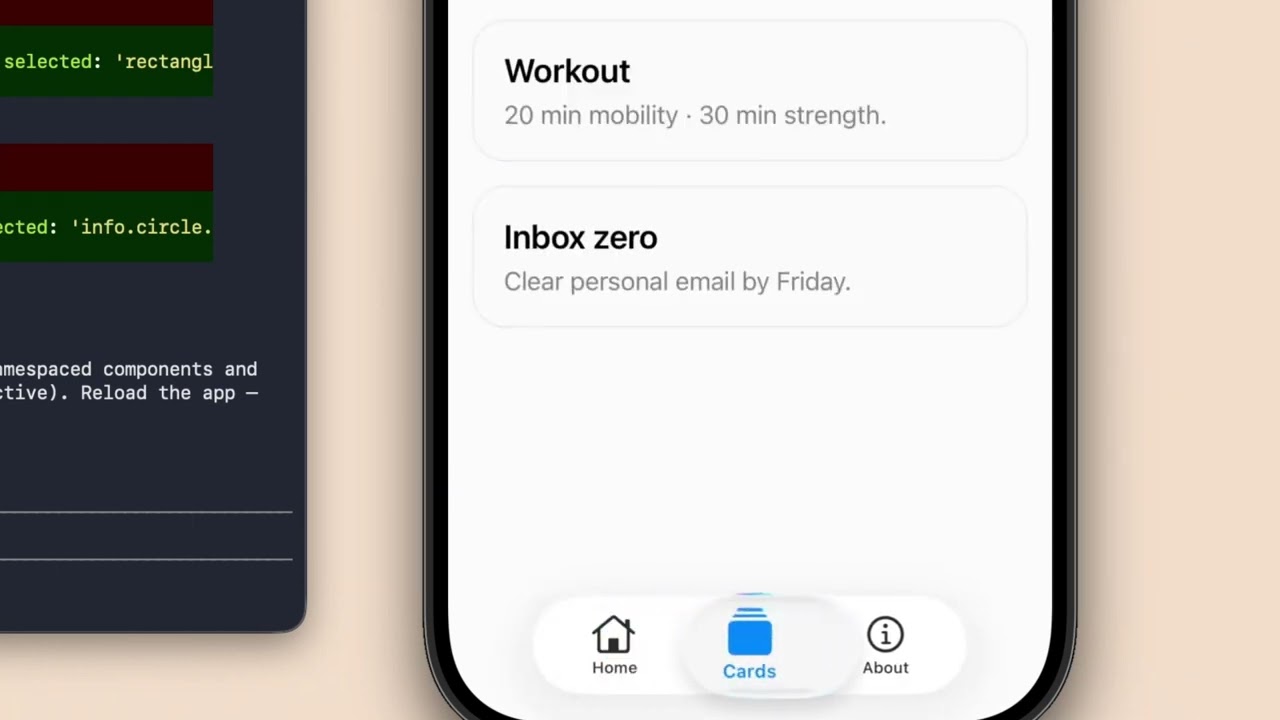
Quick start
npm create proto@latest myapp
That's it. The iOS Simulator opens with a Welcome screen. In another terminal:
cd myapp && claude
Then describe what you want. Example:
> add a liquid glass bottom tab bar with Home, Explore, Library, Profile tabs
Claude Code generates app/_layout.tsx using Apple's native UITabBar (via expo-router/unstable-native-tabs). Metro hot-reloads. The Simulator updates instantly with a real refractive Liquid Glass tab bar and SF Symbol icons — no engineering needed.
Note: the npm package is
create-proto(and the CLI bin isproto) for historical reasons. The brand and product name is Prototo — that's what designers see in the banner, in the iOS nav bar, and at prototo.app.
Prerequisites
| What | Why |
|---|---|
| Xcode (with iOS Simulator) | The iOS Simulator IS the canvas. Required to render your prototype. Install via the Mac App Store (large download — give it time). Run it once and accept the license before using Prototo. |
| macOS | Xcode runs only on Mac. Windows / Linux not supported for Phase 2. |
| Node.js 20+ | Runtime for Prototo's CLI. Install via nodejs.org or your package manager. |
| Claude Code | The design tool. Install with npm i -g @anthropic-ai/claude-cli and authenticate before using. |
iOS Simulator with iOS 26+ is recommended — that's where Apple's native Liquid Glass material renders. Older iOS versions fall back to a plain surface.
The designer flow
┌──────────────────────────────────────────────────────────────────┐
│ Terminal 1 — Prototo                                             │
│                                                                  │
│  $ npm create proto@latest myapp                                 │
│     [ASCII banner, scaffolding, install]                         │
│     [iOS Simulator launches → Welcome screen appears]            │
│                                                                  │
│  Open another terminal and run:                                  │
│    cd myapp && claude                                            │
└──────────────────────────────────────────────────────────────────┘

┌──────────────────────────────────────────────────────────────────┐
│ Terminal 2 — Claude Code                                         │
│                                                                  │
│  $ claude                                                        │
│  > add a settings screen with a dark mode toggle                 │
│                                                                  │
│  [Claude reads CLAUDE.md + DESIGN.md, writes screens/Settings.tsx│
│   and app/settings.tsx, Metro hot-reloads]                       │
└──────────────────────────────────────────────────────────────────┘

         ┌────────────────────────────────┐
         │  iOS Simulator (the canvas)    │
         │  Welcome screen → Settings     │
         │  Liquid Glass renders live     │
         └────────────────────────────────┘
The designer never touches a file. Every change is a prompt.
Preview on iPhone (optional)
Want to feel your prototype on a real iPhone — Liquid Glass, system haptics, real gestures?
Open https://prototo.app/install/ios on your iPhone and follow the 3-step install (~2 minutes, no App Store, no Expo account needed). Once Prototo is on your home screen, proto start in your project gives you a QR your Camera can scan.
What's in the box
When create-proto scaffolds your project, you get:
DESIGN.md— your design system source of truth. Tokens (color, spacing, typography, radius), component library choice, and screen registry. Update it by prompting Claude.CLAUDE.md— instructions for Claude Code, scoped to this project. Tells Claude to prefer Apple's native components (UITabBar, SF Symbols,@expo/ui, GlassView) over wrappers. Includes the Prototo component library reference.components/proto/— fallback primitives for things native iOS doesn't ship: layout helpers (Screen,Stack,Row), themed text, genericCardwith Liquid Glass support, animatedButton,Toggle,Modal,Divider. Plus four subpath modules for motion + graphics:motion(declarative transitions),gestures(drag / scroll / shared-value),lottie(LottieFiles + After Effects playback),canvas(custom drawing). Read-only, managed by Prototo.screens/Home.tsx— Welcome screen with a Liquid Glass hero card and a 2-step tutorial (background color → native tab bar) with Copy buttons.app/— expo-router routing layer. Thin re-exports ofscreens/.app/_layout.tsxconfigures the native UINavigationBar with large titles.assets/lottie/— drop LottieFiles / After Effects JSON exports here; the PrototoLottiecomponent picks them up viarequire('../assets/lottie/<name>.json').proto.config.js— the only file designers may edit directly (theme, accent, app name, layout, motion preferences).- Pre-configured for Expo SDK 56 with
expo-glass-effect,react-native-reanimated 4,react-native-worklets,react-native-ease,lottie-react-native,@shopify/react-native-skia,@expo/ui,react-native-gesture-handler,expo-clipboard.
Motion & graphics
Prototo ships with four curated modules in components/proto/ for micro-interactions and graphics — wired into the runtime, never imported directly by designers. Claude picks the right one based on your prompt:
| Module | When Claude reaches for it | Powered by |
|---|---|---|
motion |
"fade this in" / "scale on tap" / "slide up on mount" | react-native-ease — declarative, native platform animator (CAAnimation / ObjectAnimator), zero JS overhead |
gestures |
"drag this card" / "swipe to delete" / "parallax this header" | react-native-reanimated + react-native-gesture-handler — imperative shared values + worklets |
lottie |
"play assets/lottie/confetti.json when subscribe is tapped" | lottie-react-native — LottieFiles / After Effects timeline playback |
canvas |
"draw a gradient blob behind the header" | @shopify/react-native-skia — custom drawing surfaces |
Example prompts:
> fade the welcome card in on mount with a 200ms ease-out
> add a draggable card that springs back when released
> drop a celebration Lottie when the user taps Subscribe
> draw a gradient confetti burst behind the header on Home
All four native modules are pre-bundled in the Prototo App (device + simulator) and pre-installed in the project template, so no extra setup.
Commands
After install, inside your project:
npx proto start         # Boot Metro + open Simulator
npx proto new-screen    # Scaffold a new screen
npx proto reset         # Clear Metro + project caches
npx proto design        # Interactive: theme + accent + component library
npx proto help          # Show all commands
Designers typically only use npx proto start — everything else happens via Claude Code prompts.
How it works
You ──prompt──► Claude Code
                    │
                    ▼ writes files
                screens/X.tsx + app/x.tsx
                    │
                    ▼ Metro detects change
                Hot reload
                    │
                    ▼ JS bundles
                iOS Simulator updates
                    │
                    ▼ renders
                Native iOS UI + Liquid Glass
Three principles drive the architecture:
- The iOS Simulator is the canvas. Every change a designer makes appears in the Simulator within milliseconds via Metro hot reload. No build step, no preview render.
- Apple-native first. Prototo's
CLAUDE.mdtells Claude to use Apple's native components (UITabBar viaexpo-router/unstable-native-tabs, SF Symbols viaexpo-symbols, SwiftUI primitives via@expo/ui/swift-ui, Liquid Glass viaexpo-glass-effect) before any wrapper. This gets you real iOS fidelity for free. - Designers never touch code. All interaction is prompts in Claude Code. The CLI takes a single command (
proto start) and does the right thing.
Roadmap
| Phase | Status | What |
|---|---|---|
| Phase 1 — Scaffolding + preview | ✅ Shipped | create-proto scaffolds a project, proto start runs Metro + Simulator |
| Phase 2 — Prompt layer | ✅ Shipped | CLAUDE.md + DESIGN.md template, proto design interactive command, native-first component library |
| Phase 2.5 — Simulator-as-canvas MVP | ✅ Shipped | Auto-launch Simulator, ASCII banner, Expo Go auto-clean on SDK mismatch, drop custom Nav for native UITabBar, native large-title nav bar, iOS-26-native Liquid Glass only |
| Phase 3 — Prototo App (physical device) | ✅ Beta | Custom Expo dev client distributed via EAS Internal (see https://prototo.app/install/ios). Real Liquid Glass on iPhone via QR. Beta-quality; App Store version is a separate later track. |
Phase 3 — Marketing site (prototo.app) |
🚧 In progress | Landing page at prototo.app. |
Phase 3 — Web share (prototo.run) |
📋 Planned | Share a QR code to a stakeholder, they run the prototype on their phone via the web companion. |
| Phase 3 — Graduate to real app | 📋 Planned | Your Prototo project IS a real Expo SDK 56 app — same app/, screens/, components/ structure as any production Expo app. Graduation path: add EAS Build for distribution, swap placeholder data for real APIs, add auth, ship to TestFlight + App Store. We'll write the graduation guide + a proto graduate command that scaffolds EAS config and a .env.production once Phase 2.5 stabilizes. |
Repo layout
.
├── apps/
│   └── prototo-app/            Phase 3: custom dev client (EAS Internal beta)
└── packages/
    ├── create-proto/           npm `create-proto` — the scaffold CLI
    ├── proto-cli/              `proto` command — Metro + Simulator wrapper
    └── proto-components/       fallback component library (Card, Button, etc.)
Packages
create-proto— thenpm create proto@latestentry point@sherizan/proto-cli— theprotocommand inside scaffolded projects
Contributing
This is an early-stage personal project. Issues and PRs welcome but unpredictable response time.
License
MIT © 2026 Sherizan Sheikh
Reviews (0)
Sign in to leave a review.
Leave a reviewNo results found