z-grc
Health Warn
- License — License: MIT
- No description — Repository has no description
- Active repo — Last push 0 days ago
- Low visibility — Only 5 GitHub stars
Code Fail
- rm -rf — Recursive force deletion command in packages/node/dev.sh
Permissions Pass
- Permissions — No dangerous permissions requested
No AI report is available for this listing yet.
Note: This codebase has been completely rewritten from the ground up (v2). The old proxy-based architecture is replaced with a native C interceptor with Python and Node.js bindings. Documentation below is outdated and will be updated soon.
Governance, Risk, and Control Engine for LLMs
Built by Zeb Labs
Enterprise-grade governance engine for Large Language Model applications. Provides automatic interception, policy enforcement, quota management, and comprehensive observability across multiple LLM providers with zero code changes.
Installation
uv add z-grc
Or with auto-instrumentation:
uv add z-grc[auto-instrument]
Quick Start
AWS Bedrock Example
import zgrc
import boto3
import json

# Initialize GRC
zgrc.init(api_key="your-zgrc-api-key")

# Use your LLM SDK normally - GRC handles everything
client = boto3.client("bedrock-runtime", region_name="us-east-1")

response = client.invoke_model(
    modelId="us.anthropic.claude-sonnet-4-5-20250929-v1:0",
    body=json.dumps({
        "anthropic_version": "bedrock-2023-05-31",
        "max_tokens": 1024,
        "messages": [{"role": "user", "content": "Hello!"}]
    })
)
OpenAI Example
import zgrc
from openai import OpenAI

# Initialize GRC
zgrc.init(api_key="your-zgrc-api-key")

# Use OpenAI SDK normally
client = OpenAI(api_key="your-openai-key")

response = client.chat.completions.create(
    model="gpt-4",
    messages=[{"role": "user", "content": "Hello!"}]
)

# Z-GRC automatically:
# - Validates quota before requests
# - Tracks token usage and calculates costs
# - Enforces policies
# - Sends telemetry (traces, metrics, logs)
Features
Zero-Code Integration
Drop-in solution requiring only zgrc.init(). Works with existing code without modifications.
Auto-Discovery
Automatically detects and intercepts installed LLM SDKs:
- AWS Bedrock (boto3)
- OpenAI (including Azure OpenAI, Databricks, and OpenAI-compatible endpoints)
- Anthropic (coming soon)
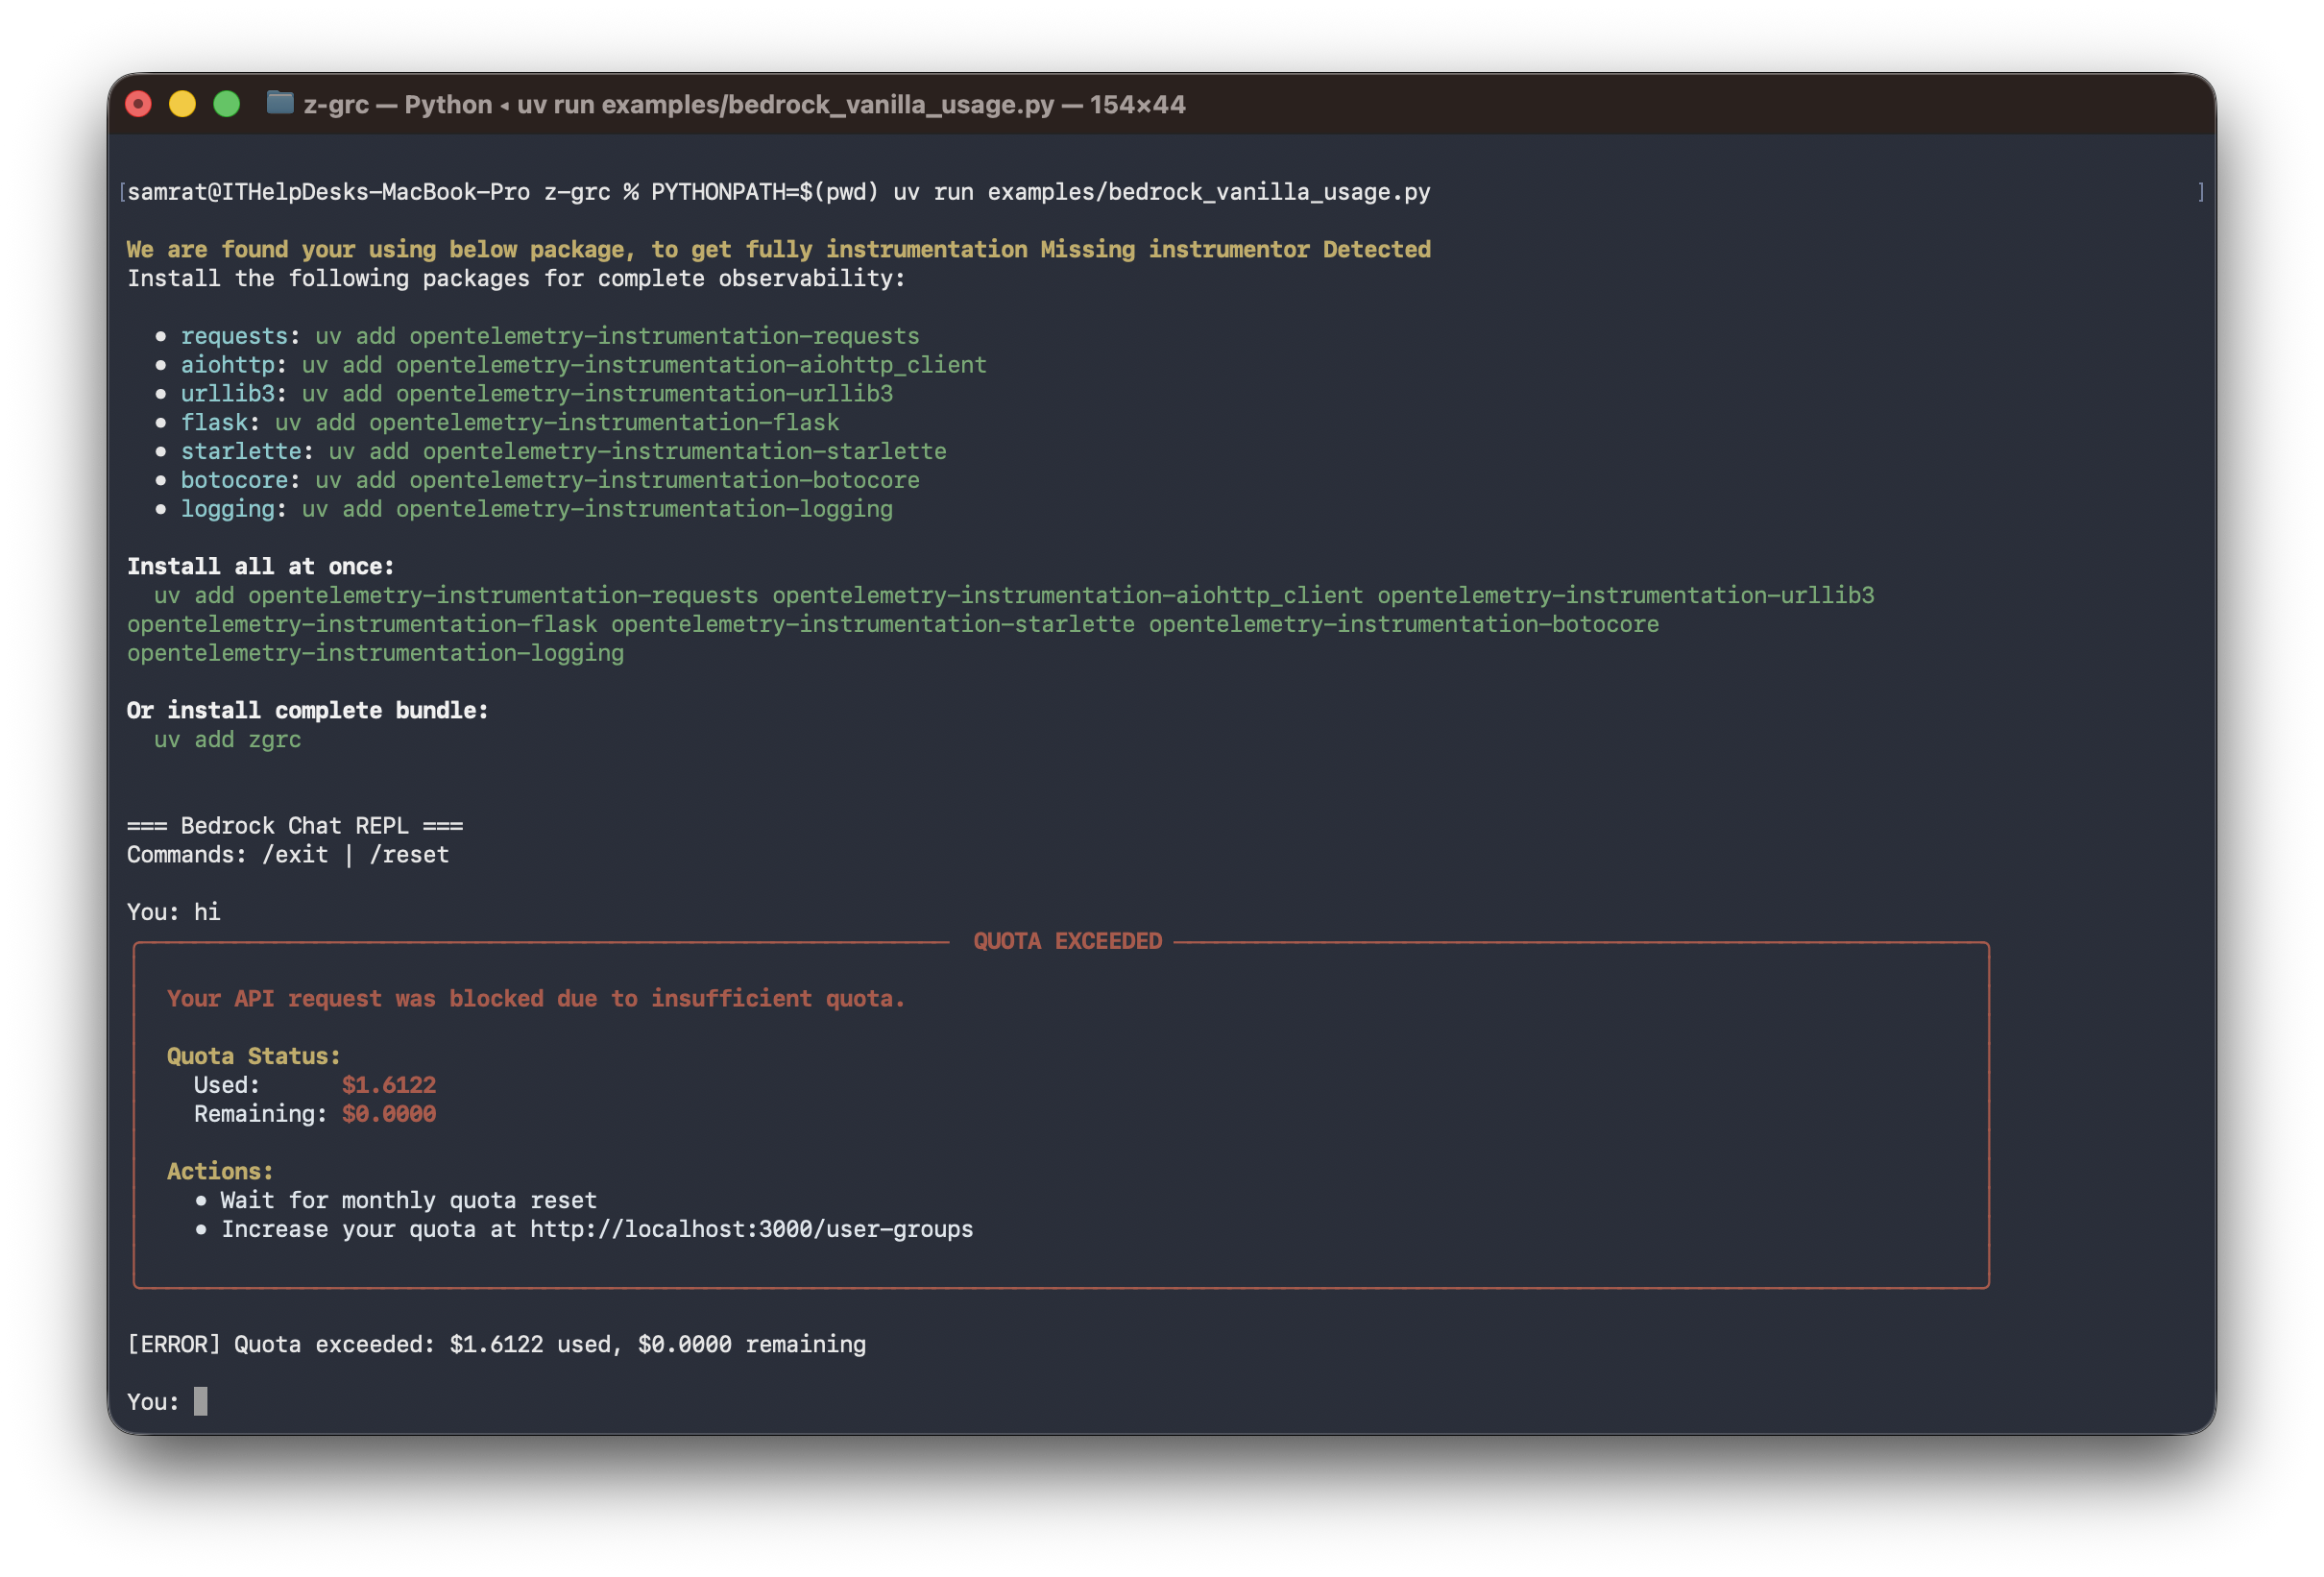
Policy Enforcement
Real-time quota validation and cost limit enforcement. Blocks requests when quota is exceeded.
from zgrc.utils import QuotaExceededException

try:
    response = client.invoke_model(...)
except QuotaExceededException as e:
    print(f"Quota exceeded: ${e.used:.4f} used, ${e.remaining:.4f} remaining")
Auto-Instrumentation
Optional automatic instrumentation for HTTP clients, web frameworks, databases, and more:
zgrc.init(
    api_key="your-zgrc-api-key",
    auto_instrument=True,
    app_name="my-app",
    environment="production"
)
Framework Agnostic
Works with vanilla SDKs and popular frameworks:
# PydanticAI
from pydantic_ai import Agent
agent = Agent("bedrock")
result = await agent.run("Your prompt")

# LangChain
from langchain_aws import ChatBedrock
llm = ChatBedrock(model_id="...")
response = llm.invoke("Your prompt")

# Strands Agents
from strands_agents import Agent
agent = Agent(provider="bedrock")
response = agent.execute("Your prompt")
Streaming Support
Fully supports streaming responses with automatic token tracking:
response = client.converse_stream(
    modelId="...",
    messages=[{"role": "user", "content": [{"text": "Tell me a story"}]}]
)

for event in response["stream"]:
    if "contentBlockDelta" in event:
        print(event["contentBlockDelta"]["delta"]["text"], end="")
Configuration
zgrc.init(
    api_key: str,                  # Your Z-GRC API key (required)
    verbose: bool = False,         # Enable debug logging (default: False)
    auto_instrument: bool = False, # Enable auto-instrumentation
    app_name: str = None,          # Application name for telemetry
    environment: str = None        # Environment (dev/staging/prod)
)
Proxy Mode (Claude Code CLI)
For environments where code modification isn't possible (like Claude Code CLI), use the standalone proxy:
Quick Start
Background Mode (Recommended):
In the same terminal, run both commands:
# Step 1: Start proxy in background and set environment variables
eval $(z-grc-proxy --api-key=your-key -d)

# Step 2: Run Claude Code in the same terminal
claude
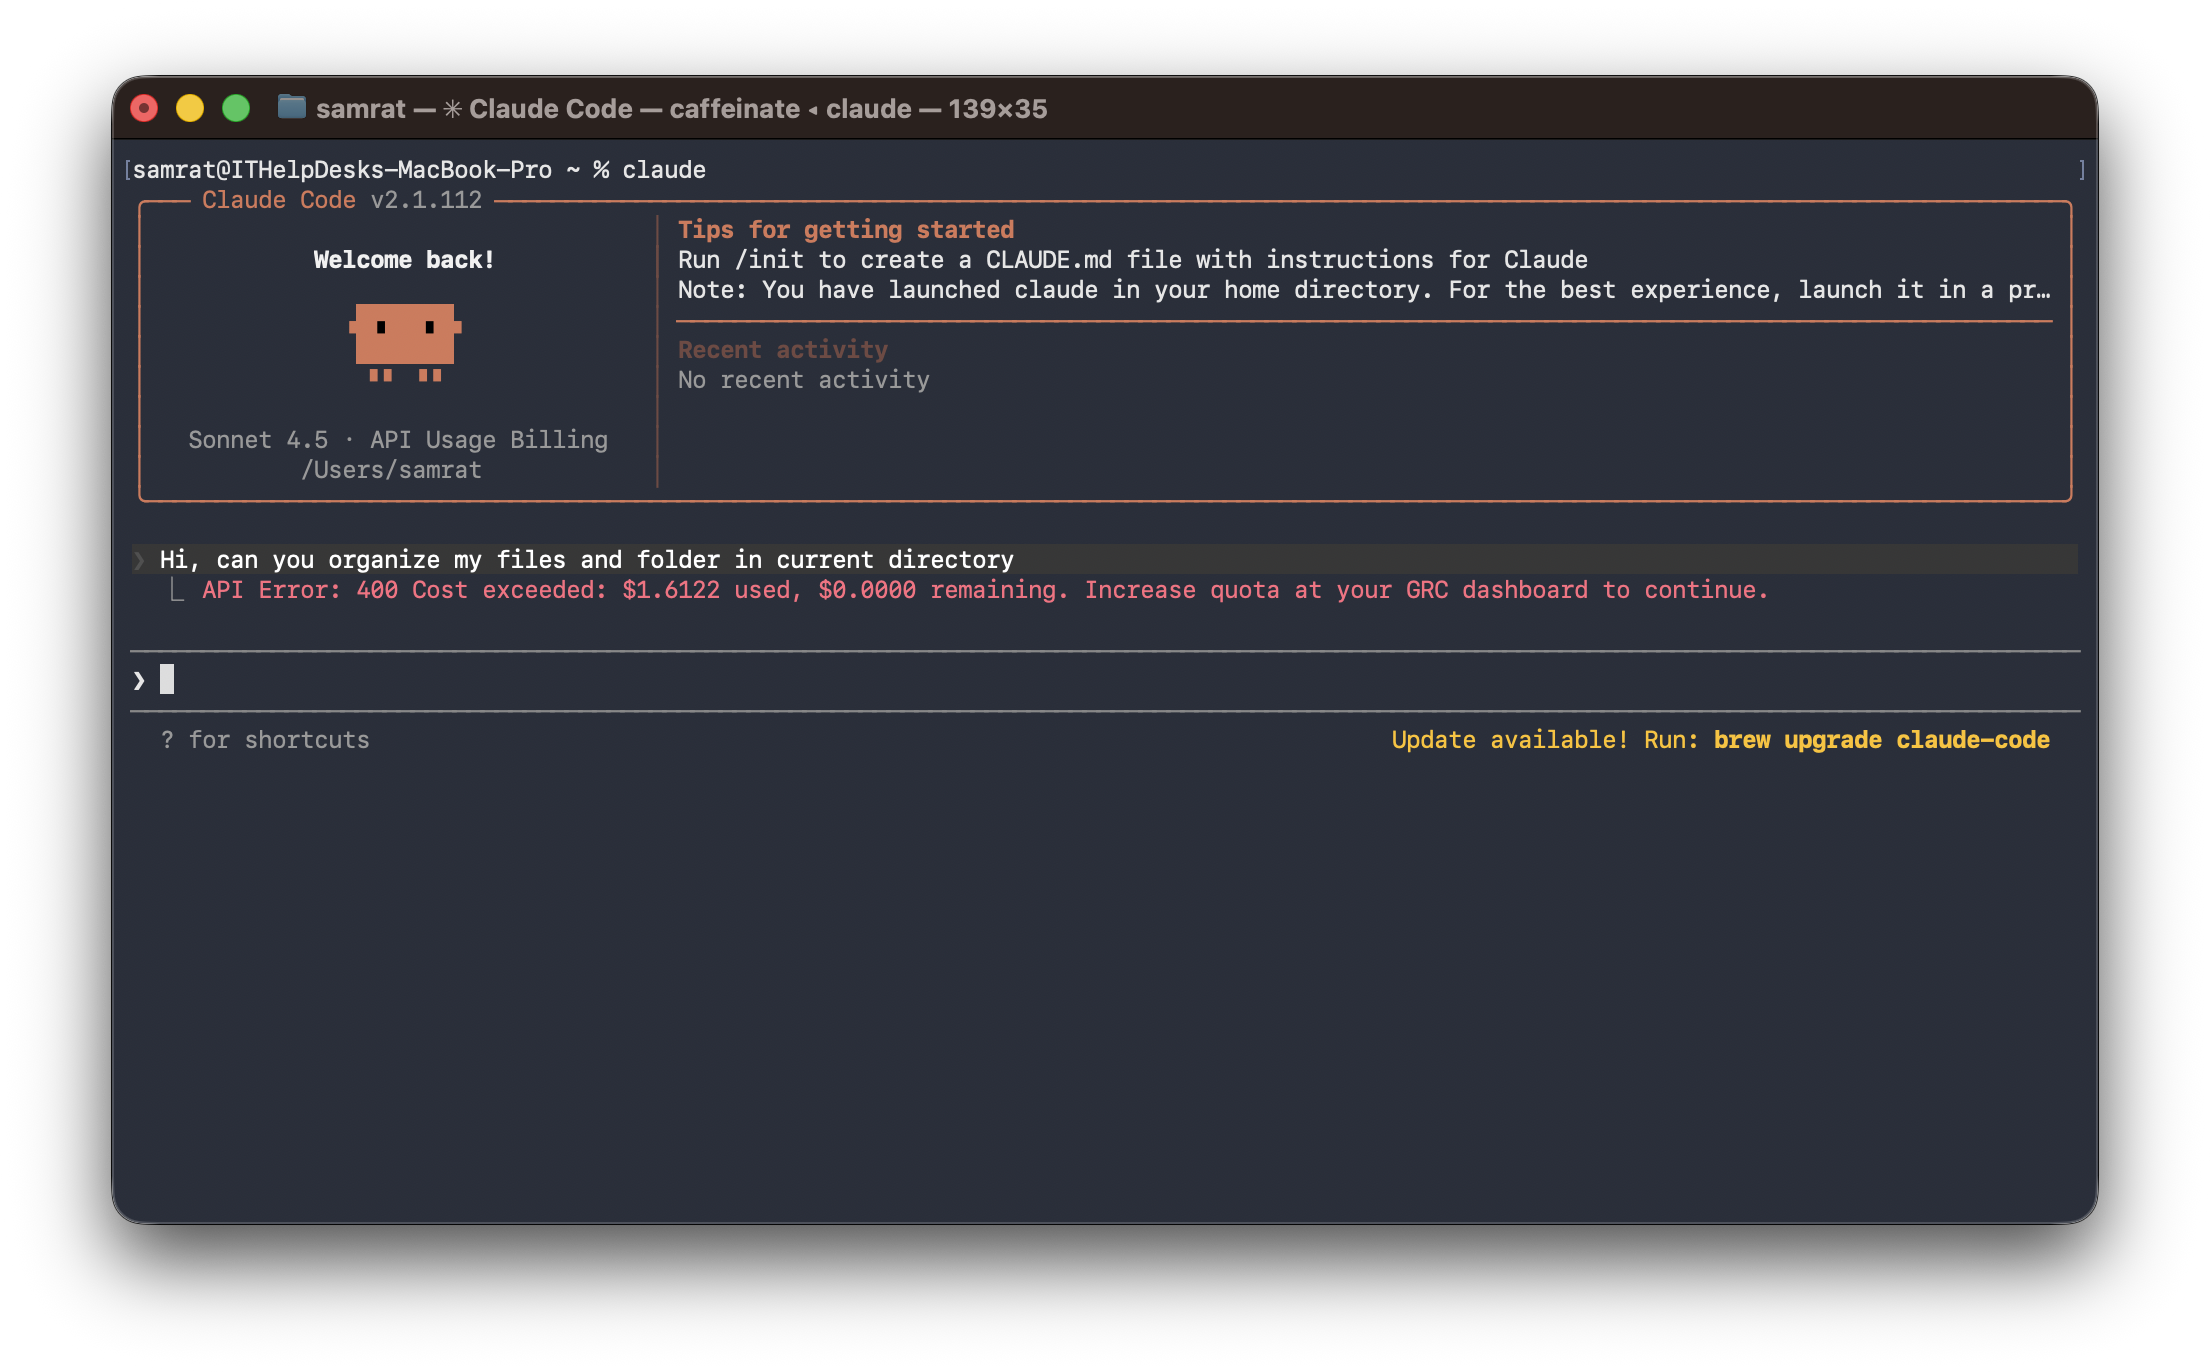
Claude Code running with Z-GRC proxy in background mode
Note: You need to run the
eval $(z-grc-proxy ...)command in every new terminal where you want to use Claude Code with Z-GRC. The environment variables only apply to the current terminal session.
Foreground Mode:
Terminal 1 - Start the proxy (shows logs):
z-grc-proxy --api-key=your-key
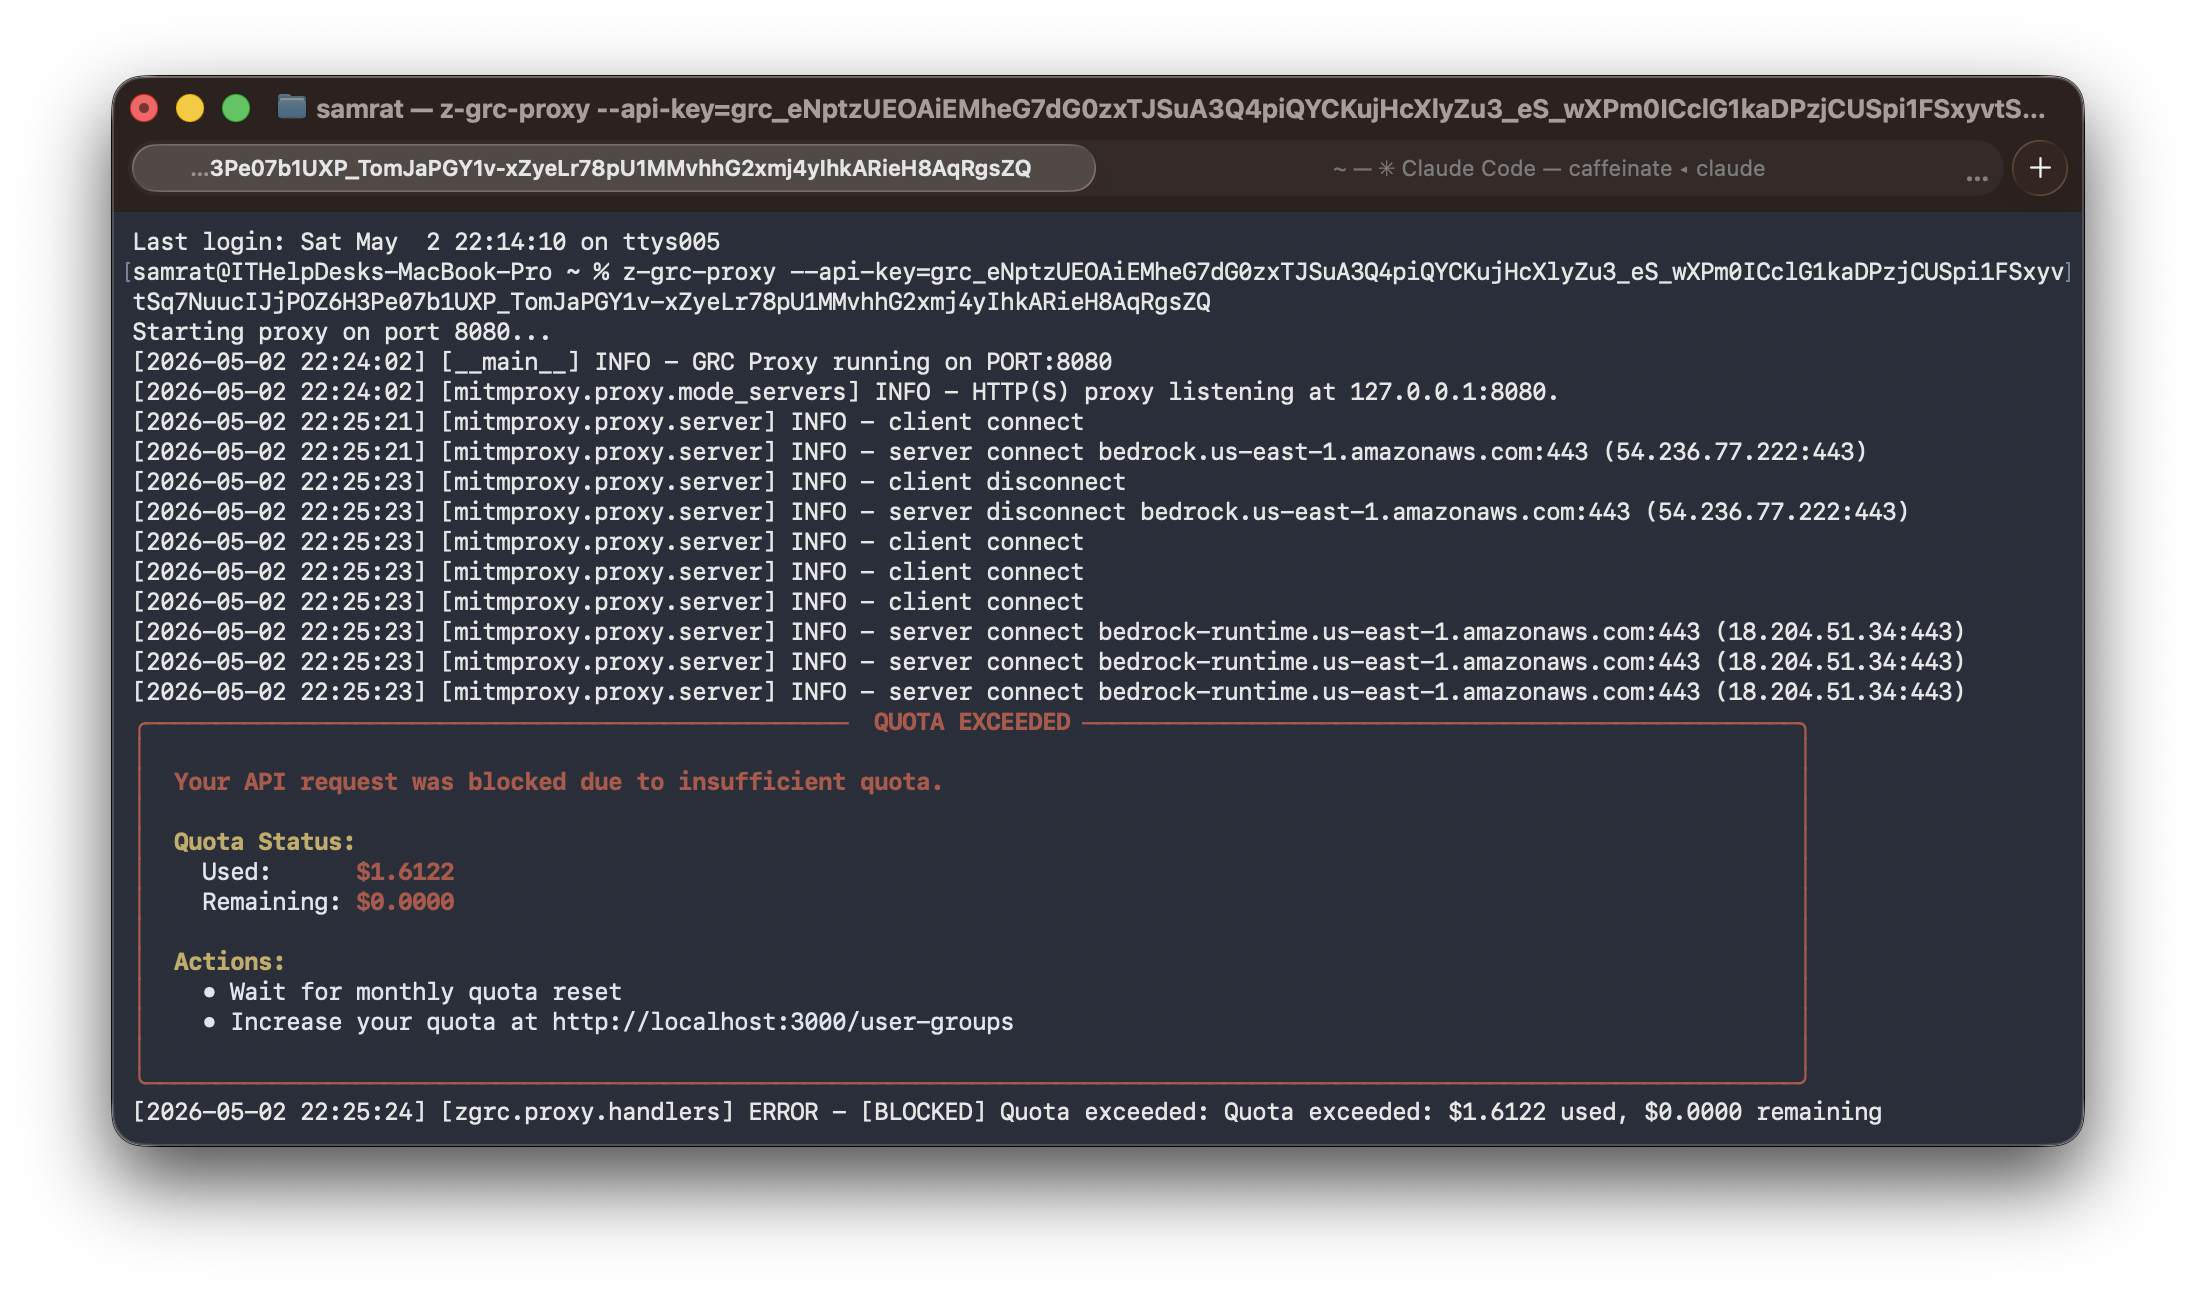
Proxy server running in foreground with request logs
Terminal 2 - Open another tab, set environment variables, and run Claude:
# Mac & Linux
export HTTPS_PROXY=http://127.0.0.1:8080
export NODE_EXTRA_CA_CERTS=~/.mitmproxy/mitmproxy-ca-cert.pem

# Windows
$env:HTTPS_PROXY = "http://127.0.0.1:8080"
$env:NODE_EXTRA_CA_CERTS = "$env:USERPROFILE\.mitmproxy\mitmproxy-ca-cert.pem"

# then run any cli application
claude
Note: In foreground mode, the proxy runs in Terminal 1 and shows live logs. Claude Code runs in Terminal 2 with the environment variables set to use the proxy.
Proxy Commands
# Mac & Linux Start in background (auto port detection)
eval $(z-grc-proxy --api-key=your-key -d)

# Windows Start in background (auto port detection)
z-grc-proxy --api-key=your-key -d | Out-String | Invoke-Expression

# Mac & Linux Start on specific port
eval $(z-grc-proxy --api-key=your-key --port=8085 -d)
# Windows
z-grc-proxy --api-key=your-key --port=8085 -d | Out-String | Invoke-Expression

# Check active proxy sessions
z-grc-proxy --status

# Kill all proxy servers
z-grc-proxy --kill-all

# Verbose logging
eval $(z-grc-proxy --api-key=your-key -d --verbose)
How It Works
- Automatic Port Detection: Finds available port (8080-8090)
- Session Management: Reuses existing proxy for same API key
- mitmproxy Certificates: Auto-generated in
~/.mitmproxy/on first run - Platform Independent: Works on macOS, Linux, Windows
Building Executables
Build standalone proxy binary with PyInstaller:
# Current platform only
make grpc-proxy-build
Output: dist/z-grc-proxy
Test Binary
# Background mode
eval $(./dist/z-grc-proxy --api-key=your-key -d)

# Foreground mode
./dist/z-grc-proxy --api-key=your-key
Installing Executor
macOS / Linux
curl -fsSL https://raw.githubusercontent.com/zeb-ai/z-grc/main/install.sh | bash
Windows (PowerShell)
irm https://raw.githubusercontent.com/zeb-ai/z-grc/main/install.ps1 | iex
Reviews (0)
Sign in to leave a review.
Leave a reviewNo results found