Jumping-Agent-platform
Health Uyari
- No license — Repository has no license file
- Description — Repository has a description
- Active repo — Last push 0 days ago
- Community trust — 193 GitHub stars
Code Uyari
- fs module — File system access in Frontend/js/agent-chat/_fix-tags.js
- network request — Outbound network request in Frontend/js/agent-chat/api.js
- network request — Outbound network request in Frontend/js/game/index.js
Permissions Gecti
- Permissions — No dangerous permissions requested
Bu listing icin henuz AI raporu yok.
Build your own AI agent through gameplay.
项目简介
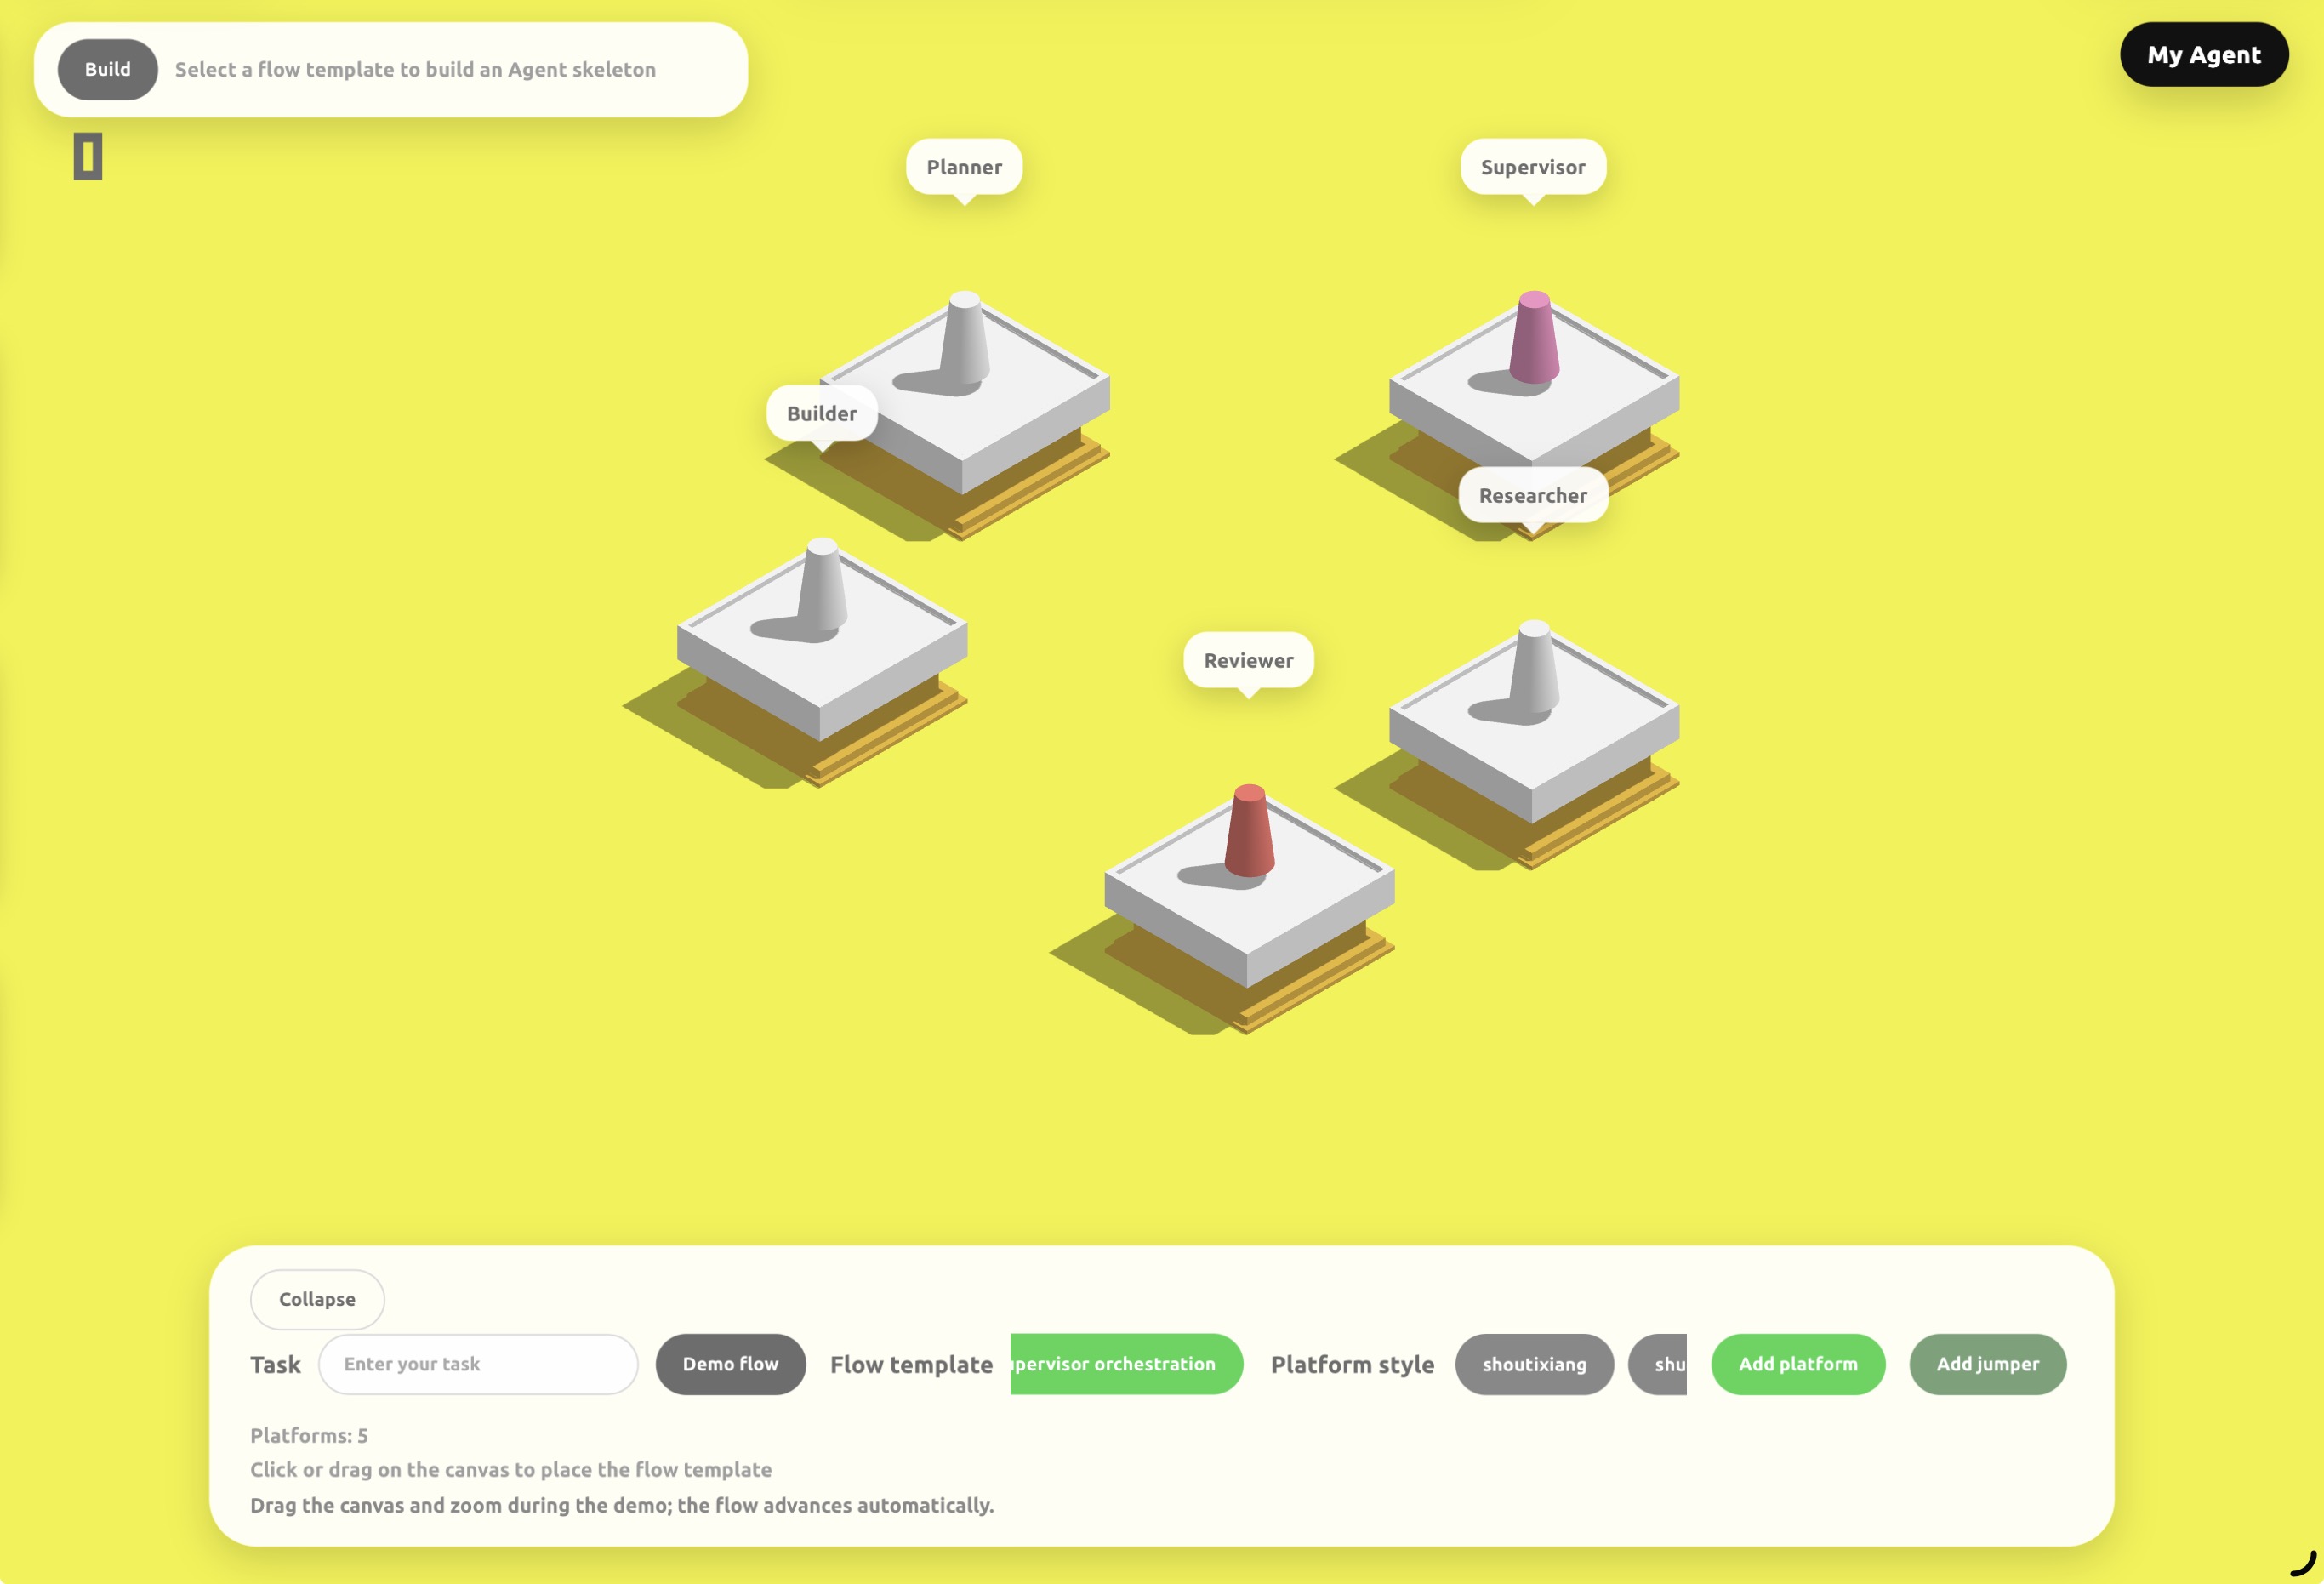
这是一个非常有趣的项目,以跳一跳游戏式的交互与呈现,帮助零基础用户在移动端(先以平板为主)简单、快速地搭建属于自己的 Agent,把抽象的流程变成可点、可跳跃的步骤,极大降低上手门槛。
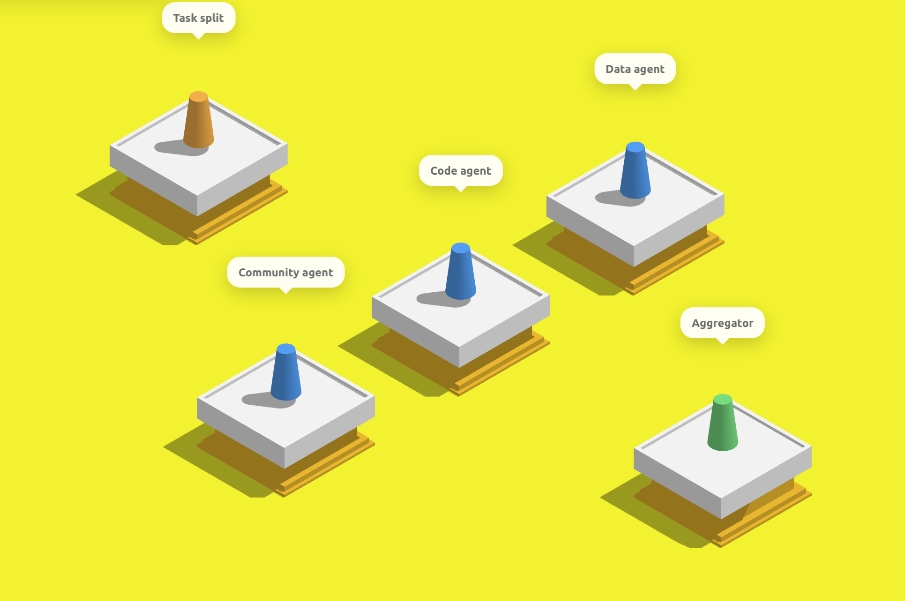
本项目把传统平面 workflow 转换为空间化、游戏化流程,通过跳一跳这个载体更动态地演示 Agent 的运行过程。
在这里,你看不到错综复杂的连线与箭头;只需按压屏幕、操控棋子一次次跳跃,就能直观地体会 Agent 工作流是如何一环接一环向前推进的。
架构说明
Frontend/:跳一跳式 Agent 构建界面,负责 workflow 展示、节点配置和聊天入口。agent_builder/:Agent 骨架与模板,包括流程模板、Agent 模板、项目模板和配置生成逻辑。back_agent/:读取骨架代码,并结合用户在前端输入的需求,对 Agent 进行补全、改写与落地。backend/:编排服务。orchestrator.py负责串联前端请求、动态加载agent_builder、生成 Agent workspace,并通过本地 HTTP 调用back_agent。sandbox//sandbox-main/:为生成后的 Agent 提供沙盒工具能力,例如文件操作、Shell 和浏览器自动化,避免 Agent 直接操作宿主机。非常感谢这个沙盒项目提供者:https://github.com/agent-infra/sandbox.git 😊
默认服务关系:
- Frontend:
http://localhost:6301 - back_agent:
http://localhost:8000/chat - backend / Orchestrator:
http://localhost:8001 - Sandbox:
http://localhost:8080
Quick Start
Prerequisites
- Git
- Python 3.11+
- Node.js 18+
- npm
- Docker
Clone
git clone https://github.com/answeryt/Jumping-Agent-platform.git
cd Jumping-Agent-platform
Install Frontend Dependencies
cd Frontend
npm install
cd ..
Install Backend Dependencies
建议先创建虚拟环境:
python -m venv .venv
Windows:
.venv\Scripts\activate
macOS / Linux:
source .venv/bin/activate
安装 Python 依赖:
python -m pip install "fastapi" "uvicorn[standard]" "pydantic" "openai"
Configure API Key
back_agent/config/model_config.toml 默认读取 OPENAI_API_KEY 环境变量。你可以直接设置环境变量,也可以使用项目内置脚本写入 .env。
方式一:使用环境变量。
Windows PowerShell:
$env:OPENAI_API_KEY="your_api_key_here"
macOS / Linux:
export OPENAI_API_KEY="your_api_key_here"
方式二:使用项目脚本。
python backend/set_agent_api_key.py
脚本会要求你输入 API Key,并更新 back_agent/.env 以及已生成 workspace 的 .env。
Start Sandbox
docker run --security-opt seccomp=unconfined --rm -it -p 8080:8080 ghcr.io/agent-infra/sandbox:latest
Start Services
需要打开 3 个终端,并都在仓库根目录下执行。
终端 A:启动 back_agent。
cd back_agent
python -m uvicorn api:app --host 0.0.0.0 --port 8000
终端 B:启动 backend / Orchestrator。
cd backend
python -m uvicorn orchestrator:app --host 0.0.0.0 --port 8001
终端 C:启动前端。
cd Frontend
npm run server -- --host 0.0.0.0 --port 6301 --allowed-hosts all
打开浏览器访问:
http://localhost:6301
iPad / 局域网访问
如果希望在 iPad 上访问前端,需要确保 iPad 和电脑处于同一局域网,并使用电脑的局域网 IP 访问。
Windows 查看 IP:
ipconfig
macOS / Linux 查看 IP:
ifconfig
找到当前网卡的 IPv4 地址,例如 192.168.x.x,然后在 iPad 浏览器中访问:
http://192.168.x.x:6301
CLI 计划
当前仓库可以通过上面的源码命令运行。为了让 GitHub 用户更容易上手,推荐后续把这些步骤封装成 CLI,例如:
agent-jump setup
agent-jump config set OPENAI_API_KEY
agent-jump dev
理想情况下:
agent-jump setup安装前端和后端依赖。agent-jump config set OPENAI_API_KEY写入模型 API Key。agent-jump dev同时启动 Sandbox、back_agent、backend 和 Frontend。
在 CLI 正式实现前,请使用 Quick Start 中的手动启动方式。
致谢与说明
本项目由我个人独立开发。沙盒能力得益于 agent-infra/sandbox,在此表示感谢。
受限于个人精力和能力,当前版本仍有不少不足,例如:沙盒操作偶发失败、Agent Workflow 目前仅提供 7 种模板、跳台编排与最终构建流程尚不够稳定等。我会持续迭代完善。
若您愿意一起把项目做得更好,欢迎提交 Issue 或 PR。或者您可以直接联系我:[email protected]。中国朋友可以通过微信联系我:answerYTAarun
也期待更多小白能用它发挥想象力,搭建属于自己的 Agent。
Yorumlar (0)
Yorum birakmak icin giris yap.
Yorum birakSonuc bulunamadi