astralbeam
Health Gecti
- License — License: AGPL-3.0
- Description — Repository has a description
- Active repo — Last push 0 days ago
- Community trust — 18 GitHub stars
Code Gecti
- Code scan — Scanned 12 files during light audit, no dangerous patterns found
Permissions Gecti
- Permissions — No dangerous permissions requested
Bu listing icin henuz AI raporu yok.
Add an agent to your app in minutes
AstralBeam



Links: Website · Docs · Discord · Cloud
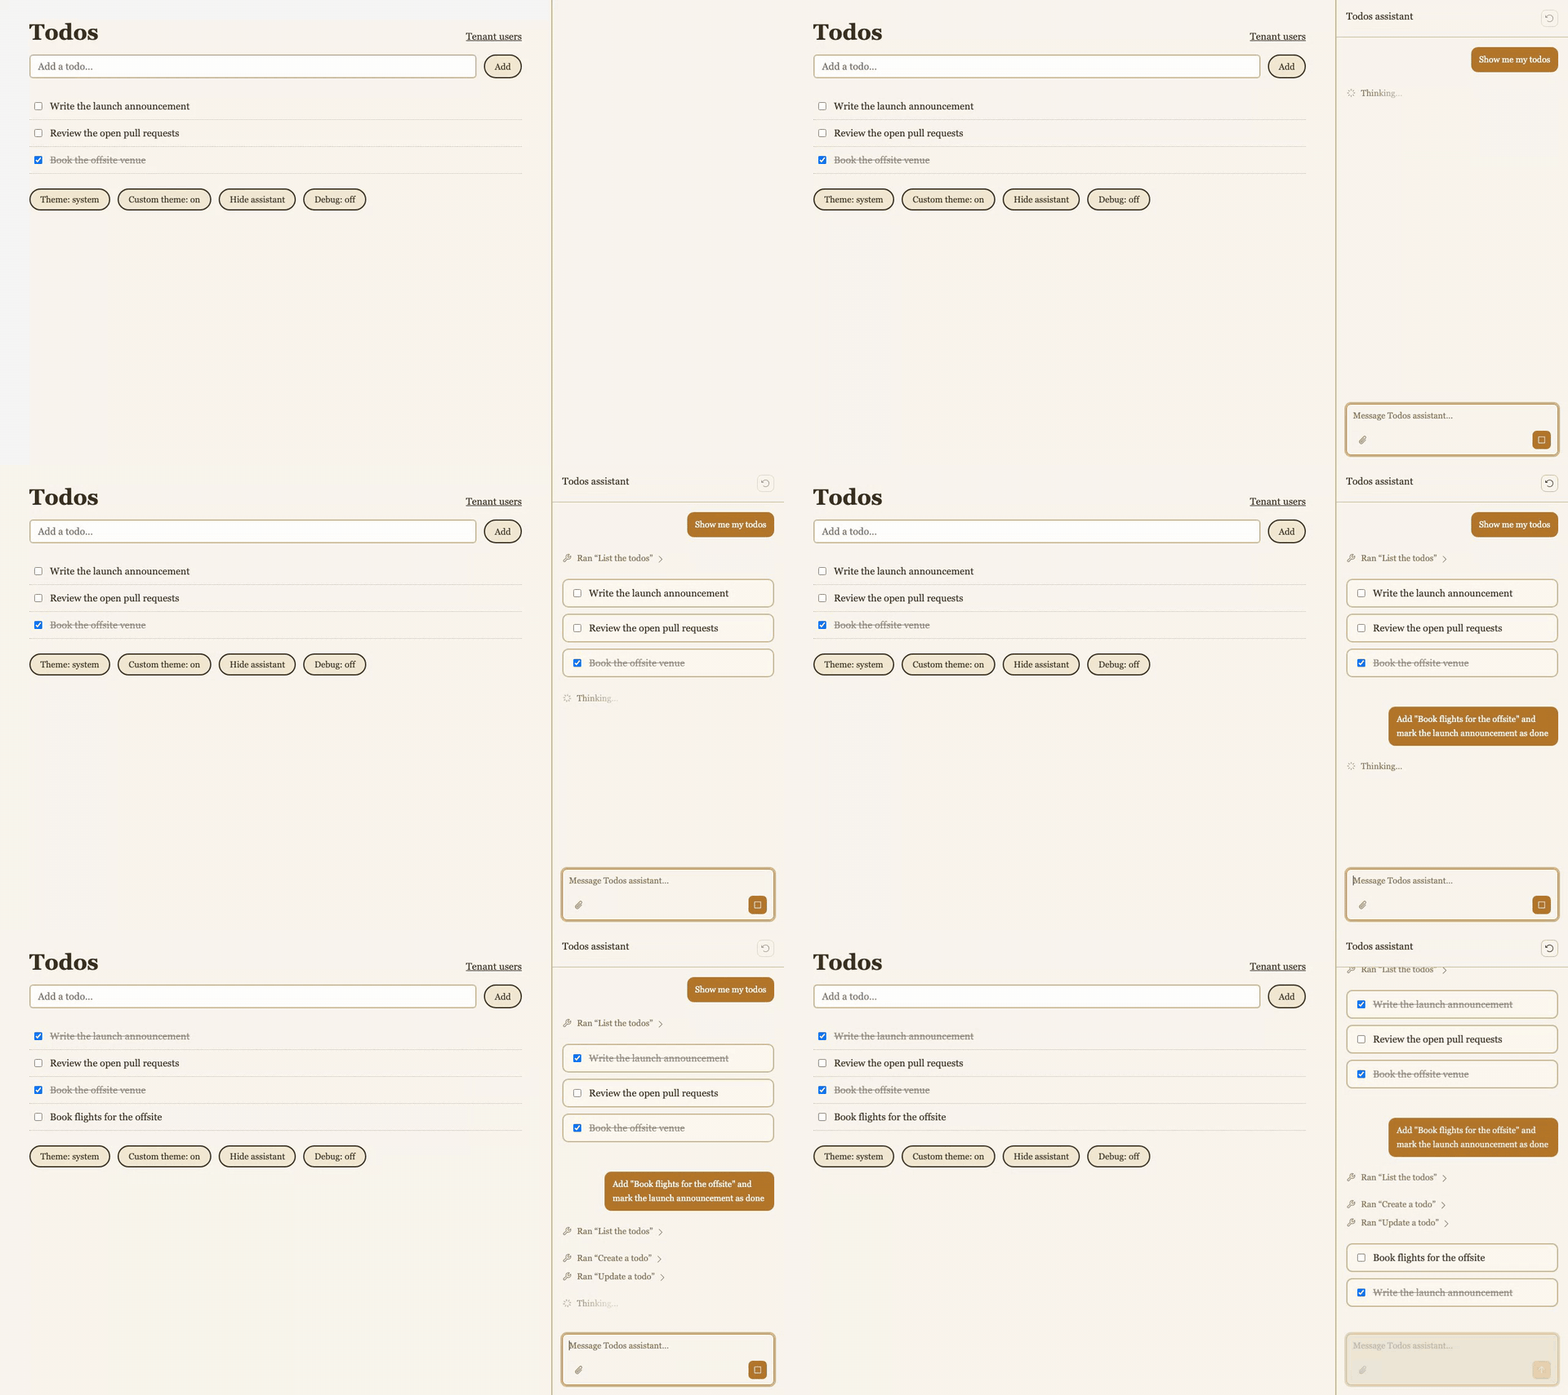
AstralBeam is the agentic chat widget for your app. Drop a Cursor-style agent sidebar into your product. It streams answers, calls your tools, renders your components, and works with users' files. Self-host it or use AstralBeam Cloud.
How it works
Integration takes three steps. Each one is a few lines of code and unlocks the next layer of the platform. Items marked in progress are on the roadmap and not shipped yet.
1. Add the frontend SDK
npm install @astralbeam/sdk
import { AstralBeamChat } from "@astralbeam/sdk/react"

export function Sidebar() {
  return <AstralBeamChat title="Acme Assistant" />
}
You get a Cursor-style agentic chat sidebar with a managed backend, full customization of copy, colors, and slots, users' file attachments, coding sandboxes with downloadable artifacts, and resumable streaming (in progress).
2. Identify your users
Your server already knows who is signed in. Mint a short-lived token that carries the user and their tenant, and the widget picks it up. API keys never reach the browser.
import { createAstralBeamToken } from "@astralbeam/sdk/server"

export async function POST(request: Request) {
  const session = await getSession(request)
  const token = await createAstralBeamToken({
    apiKey: process.env.ASTRALBEAM_API_KEY,
    user: { id: session.user.id, name: session.user.name },
    tenant: { id: session.org.id, name: session.org.name },
  })
  return Response.json({ token })
}
You get per-customer and per-user rate limits and tenant isolation, plus conversation history, usage tracking, Stripe-metered billing, and one-click observability (in progress).
3. Hook up tools and widgets
Declare what the agent can do and what it can draw. Tools run in your page against your own state. Widgets render your components inside the reply.
<AstralBeamChat
  tools={{
    refundOrder: defineTool({
      description: "Refund an order and notify the customer",
      parameters: z.object({ orderId: z.string() }),
      execute: ({ orderId }) => api.refund(orderId),
    }),
  }}
  widgets={{
    orderCard: defineWidget({
      description: "Show an order's status and total",
      parameters: z.object({ orderId: z.string() }),
      render: ({ orderId }) => <OrderCard id={orderId} />,
    }),
  }}
/>
The agent can read user data, take actions inside your app, render interactive widgets in its replies, and ask before acting. Exposing the same tools over MCP, so users can drive your app from Claude or ChatGPT, is in progress.
AstralBeam works with your existing LLM providers and gateways, observability platforms, and coding sandbox providers. The SDK is MIT licensed and the platform is AGPL-3.0. Start with the docs.
Codebase Structure
There are five independent Deno projects: a TanStack Start product application with app-local shadcn/ui components, the prerendered TanStack Start marketing website, the frontend SDK published to npm, the organization admin CLI published to npm and as Deno binaries, and a standalone TanStack Start example that consumes the built SDK.
webapp/       # TanStack Start application, database, theme, and UI
www/          # Public website
sdk/          # Frontend SDK, published to npm as @astralbeam/sdk
cli/          # Organization admin CLI, published to npm as @astralbeam/cli
examples/     # Standalone SDK consumer applications
Local development
Run the applications natively with Deno and the database services through Docker Compose or Podman Compose. See Setup for one-time prerequisites.
Start PostgreSQL and Mailpit
Compose starts PostgreSQL, PgBouncer, Valkey, and Mailpit. The default DATABASE_URL in webapp/.env.development points at PgBouncer, the only database endpoint published to the host. On macOS, run Deno natively and use Compose for these services.
From the repository root, start the services with Docker:
docker compose up --detach --wait
Or use Podman, then wait for the services to become healthy:
podman compose up --detach
podman compose ps
Mailpit captures outgoing email on SMTP port 1025. Read it in the local inbox on port 8025.
Set up the projects
Install dependencies, migrate, seed local data, and build the SDK:
./scripts/setup.sh
The seed creates local accounts and credentials and writes examples/todos/.env and examples/todos-rails/.env only when absent. Bootstrap defaults are in webapp/.env.development. Manage runtime settings at /configure using the first DATABASE_ENCRYPTION_KEY value.
Chat credentials
Chat runs on the organization's own OpenAI API key, which owners set in the dashboard under Settings. Put a key of your own in webapp/.env.local and the seed gives it to every seeded organization:
OPENAI_API_KEY=sk-...
Run everything
deno task dev
This starts the three dev servers and the SDK watcher together:
- http://localhost:4500, the product application and its
/api/v1/chatagent endpoint - http://localhost:4600, the public website
- http://localhost:4700, the todos example with the embedded widget. See
examples/todos/README.mdfor what to try
The Ruby on Rails version of the example runs separately with bin/setup from examples/todos-rails and opens on http://localhost:3000. See examples/todos-rails/README.md.
Reload the page after changing SDK sources: the watcher rewrites the sdk/dist output the example imports.
Project commands
Run from the repository root:
deno task install  # all project dependencies
deno task dev      # all apps and the SDK watcher
deno task build    # all projects, SDK first
Per-project aliases include deno task dev:webapp, deno task build:sdk, and deno task install:todos. Other tasks use deno task --cwd <project> <task>. Run deno task to list root commands.
For account creation and email delivery, follow Authentication setup.
Licensing
Portions of this repository are licensed as follows:
- Files under
www,sdk, andexamplesare licensed under the MIT License, except for third-party material governed by its applicable license. - All other files in this repository are licensed under the GNU Affero General Public License v3.0 only (
AGPL-3.0-only), except where an adjacent license or notice states otherwise. - Third-party components and materials are licensed under the applicable licenses provided by their respective owners. See third-party notices.
Copyright © 2026 AstralBeam Inc. for AstralBeam-controlled material. Third-party material remains subject to its respective copyright and license terms.
Yorumlar (0)
Yorum birakmak icin giris yap.
Yorum birakSonuc bulunamadi