passportsim
Health Uyari
- License — License: MIT
- Description — Repository has a description
- Active repo — Last push 0 days ago
- Low visibility — Only 5 GitHub stars
Code Basarisiz
- rm -rf — Recursive force deletion command in .github/actions/fetch-demo/action.yml
- network request — Outbound network request in .github/actions/fetch-demo/action.yml
- rm -rf — Recursive force deletion command in .github/scripts/smoke-check.sh
- network request — Outbound network request in .github/scripts/smoke-check.sh
- process.env — Environment variable access in .github/workflows/pr-check.yml
- fs module — File system access in .github/workflows/pr-check.yml
Permissions Gecti
- Permissions — No dangerous permissions requested
Bu listing icin henuz AI raporu yok.
Develop and debug FoloToy AI Passport firmware without the device: an ESP32-C3 emulator that runs unmodified ESP-IDF images in the browser (WebAssembly) or on macOS and Windows, with a CLI and an MCP server for AI agents.

Develop and debug FoloToy AI Passport firmware without the device.
Run unmodified ESP-IDF firmware in your browser or on your desktop.
Try it online: passportsim.bugs.cc, nothing to install.




English | 简体中文 | 日本語 | Français
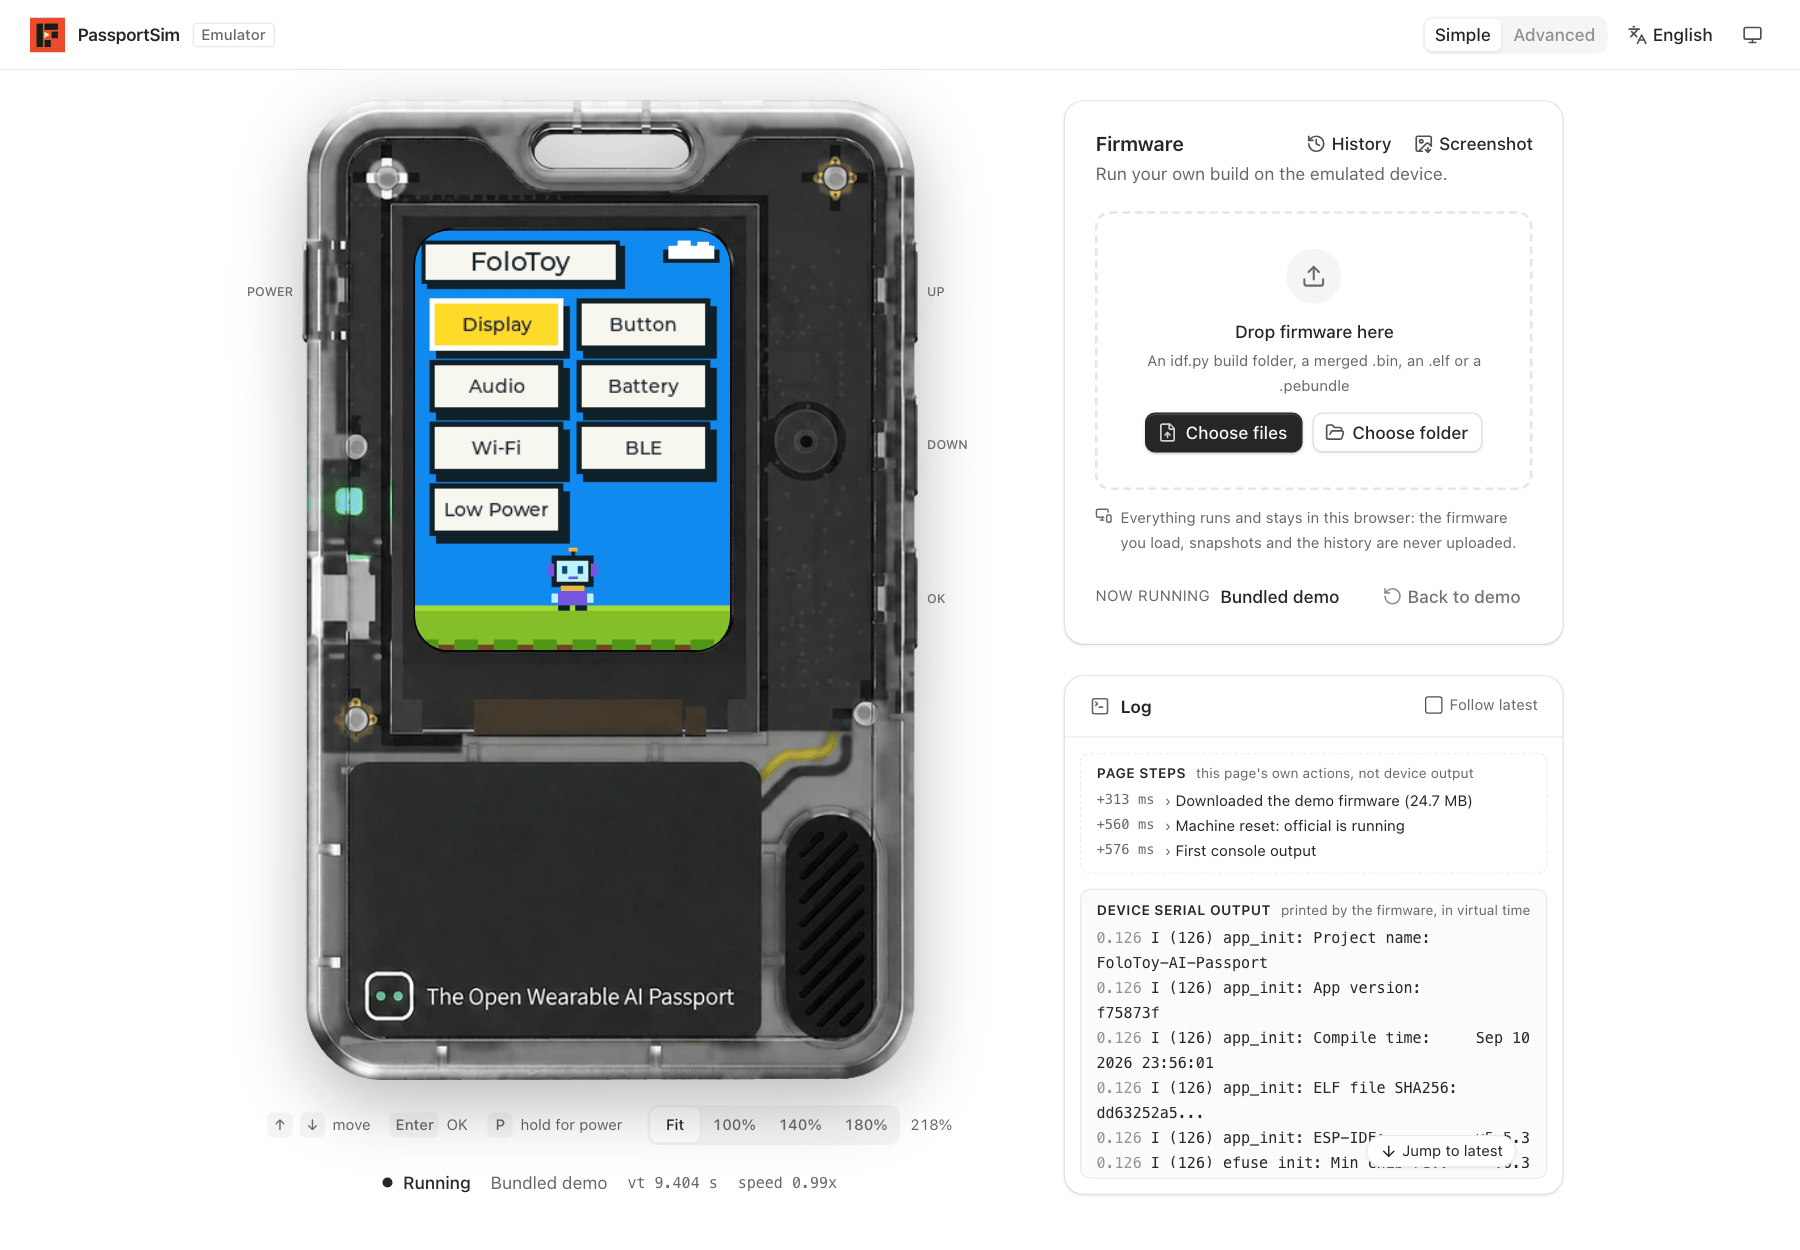
What you can do
- Run firmware without a device. Drop a build onto the page; the screen, buttons, sound and
serial console work as on the board. - Debug it. Pause, step, save and restore state, read the console, the UI tree, tasks and
memory. - Try other people's firmware. Any merged
.bin,idf.pybuild folder or.pebundleruns as
is. Nothing is uploaded; everything stays in your browser. - Automate it. A command line and an MCP server for scripts, CI and AI agents.
Quick start
The quickest way is the online version: open it and drop your
firmware on the page.
Install the CLI from the latest release:
curl -fsSL https://passportsim.bugs.cc/install.sh | sh # macOS (Apple silicon)
irm https://passportsim.bugs.cc/install.ps1 | iex # Windows x64 (PowerShell)
To build and run it from a checkout you need Rust, Bun and just
(or make).
just setup    # once
just run      # build and open the web UI at http://127.0.0.1:4173/
Other commands:
| Command | What it does |
|---|---|
just cli start --fw official |
Run the command line with any arguments |
just test |
Unit tests |
just package |
Build a release package for this computer into target/package/ |
just deploy |
Publish the web UI to Cloudflare Workers |
just |
List every command |
With make, pass arguments as variables: make run PORT=8080, make cli ARGS="start".
In the browser
- Simple mode opens first: the device, a place to drop your firmware, and a log.
- Advanced mode adds run control, the serial console, the UI tree, event recording, and
cards for battery, USB, audio, NFC, Wi-Fi and Bluetooth.
The page is available in English, Chinese, Japanese and French, in light and dark themes.
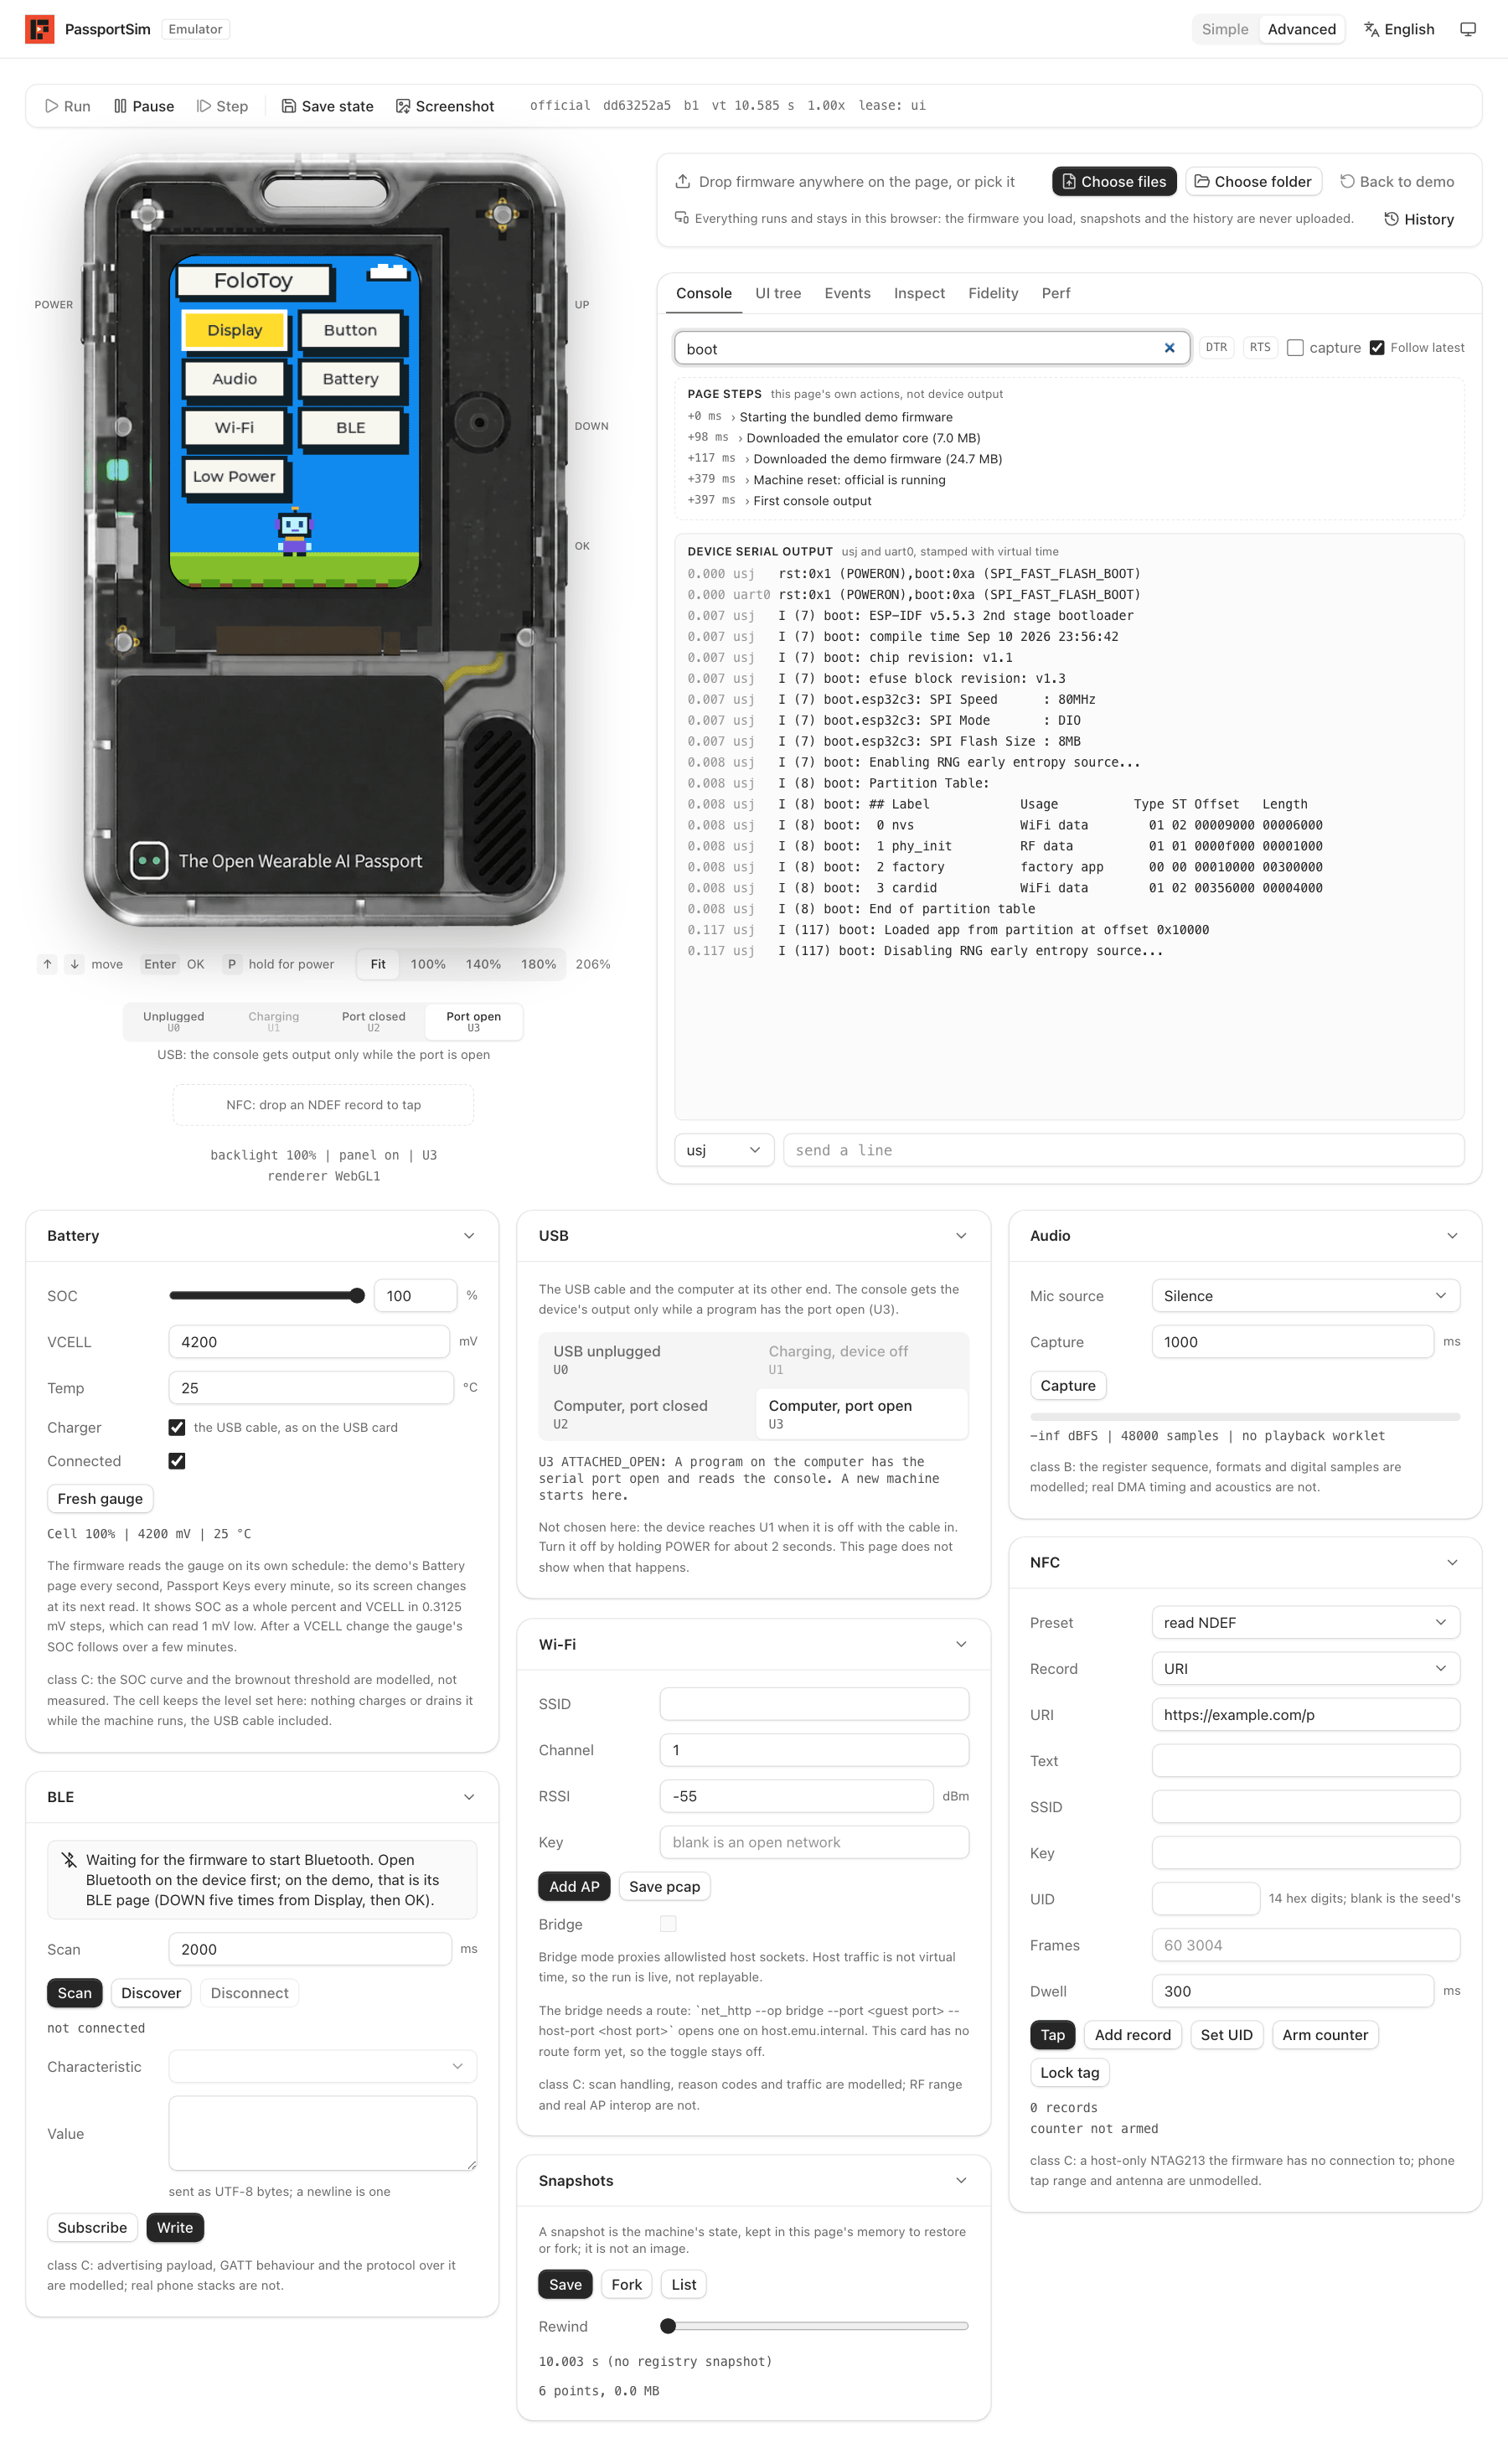
Advanced mode: run control, the serial console (filtered to
boot), and the cards for battery, USB, audio, Wi-Fi, Bluetooth, NFC and snapshots
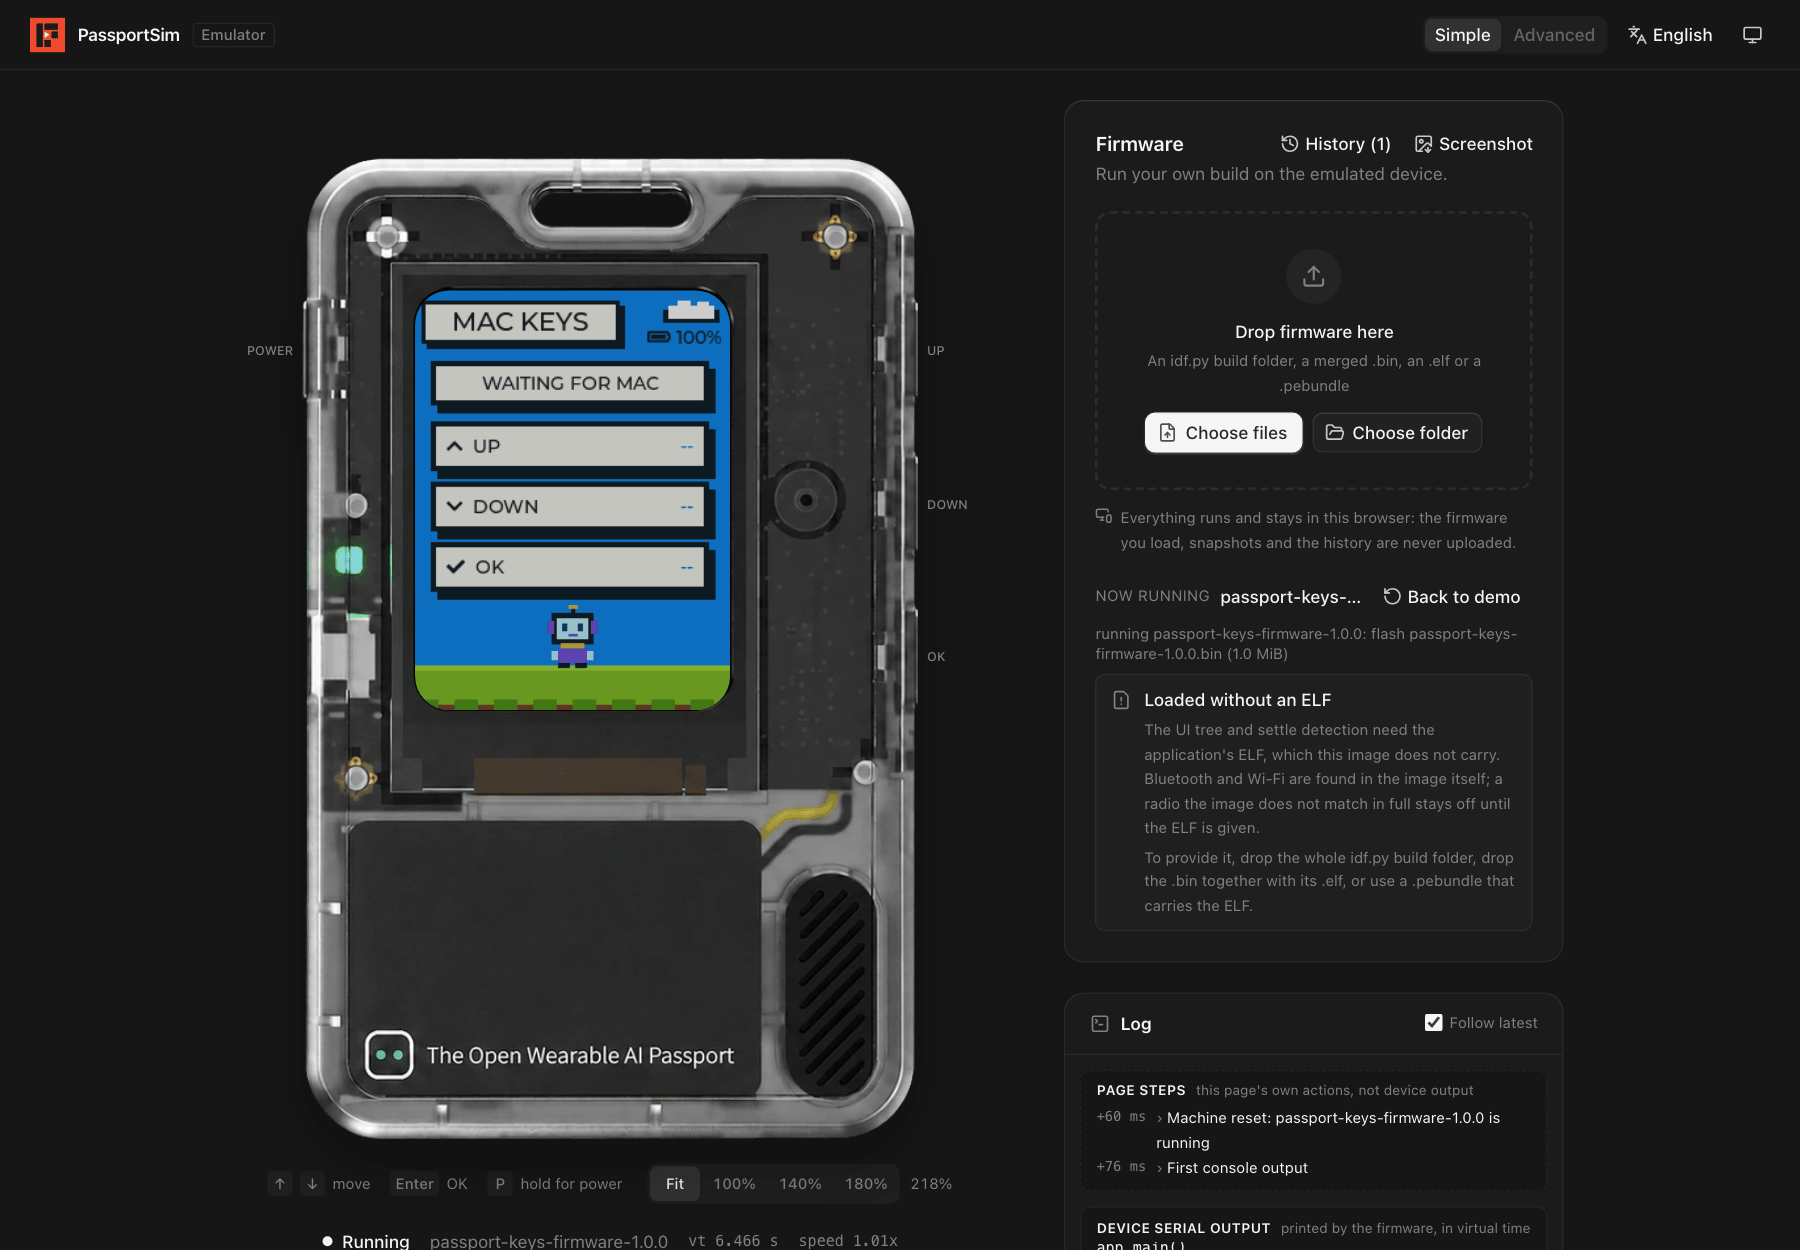
Loading your own firmware (here Passport Keys)
From the command line
just package
cd target/package/passportsim-*-macos-arm64
./passportsim start                  # boot the demo
./passportsim start path/to/firmware.bin
./passportsim screenshot             # save the screen as a PNG
./passportsim serial read            # read the console
./passportsim stop
On Windows the binary is passportsim.exe. The quickstart covers first
launch on each system.
With AI agents
passportsim mcp is an MCP server. Add it to your MCP client:
{ "mcpServers": { "passportsim": { "command": "/path/to/passportsim", "args": ["mcp"] } } }
The agent can boot a build, press buttons, wait for a console line, read the UI tree and take
screenshots. Add the agent skill withnpx skills add BlackHole1/passportsim, or copy skills/passportsim/ into your agent's skills
directory.
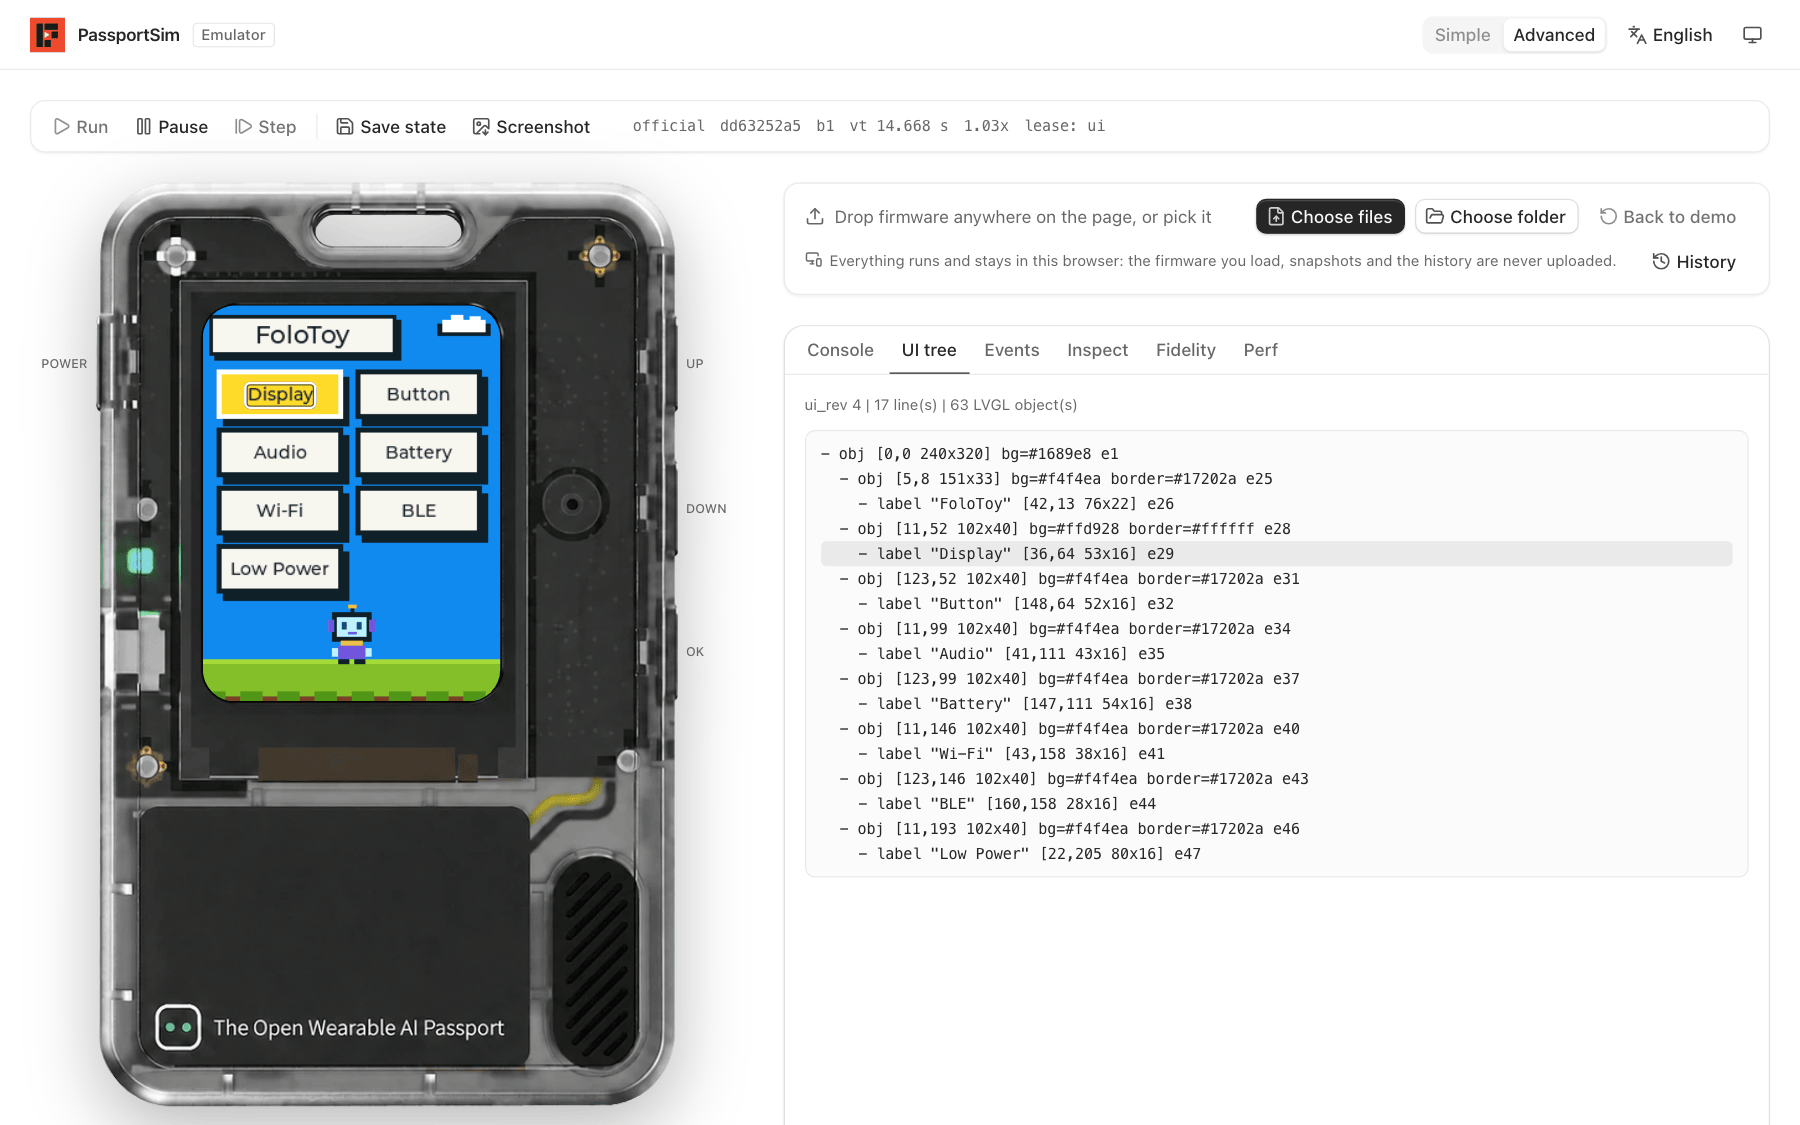
The UI tree an agent reads, with the hovered widget outlined on the screen
Supported systems
| macOS on Apple silicon | Supported |
| Windows 10 or newer, x64 | Supported |
| Browsers | Chrome, Edge, Firefox and Safari |
| Linux | Not supported |
Learn more
| How it works | What is emulated, the architecture, determinism and fidelity |
| Quickstart | Packages, first launch, the daemon, the web bundle, Windows |
| Commands | Every command with its arguments and errors |
| Deploying to Cloudflare | Publishing the web UI as a static site |
| Architecture | The full design |
Contributing and license
Contributions are welcome; see CONTRIBUTING.md and the
Code of Conduct. Report security issues as described in
SECURITY.md.
MIT, see LICENSE. Third-party material is listed in THIRD_PARTY.md.
FoloToy, AI Passport, Espressif and ESP32 are names of their respective owners.
Yorumlar (0)
Yorum birakmak icin giris yap.
Yorum birakSonuc bulunamadi