awesome-copilot-id
Health Gecti
- License — License: MIT
- Description — Repository has a description
- Active repo — Last push 0 days ago
- Community trust — 24 GitHub stars
Code Gecti
- Code scan — Scanned 12 files during light audit, no dangerous patterns found
Permissions Gecti
- Permissions — No dangerous permissions requested
Bu listing icin henuz AI raporu yok.
Awesome copilot instructions, agents, and prompts from Indonesian developer
Awesome Copilot Indonesia 🇮🇩
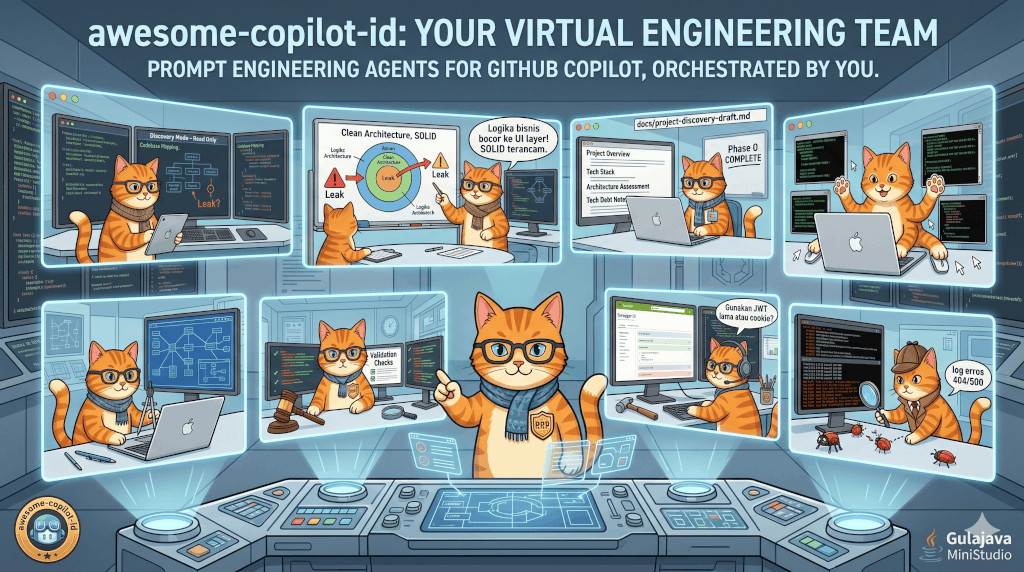
A curated collection of custom agents, skills, rules, and prompts. Originally for GitHub Copilot, this collection now fully supports OpenCode, Google Antigravity, CommandCode, ChatGPT Codex, Pi Dev Coding Agent, and Oh My Pi (omp), specifically tailored for Indonesian developers and development workflows. The custom agents and SDLC workflows are heavily inspired by the GitHub Spec Kit, with additional enhancements and refinements.


📋 Overview
This repository provides a comprehensive set of tools to enhance your AI-assisted development experience, including:
- 🤖 Custom Agents: Specialized AI agents for different development scenarios (PRD, Specification, Planning, Coding, Review).
- 🤹 Skills: Specialized capabilities paired with agents for advanced autonomous workflows.
- 📝 Rules & Instructions: Best practices and coding guidelines for various languages and frameworks.
- 🔑 BYOK Copilot Config: Ready-to-use
chatLanguageModels.jsontemplate for bringing your own API keys to VS Code Copilot chat. - 🔌 Multi-Platform: Ready-to-use configurations for OpenCode (
.opencode), Google Antigravity (.agents), GitHub Copilot (.github), CommandCode (.commandcode), ChatGPT Codex (.codex), Pi Dev Coding Agent (.pi), and Oh My Pi (.omp).
🚀 Getting Started
Prerequisites
- An AI Assistant platform of your choice:
Installation
Choose either the Automated (recommended) or Manual installation method:
Method 1: Automated Installation (One-Liner)
Run the following command in your terminal inside your project root directory:
- Linux / macOS (Bash/Zsh):
curl -fsSL https://raw.githubusercontent.com/GulajavaMinistudio/awesome-copilot-id/main/install.sh | bash - Windows Terminal (PowerShell):
irm https://raw.githubusercontent.com/GulajavaMinistudio/awesome-copilot-id/main/install.ps1 | iex
The interactive script will download the repository, prompt you to choose your platform configuration, copy the files, and safely handle existing configuration files (such as memory.instructions.md and AGENTS.md) by offering options to keep, replace, or merge them.
Method 2: Manual Installation
Clone this repository:
git clone https://github.com/GulajavaMinistudio/awesome-copilot-id.gitChoose your platform configuration:
- For CommandCode: Copy the
.commandcodedirectory to your project root. - For OpenCode: Copy the
.opencodedirectory fromopencode-configuration/to your project root. - For Google Antigravity: Copy the
.agentsdirectory to your project root. - For GitHub Copilot: Copy the
.githubdirectory to your project root. - For ChatGPT Codex: Copy the
.codexdirectory to your project root. - For Pi Dev Coding Agent: Copy the
.pidirectory to your project root. - For Oh My Pi (
omp): Copy the.ompdirectory to your project root.
[!IMPORTANT]
Don't copy everything! Only select the agents, skills, or rules that match your development needs.- For CommandCode: Copy the
Mandatory Step: Copy the
AGENTS.mdfile to the root of your project. This file contains the core SDLC rules, directives, and interaction philosophy that all agents must follow to ensure consistency.cp awesome-copilot-id/AGENTS.md ./[!IMPORTANT]
After copyingAGENTS.md, you must open it and update the first line (# AGENTS.md - [Your Application Name]) to match your actual project's context. This helps the AI agents understand the specific project they are working on.Example manual installation for specific agents and skills:
# Create directories based on your platform (e.g., Google Antigravity)
mkdir -p .agents/rules .agents/skills

# Copy specific agents
cp awesome-copilot-id/.agents/rules/GodModeDev.md .agents/rules/

# Copy specific skills
cp -r awesome-copilot-id/.agents/skills/karpathy-guidelines .agents/skills/
Restart your IDE or AI assistant to apply the changes.
[!TIP]
You can also reference these files from a central location in your system and symlink them to your projects for easier management.
🤖 Custom Agents
Custom agents are specialized AI assistants for specific development roles and tasks. Each agent is paired with a specific skill to accomplish its phase in the development lifecycle. Place them in your platform's respective directory (.commandcode/agents/, .agents/rules/, .opencode/agents/, .github/agents/, .codex/agents/, .pi/agents/, or .omp/agents/).
[!IMPORTANT]
Don't forget to copyAGENTS.mdto your project root after copying these agents. This file contains the core SDLC rules that all agents must follow. See Step #3 in Installation for details.
| Agent | Associated Skill | Description | Best For |
|---|---|---|---|
| @BrainstormingExplorerAnalyst | brainstorming-explorer |
Codebase exploration and architectural brainstorming | Phase 0 Discovery, exploring unfamiliar code, generating raw drafts |
| @ProductManagerPRD | product-manager-prd |
Product Requirement Document creation | Feature planning, writing user stories, and acceptance criteria |
| @ClarificationAnalyst | clarification-analyst |
Requirement interrogation | Finding ambiguities and missing edge cases in PRD/Specs/Plans |
| @SpecificationArchitect | specification-architect |
Technical specification creation | Writing detailed, machine-readable tech specs |
| @ArtifactConsistencyChecker | artifact-consistency-checker |
Consistency & traceability audit | Validating PRD vs Spec vs Plan to prevent scope creep |
| @PlannerArchitect | planner-architect |
Strategic planning & architecture | Generating formal, structured implementation plans |
| @GodModeDev | karpathy-guidelines (supp: omni-dev, ui-designer, fable-protocol) |
God-Tier Autonomous Engineer | Coding, implementation, and surgical modifications |
| @ExpertCodeReviewer | expert-code-reviewer |
Code review and security audit | Clean Code/SOLID audits and refactoring plans |
| @BugRemediationArchitect | bug-remediation-architect |
Bug analysis and fixing | Root cause analysis and structured bug-fix plans |
| @DiataxisDocumentationArchitect | diataxis-documentation-architect |
Technical documentation specialist | Writing tutorials, how-to guides, and reference docs |
How to Use Custom Agents
Depending on your platform (CommandCode, OpenCode, Antigravity, Copilot, ChatGPT Codex, Pi Dev, or Oh My Pi omp), you can usually invoke these agents via chat:
@GodModeDev implement the shopping cart based on the plan
@ExpertCodeReviewer review my service layer and suggest refactoring
@ProductManagerPRD create a PRD for the user authentication module
🤹 Skills
Skills provide agents with specialized capabilities, workflows, and prompts. They are located in the skills directory (e.g., .commandcode/skills, .agents/skills, .opencode/skills, .codex/skills, .pi/skills, or .omp/skills).
[!IMPORTANT]
Don't forget to copyAGENTS.mdto your project root after copying these skills. This file contains the core SDLC rules that all agents and skills must follow. See Step #3 in Installation for details.
| Skill | Description |
|---|---|
| brainstorming-explorer | Systematic codebase exploration, architectural critique, and Project Discovery Draft generation |
| memory-manager | Standardized workflow for discovering, reading, writing, and compacting memory.instructions.md with a permanent Knowledge Base for cross-session decisions and fast-path discovery via AGENTS.md |
| karpathy-guidelines | Behavioral guidelines to reduce common LLM coding mistakes and encourage surgical modifications |
| omni-dev | Omni-expert principal software architect. Enforces clean code, clean architecture, deep reasoning, mandatory testing, and strict anti-ambiguity protocols |
| product-manager-prd | Workflow to generate comprehensive PRDs |
| clarification-analyst | Interrogates requirements for hidden assumptions and edge cases |
| specification-architect | Generates detailed technical specs based on clarified requirements |
| ui-designer | Elite UI/UX Design Lead & Frontend Architect. Generates distinctive, non-templated interfaces with opinionated aesthetics, deliberate typography, and exact UX copy |
| artifact-consistency-checker | Validates traceability across documents to prevent missing coverage |
| planner-architect | Generates formal executable implementation plans |
| expert-code-reviewer | Code review and security audit against Clean Code principles |
| bug-remediation-architect | Workflow for tracing root causes and generating bug-fix strategies |
| diataxis-documentation-architect | Audits and writes structured documentation based on Diátaxis Framework |
| fable-protocol | An advanced, autonomous AI agent skill designed to execute complex, multi-step, and long-horizon tasks with high reliability and minimal human interruption |
Agent and Skill Configuration File Structure
Agent files use the .md or .agent.md extension depending on the platform, and feature a YAML frontmatter:
---
description: "God Mode Developer - God-Tier Autonomous Engineer with Deep Thinking Protocol."
mode: all
---
Body: Instructions and guidelines for the agent behavior. You can:
- Define specialized instructions for the agent's role
- Specify core directives and interaction philosophies
- Detail how the agent should utilize its assigned skill
Session Locking & Utility Skills (Cross-Cutting)
To prevent context bleeding and scope creep, our SDLC agents enforce Strict Session Isolation. Once an agent persona (e.g., @SpecificationArchitect) is activated in a chat session, that session is locked to that persona.
However, we have Utility Skills that can be invoked at any time without triggering a session lock clash:
- Persona-Bound Skills: Contain a
## 🎭 Dynamic Persona Activationblock in theirSKILL.md. Invoking them locks the session. If you try to invoke a different persona-bound skill in the same session, the agent will reject it to maintain focus. - Utility Skills: Skills without the persona activation block (like
grilling,memory-manager, andfable-protocol). These can be invoked freely by any agent in the middle of a session. For example,@ClarificationAnalystcan invoke thegrillingskill to interrogate a document without losing its analyst persona.
Custom User Skills: Any custom skill you create or download that lacks the Dynamic Persona Activation block will automatically be treated as a Utility Skill and can be freely called at any time.
🔄 Workflow & Methodology (Spec Kit Inspired)
We adopt a strict and structured SDLC workflow, heavily inspired by the GitHub Spec Kit approach. Development must follow a sequential order, with no skipped phases:
- Discovery (Phase 0): Use
@BrainstormingExplorerAnalystto explore existing codebases, brainstorm architecture, and generate raw drafts for Product Managers. - PRD (Requirements): Use
@ProductManagerPRDto define user stories and acceptance criteria. - Clarification: Use
@ClarificationAnalystto interrogate the PRD to resolve ambiguities. - Spec (Technical Specification): Use
@SpecificationArchitectto generate machine-readable technical specs. - Spec Clarification: Use
@ClarificationAnalystto interrogate the technical specification. - Consistency Check: Use
@ArtifactConsistencyCheckerto validate traceability across PRD and Spec. - Plan (Implementation Planning): Use
@PlannerArchitectto generate executable implementation plans. - Plan Clarification: Use
@ClarificationAnalystto interrogate the implementation plan. - Code (Implementation): Use
@GodModeDevfor coding, ensuring strict testing (unit/widget/integration) after every phase. - Review: Use
@ExpertCodeReviewerfor code review and security audits. (For bug fixes, use@BugRemediationArchitect) - Docs: Use
@DiataxisDocumentationArchitectfor user documentation.
[!IMPORTANT]
- Complete and structured documentation must exist before coding begins.
- Every output must be verified against the PRD and Spec before proceeding.
- We recommend starting a new chat session when switching phases to maintain context focus.
🎯 Use Cases
End-to-End Feature Development (SDLC Workflow)
Following our strict sequential workflow, here is how you would develop a new feature:
Phase 1: Requirements & Clarification
@ProductManagerPRD create a PRD for the shopping cart feature
(Once the PRD is complete and approved, use the memory-manager skill to save context, then open a new chat session to prevent context bleeding)
@ClarificationAnalyst interrogate the new shopping cart PRD for missing edge cases
(Answer the Clarification Analyst's questions one by one. Once finished and the PRD is revised, use memory-manager to save context, then proceed to the Spec phase in a new chat session)
Phase 2: Specification & Planning
@SpecificationArchitect design a technical specification for the shopping cart based on the PRD
(Once the Spec is complete, use memory-manager and open a new chat session)
@ClarificationAnalyst interrogate the technical specification for any technical ambiguities
(Once the Spec interrogation is finalized, use memory-manager and open a new chat session)
@ArtifactConsistencyChecker verify that the spec covers all requirements in the PRD
(If no PRD requirements are missing from the Spec, use memory-manager and open a new chat session)
@PlannerArchitect create a step-by-step implementation plan for the shopping cart
(Once the Plan is created, use memory-manager and open a new chat session)
@ClarificationAnalyst interrogate the implementation plan for any unhandled edge cases
(Once all edge cases in the Plan are addressed, use memory-manager to save context, then open a new chat session to begin coding)
Phase 3: Implementation & Review
@GodModeDev implement the shopping cart based on the plan, and ensure all tests pass
(Once code implementation and testing are complete, use memory-manager and open a new chat session)
@ExpertCodeReviewer review the newly implemented service layer and suggest refactoring
(Apply any refactoring suggestions if needed, use memory-manager to save context, then open a new chat session for documentation)
Phase 4: Documentation & Bug Fixing
@DiataxisDocumentationArchitect write an API reference guide for the new endpoints
(If bugs are discovered later, use the specialized bug remediation agent in a separate chat session)
@BugRemediationArchitect analyze the bug report for the checkout failure and propose a fix
🌟 Best Practices
- Adhere to the SDLC Sequence: Never skip a phase. Ensure that PRD, Specs, and Plans are fully fleshed out before invoking
@GodModeDevfor coding. - Platform-Specific Directories: Place your rules, skills, and agents in the correct directories for your platform (
.commandcode,.opencode,.agents,.github,.codex,.pi, or.omp). - Use Appropriate Agents: Match the agent to the current SDLC phase (e.g.,
@SpecificationArchitectfor specs,@ExpertCodeReviewerfor code audits). - Leverage Project Memory: Periodically save significant milestones using the
memory-managerskill to maintain context across different chat sessions. - Iterate and Verify: Always verify the outputs of an agent against the original PRD and Spec before proceeding to the next phase.
🌐 Language Preferences
By default, the rules in this repository are configured to instruct the AI agents to communicate in Indonesian (Bahasa Indonesia).
If you prefer to interact in English or another language, you can easily change this. Open the AGENTS.md file and modify the following sections:
- Under
## Communication, change the language rule:- **Language**: Communication must use clear and proper English - Under
## User Communication Style, adjust the preference:- Uses formal but casual English
📊 SDLC Workflow Diagram
graph TD
    %% Define Styles
    classDef agent fill:#0d1117,color:#58a6ff,stroke:#30363d,stroke-width:2px;
    classDef phase fill:#238636,color:#ffffff,stroke:#2ea043,stroke-width:2px,rx:10px,ry:10px;

    %% Nodes
    Phase0[Phase 0: Discovery]:::phase
    Phase1[Phase 1: Requirements]:::phase
    Phase2[Phase 2: Specification]:::phase
    Phase3[Phase 3: Planning]:::phase
    Phase4[Phase 4: Implementation & Code]:::phase
    Phase5[Phase 5: Documentation]:::phase

    AgentBEA["@BrainstormingExplorerAnalyst<br/>(Explores Code & Brainstorms)"]:::agent
    AgentPM["@ProductManagerPRD<br/>(Creates PRD)"]:::agent
    AgentCA1["@ClarificationAnalyst<br/>(Interrogates PRD)"]:::agent

    AgentSA["@SpecificationArchitect<br/>(Creates Tech Spec)"]:::agent
    AgentCA2["@ClarificationAnalyst<br/>(Interrogates Spec)"]:::agent
    AgentACC["@ArtifactConsistencyChecker<br/>(Validates Traceability)"]:::agent

    AgentPA["@PlannerArchitect<br/>(Creates Implementation Plan)"]:::agent
    AgentCA3["@ClarificationAnalyst<br/>(Interrogates Plan)"]:::agent

    AgentGMD["@GodModeDev<br/>(Writes Code & Tests)"]:::agent
    AgentECR["@ExpertCodeReviewer<br/>(Audits Code)"]:::agent
    AgentBRA["@BugRemediationArchitect<br/>(Fixes Bugs)"]:::agent

    AgentDDA["@DiataxisDocumentationArchitect<br/>(Writes User Docs)"]:::agent

    %% Flow
    Phase0 --> AgentBEA
    AgentBEA --> Phase1

    Phase1 --> AgentPM
    AgentPM --> AgentCA1
    AgentCA1 --> Phase2

    Phase2 --> AgentSA
    AgentSA --> AgentCA2
    AgentCA2 --> AgentACC
    AgentACC --> Phase3

    Phase3 --> AgentPA
    AgentPA --> AgentCA3
    AgentCA3 --> Phase4

    Phase4 --> AgentGMD
    AgentGMD --> AgentECR
    AgentECR -.->|If issues/bugs| AgentBRA
    AgentBRA -.-> AgentGMD
    AgentECR --> Phase5

    Phase5 --> AgentDDA
Text-based Alternative (Fallback)
[ Phase 0: Discovery ]
          |
          v
  (@BrainstormingExplorerAnalyst)
          |
          v
[ Phase 1: Requirements ]
          |
          v
  (@ProductManagerPRD)
          |
          v
  (@ClarificationAnalyst)
     (Interrogate PRD)
          |
          v
[ Phase 2: Specification ]
          |
          v
  (@SpecificationArchitect)
          |
          v
  (@ClarificationAnalyst)
     (Interrogate Spec)
          |
          v
  (@ArtifactConsistencyChecker)
     (Traceability)
          |
          v
[ Phase 3: Planning ]
          |
          v
  (@PlannerArchitect)
          |
          v
  (@ClarificationAnalyst)
     (Interrogate Plan)
          |
          v
[ Phase 4: Implementation & Code ]
          |
          v
  (@GodModeDev) ───────────────────> (@ExpertCodeReviewer)
          ^                                      |
          |                                      | (If bugs/issues)
          |                                      v
          └───────────────────────── (@BugRemediationArchitect)
          |
          v
[ Phase 5: Documentation ]
          |
          v
  (@DiataxisDocumentationArchitect)
📝 Instructions
Instructions are rules and guidelines that your AI Assistant follows when generating code. Place them in your platform's respective directory (.commandcode/instructions/, .github/instructions/, .opencode/instructions/, .agents/rules/, .pi/instructions/, or .omp/instructions/).
[!IMPORTANT]
Don't forget to copyAGENTS.mdto your project root after copying these instructions. This file contains the core SDLC rules that bind all instructions. See Step #3 in Installation for details.
| Instruction | Description | Apply To |
|---|---|---|
| taming-copilot | Core directives for precise, surgical code assistance | All files (**) |
| clean-code-clean-architecture | Clean code principles and architecture patterns | All files (**) |
| strict-clean-code-clean-architecture | Strict enforcement of clean code/architecture | All files (**) |
| nodejs-codestyle | Node.js best practices and conventions | **/*.js, **/*.ts |
| eloquent-js-codestyle | Eloquent JavaScript style guide | **/*.js |
| php-laravel-codestyle | Laravel framework conventions | **/*.php |
| flutter-codestyle | Flutter and Dart best practices | **/*.dart |
| html-css-responsive | Responsive HTML/CSS design principles | **/*.html, **/*.css |
| markdown | Markdown formatting standards | **/*.md |
| memory | Project-specific context and preferences | All files (**) |
Instruction Format
---
applyTo: "**/*.js"
description: "Node.js coding standards"
---

# Your instruction content here
💡 Prompts
Prompt files are reusable templates for common development tasks like generating code, performing code reviews, or scaffolding project components. They are standalone prompts you can run directly in chat. Place them in your platform's respective directory (.commandcode/prompts/, .github/prompts/, .opencode/prompts/, or .agents/prompts/).
| Prompt | Description |
|---|---|
| create-readme | Generate comprehensive README files |
| create-specification | Create technical specifications |
| update-specification | Update existing specifications |
| create-implementation-plan | Generate implementation plans |
| update-implementation-plan | Update implementation plans |
| breakdown-feature-prd | Break down features from PRD |
| documentation-writer | Write technical documentation |
| review-and-refactor | Code review and refactoring |
| boost-prompt | Enhance and improve prompts |
| fixing-prompt | Debug and fix issues |
| remember | Store project context |
| project-memory-keeper | Maintain project memory |
How to Use Prompt Files
You have multiple options to run a prompt file:
In Chat View: Type
/followed by the prompt name in the chat input field/create-specification for user authentication module /create-readmeFrom Command Palette: Run
Chat: Run Promptcommand (Ctrl+Shift+P) and select a prompt fileFrom Editor: Open the prompt file and press the play button in the editor title area
[!TIP]
You can add extra information in the chat input field. For example:/create-react-form formName=MyFormor/breakdown-feature-prd for shopping cart
Prompt File Structure
Prompt files use the .prompt.md extension and can include:
Header (YAML frontmatter):
---
description: "A short description of the prompt"
name: "prompt-name"  # Optional, defaults to filename
argument-hint: "Optional hint text for users"
agent: "agent"  # ask, edit, agent, or custom agent name
model: "gpt-4"  # Optional language model
tools: ["edit", "search", "runCommands"]  # Available tools
---
Body: The prompt text with instructions. You can use:
- Variables:
${workspaceFolder},${selection},${file},${input:variableName} - Markdown links: Reference other workspace files using relative paths
- Tool references: Use
#tool:toolNamesyntax (e.g.,#tool:githubRepo)
🔑 BYOK Copilot Config
A ready-to-use configuration template for enabling BYOK (Bring Your Own Key) on GitHub Copilot in Visual Studio Code. Use your own API keys from various providers (OpenRouter, DeepSeek, Opencode Zen, Opencode Go, Kilo Gateway, and others) to extend the list of available chat models.
[!NOTE]
BYOK models work without a GitHub account or Copilot plan and are used for chat and utility tasks only. Some features (semantic search, inline suggestions, embeddings) still require GitHub Copilot.
See the full documentation and setup guide: byok-copilot-config/
🛠️ Customization
You can implement customizations incrementally, starting with the simplest options and gradually adding more complexity as needed.
1. Set Up Basic Guidelines (Custom Instructions)
Create custom instructions for consistent results across all your chat interactions. Custom instructions let you define common guidelines or rules for tasks like generating code, performing code reviews, or generating commit messages.
File location: .commandcode/instructions/, .github/instructions/, .opencode/instructions/, or .agents/rules/
Format:
---
applyTo: "**/*.ts"
description: "TypeScript coding standards"
---

# Your instruction content here

- Use strict type checking
- Follow functional programming principles
- Always handle errors explicitly
Use custom instructions to:
- Specify coding practices, preferred technologies, or project requirements
- Provide guidelines about commit messages or PR descriptions
- Set rules for code reviews (security, performance, coding standards)
Quick Start: Generate Instructions from Programming Books
You can use AI assistants to help create custom instructions based on programming books or documentation:
Upload a programming book PDF (e.g., "Eloquent JavaScript", "Clean Code", "Design Patterns") to:
- Gemini AI (supports PDF upload)
- Claude AI (supports PDF upload)
- ChatGPT (supports PDF upload with Plus/Pro subscription)
Use this prompt:
Study this programming book PDF carefully and create a GitHub Copilot custom instruction file based on the principles, patterns, and best practices from the book.

The instruction should:
- Follow the .instructions.md format with YAML frontmatter
- Include key principles from the book
- Provide specific coding guidelines
- Be practical and actionable for daily development
Review and customize the generated instruction file to match your team's needs
Save the file to your platform's instructions directory (e.g.,
.github/instructions/) with a descriptive name (e.g.,eloquent-js-codestyle.instructions.md)
[!TIP]
This method is especially useful for creating language-specific or framework-specific instructions based on authoritative sources.
2. Add Task Automation (Prompt Files)
Prompt files let you define reusable prompts for common and repeatable development tasks. They're standalone prompts you can run directly in chat.
File location: .commandcode/prompts/, .github/prompts/, .opencode/prompts/, or .agents/prompts/
Format:
---
agent: "agent"
description: "Create technical specifications"
---

## Role
You are a technical architect...

## Task
1. Analyze the feature requirements
2. Create a detailed technical specification
Use prompt files to:
- Create reusable prompts for common coding tasks (scaffolding components, generating tests)
- Define prompts for code reviews
- Create step-by-step guides for complex processes
- Generate implementation plans or architectural designs
3. Create Specialized Workflows (Custom Agents)
Custom agents are specialist assistants for specific roles or tasks. Within a custom agent file, you describe its scope, capabilities, which tools it can access, and preferred language model.
File location: .commandcode/agents/, .github/agents/, .opencode/agents/, or .agents/rules/
Format:
---
description: "Frontend Developer Specialist"
tools: ["edit", "search", "runCommands"]
---

# Frontend Developer Agent

You are a frontend development specialist focusing on React and TypeScript...
Use custom agents to:
- Create a planning agent with read-only access for implementation plans
- Define a research agent that can reach external resources
- Create specialized agents for specific domains (frontend, backend, database, etc.)
4. Extend Capabilities (MCP and Tools)
Connect external services and specialized tools through Model Context Protocol (MCP) to extend chat capabilities beyond code.
Use MCP and tools to:
- Connect database tools to query and analyze data
- Integrate with external APIs for real-time information
5. Choose the Right Model (Language Models)
Switch between different AI models optimized for specific tasks using the model picker in chat.
Use different models for:
- Fast models for quick code suggestions and simple refactoring
- Capable models for complex architectural decisions or detailed reviews
- Specialized models for vision processing or other specific tasks
🤝 Contributing
Contributions are welcome! Whether it's:
- Adding new agents for specific development scenarios
- Improving existing instructions
- Creating new prompt templates
- Fixing bugs or improving documentation
Please feel free to submit a Pull Request.
📚 Resources
- GitHub Copilot Customization Overview - Official VS Code documentation for customizing GitHub Copilot
- GitHub Copilot Documentation
- VS Code GitHub Copilot Extension
- Awesome Copilot - A curated list of GitHub Copilot resources, extensions, and examples
- VS Code BYOK Documentation - Official guide for bringing your own language model keys
- BYOK Config Template - Pre-built
chatLanguageModels.jsontemplate included in this repository
⭐ Support
If you find this repository helpful, please consider giving it a star! It helps others discover these resources.
📄 License
This project is open source and available under the MIT License.
Made with ❤️ for Indonesian Developers
Yorumlar (0)
Yorum birakmak icin giris yap.
Yorum birakSonuc bulunamadi