runyte
Health Gecti
- License — License: MPL-2.0
- Description — Repository has a description
- Active repo — Last push 0 days ago
- Community trust — 110 GitHub stars
Code Basarisiz
- rm -rf — Recursive force deletion command in .github/workflows/release.yml
Permissions Gecti
- Permissions — No dangerous permissions requested
Bu listing icin henuz AI raporu yok.
Helix-style modal text editor with file management, persistent terminals, and MCP for AI agents to talk to each other
Runyte


https://github.com/user-attachments/assets/51ffece5-40d1-4809-b18d-b6dea2f42615
Runyte is a Helix-style modal text editor living in your terminal or its own native window.
It supports multiple panes, and each pane shows a text file, a terminal, or a file manager.
Many keybindings have aliases and will feel familiar to both Helix and Vim users.
Three modes are available:
editor- text editor + file manageride- text editor + file manager + LSP + terminalsmux- text editor + file manager + LSP + terminals + multiple persistent sessions
In the mux mode Runyte works like a terminal multiplexer. You can close it (detach)
and open it again (attach) and you're back where you left off - no work is lost and
all terminals and AI agents keep doing what they were. The mux mode replaces the need to use tools like tmux.
There are also two Runyte editions:
- terminal edition - run Runyte in your terminal of choice
- desktop edition - run Runyte in its own native window
The desktop edition replaces the need to use separate terminal emulators -
Runyte owns it all. In addition, the desktop edition can display images and PDFs
out of the box.
In other words, you can choose how you want to use Runyte.
It can be just a text editor or a full replacement of many terminal apps
that traditionally needed to be carefully wired together to feel like a
consistent terminal environment.
In addition, Runyte is equipped with an MCP server giving AI agents optional
access (granted by the user) to read and write into all panes, including
terminals with other AI agents. It also gives AI agents an :agent-channel - a
chat window where agents can write public or private messages to other agents.
This project is well tested. Test coverage is about 92% of lines, and CI requires at least 89%.
Runyte supports all major platforms, but it is used by the devs mainly on Linux and macOS.
The desktop edition runs on Linux and macOS only.
| CPU | System | Automated tests | Prebuilt release | Hands-on use |
|---|---|---|---|---|
| x86-64 | Linux | ✅ | ✅ | ✅ |
| ARM64 | Linux | ❌ | ✅ | ❌ |
| x86-64 | macOS | ❌ | ✅ | ❌ |
| ARM64 | macOS | ✅ | ✅ | ✅ |
| x86-64 | Windows 11 | ✅ | ✅ | 🟡 |
| ARM64 | Windows 11 | ❌ | ❌ | ❌ |
🟡 Occasional hands-on testing.
If you are using Runyte on other platforms - let us know!
Website: runyte.com ·
Documentation: user guide ·
Changelog: GitHub Releases ·
Community: r/runyte
Screenshots
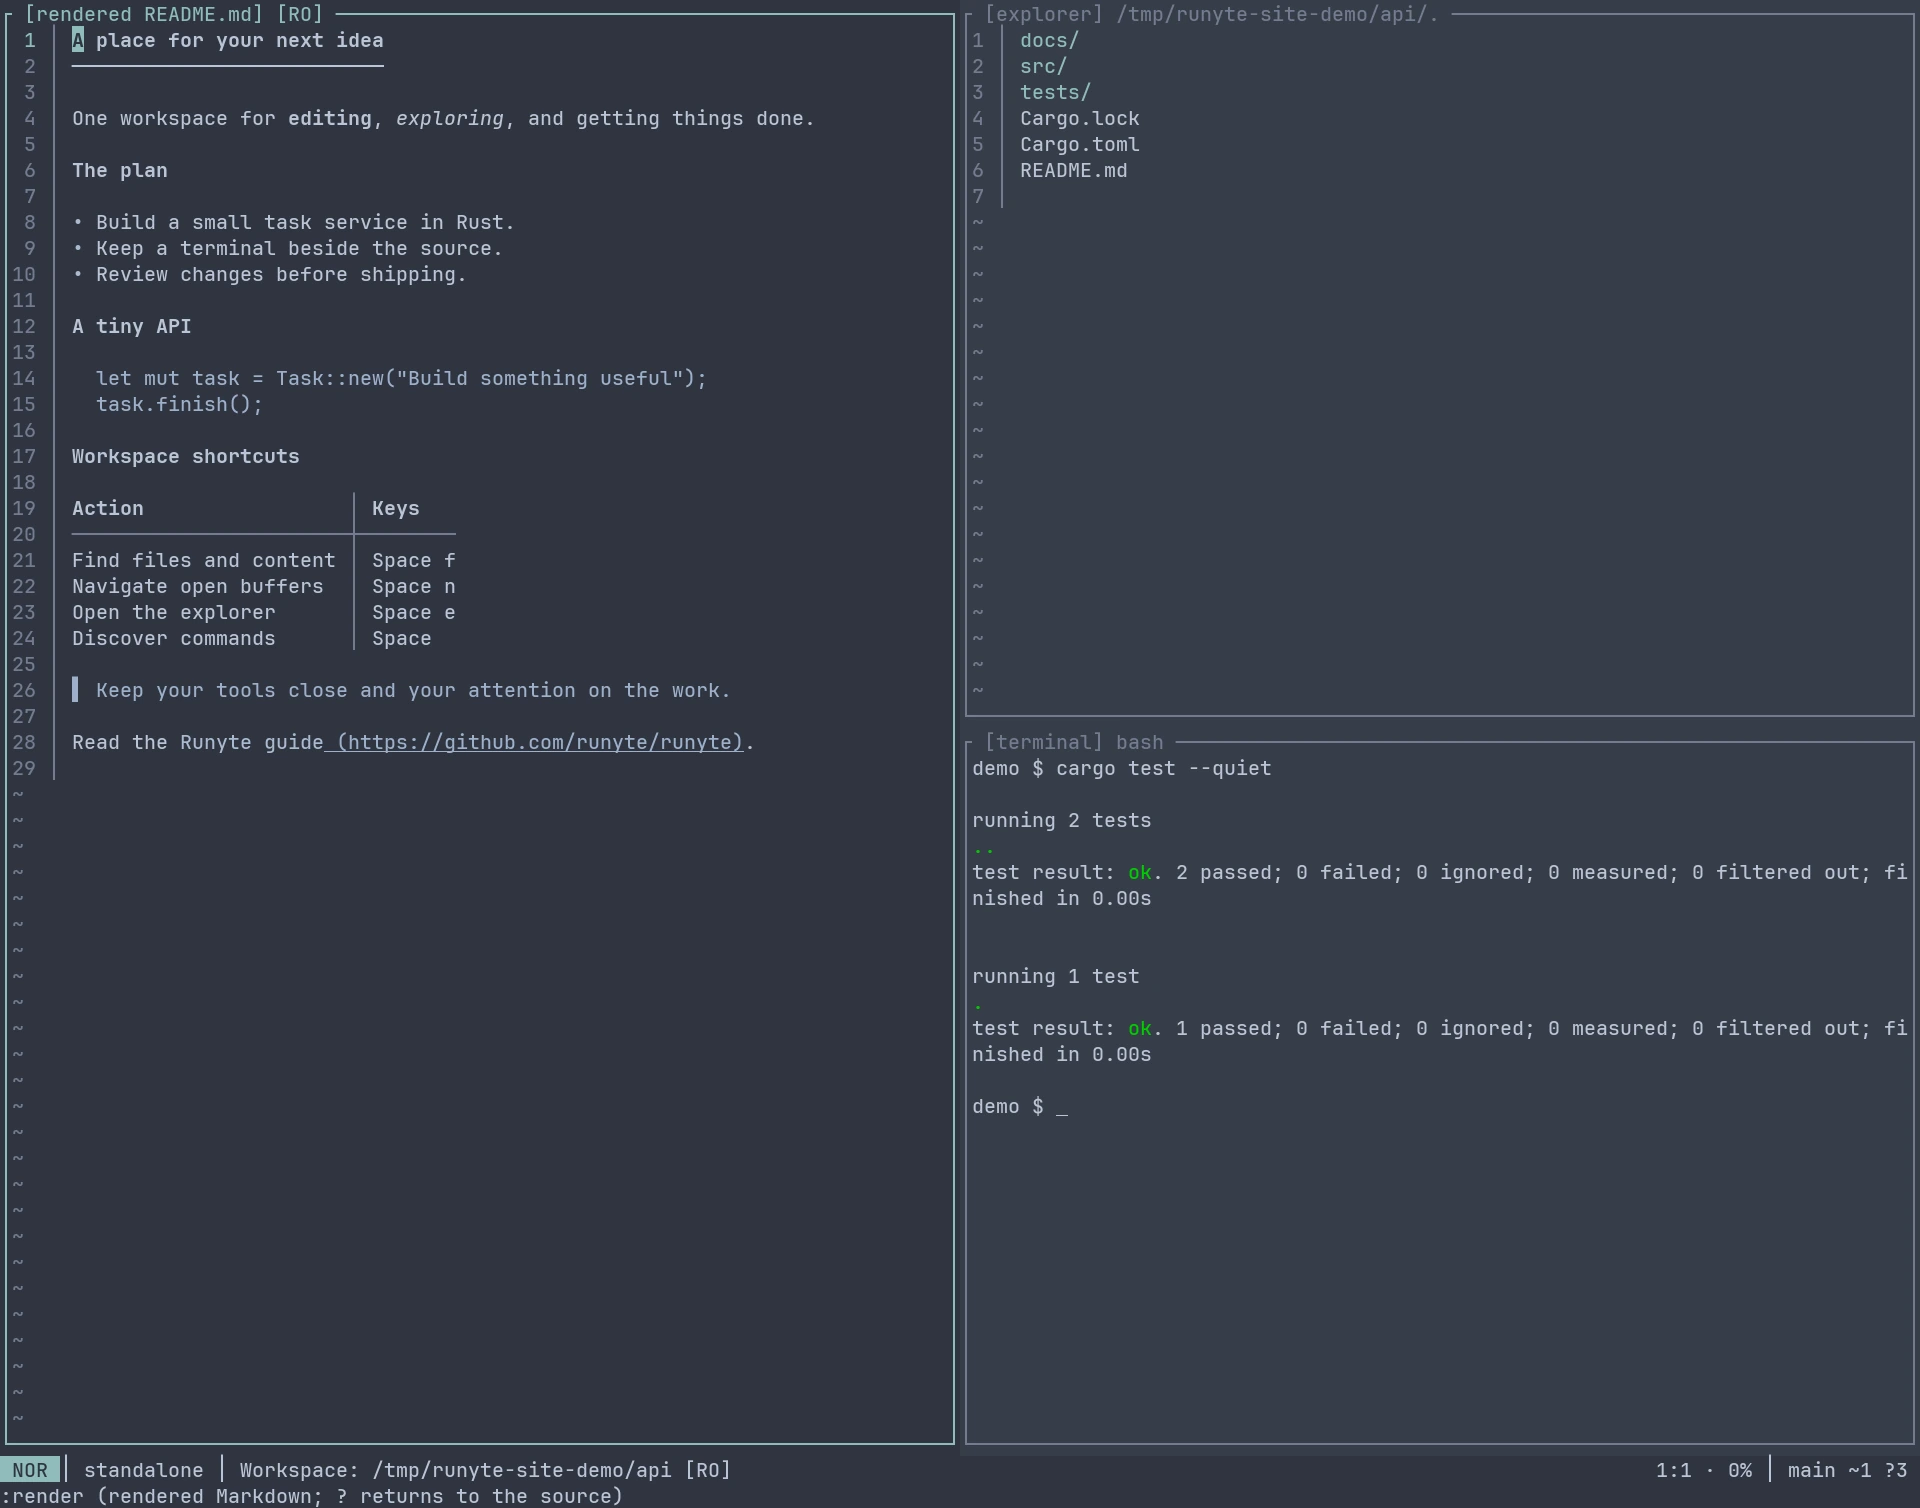
Read Markdown as a page. Return to source. · nordbones-dark-soft
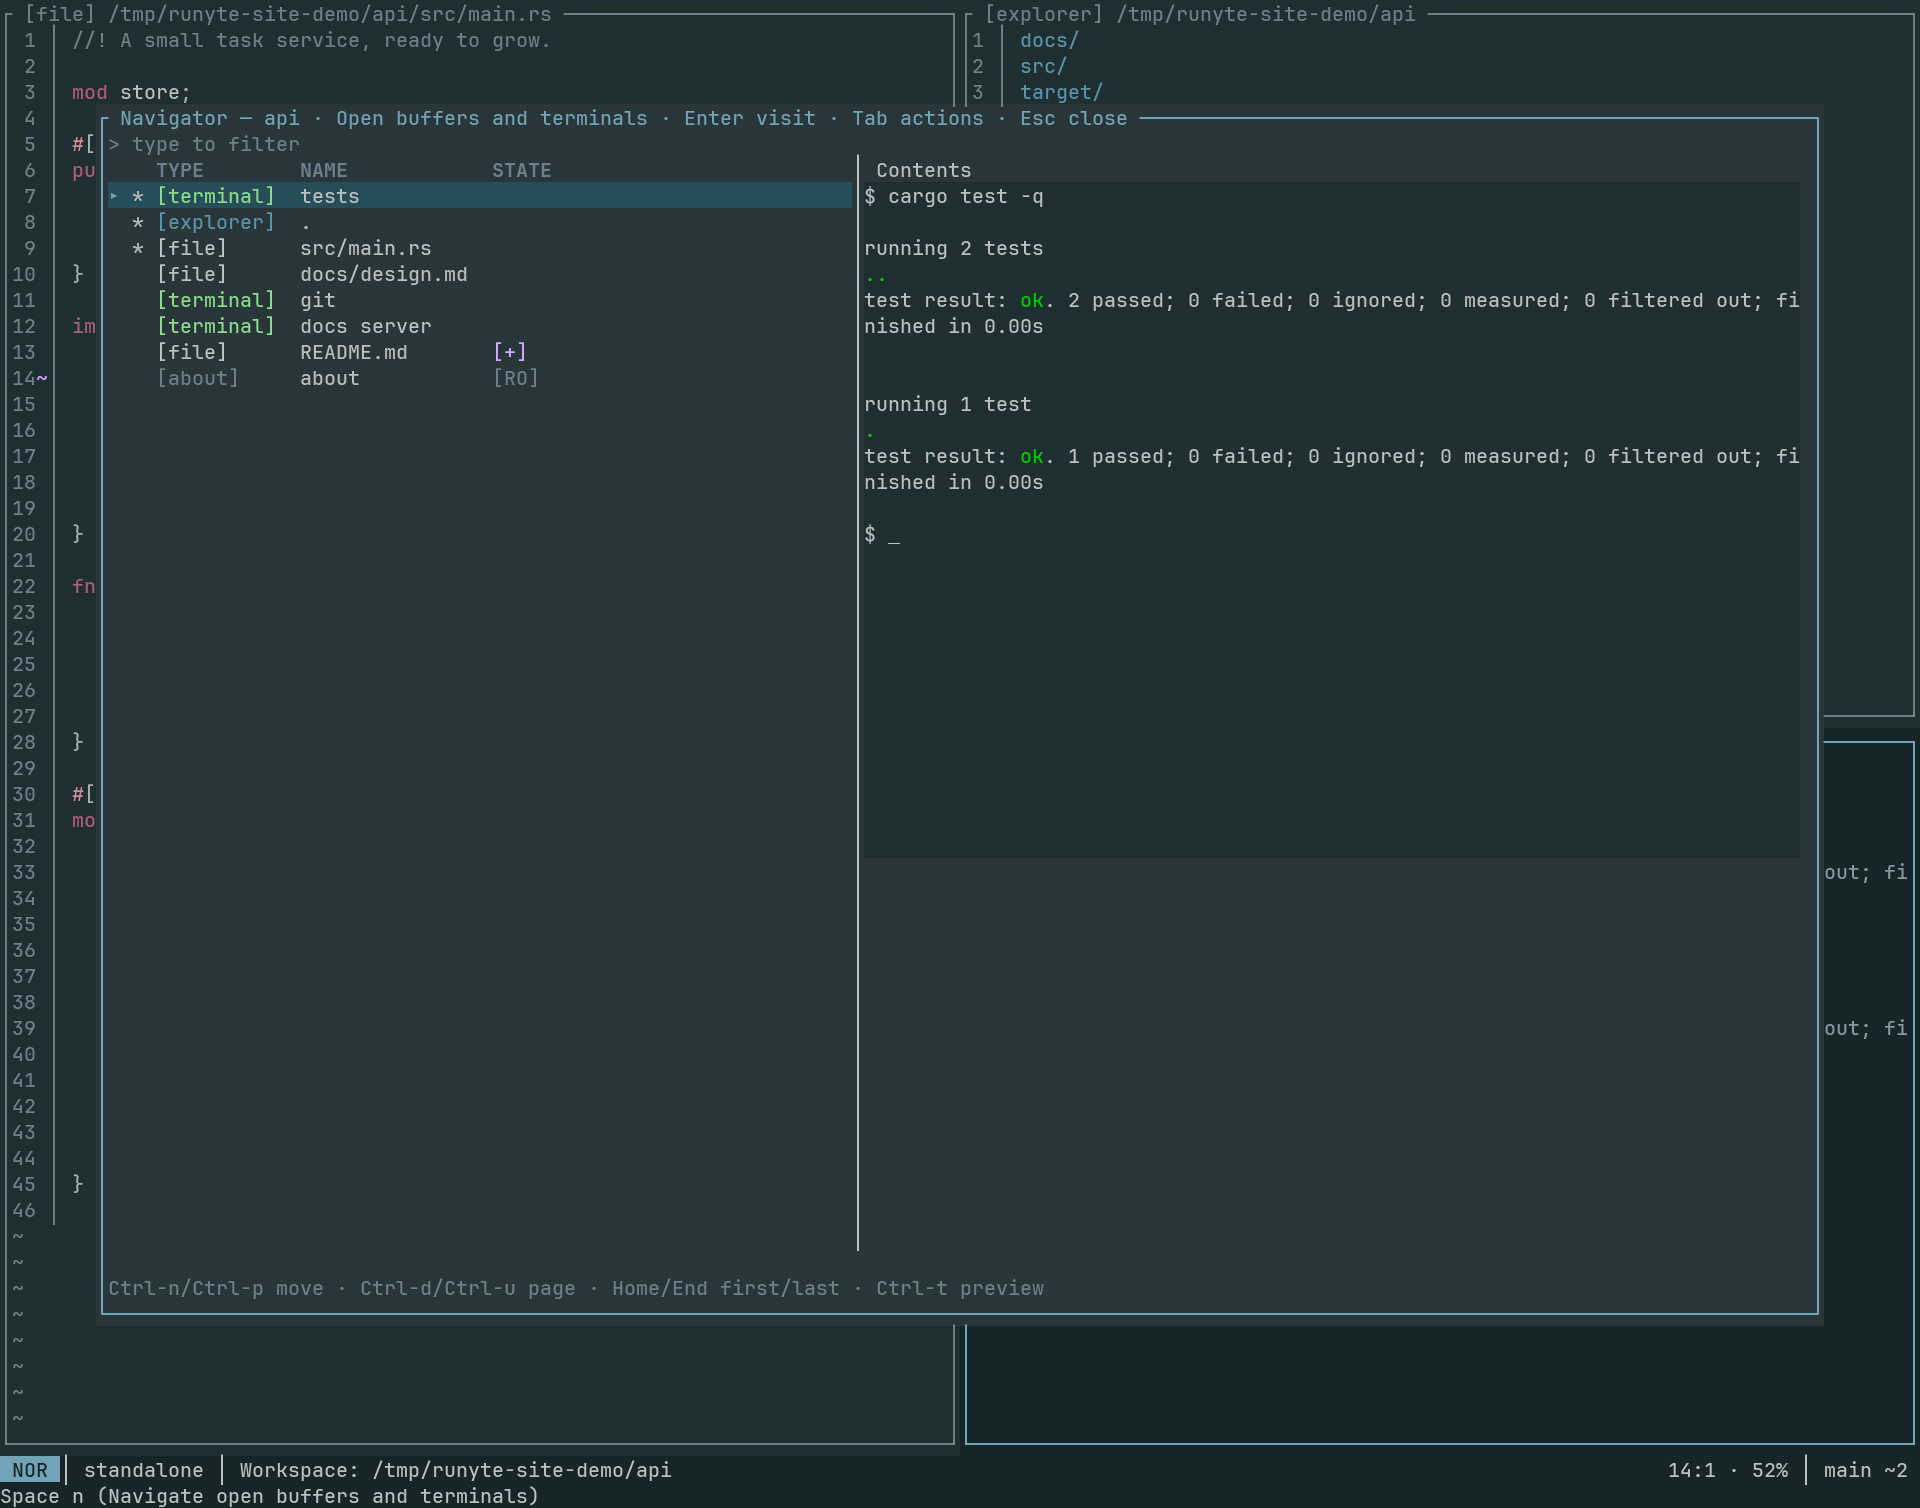
Jump between open buffers and terminals. · terafox-soft
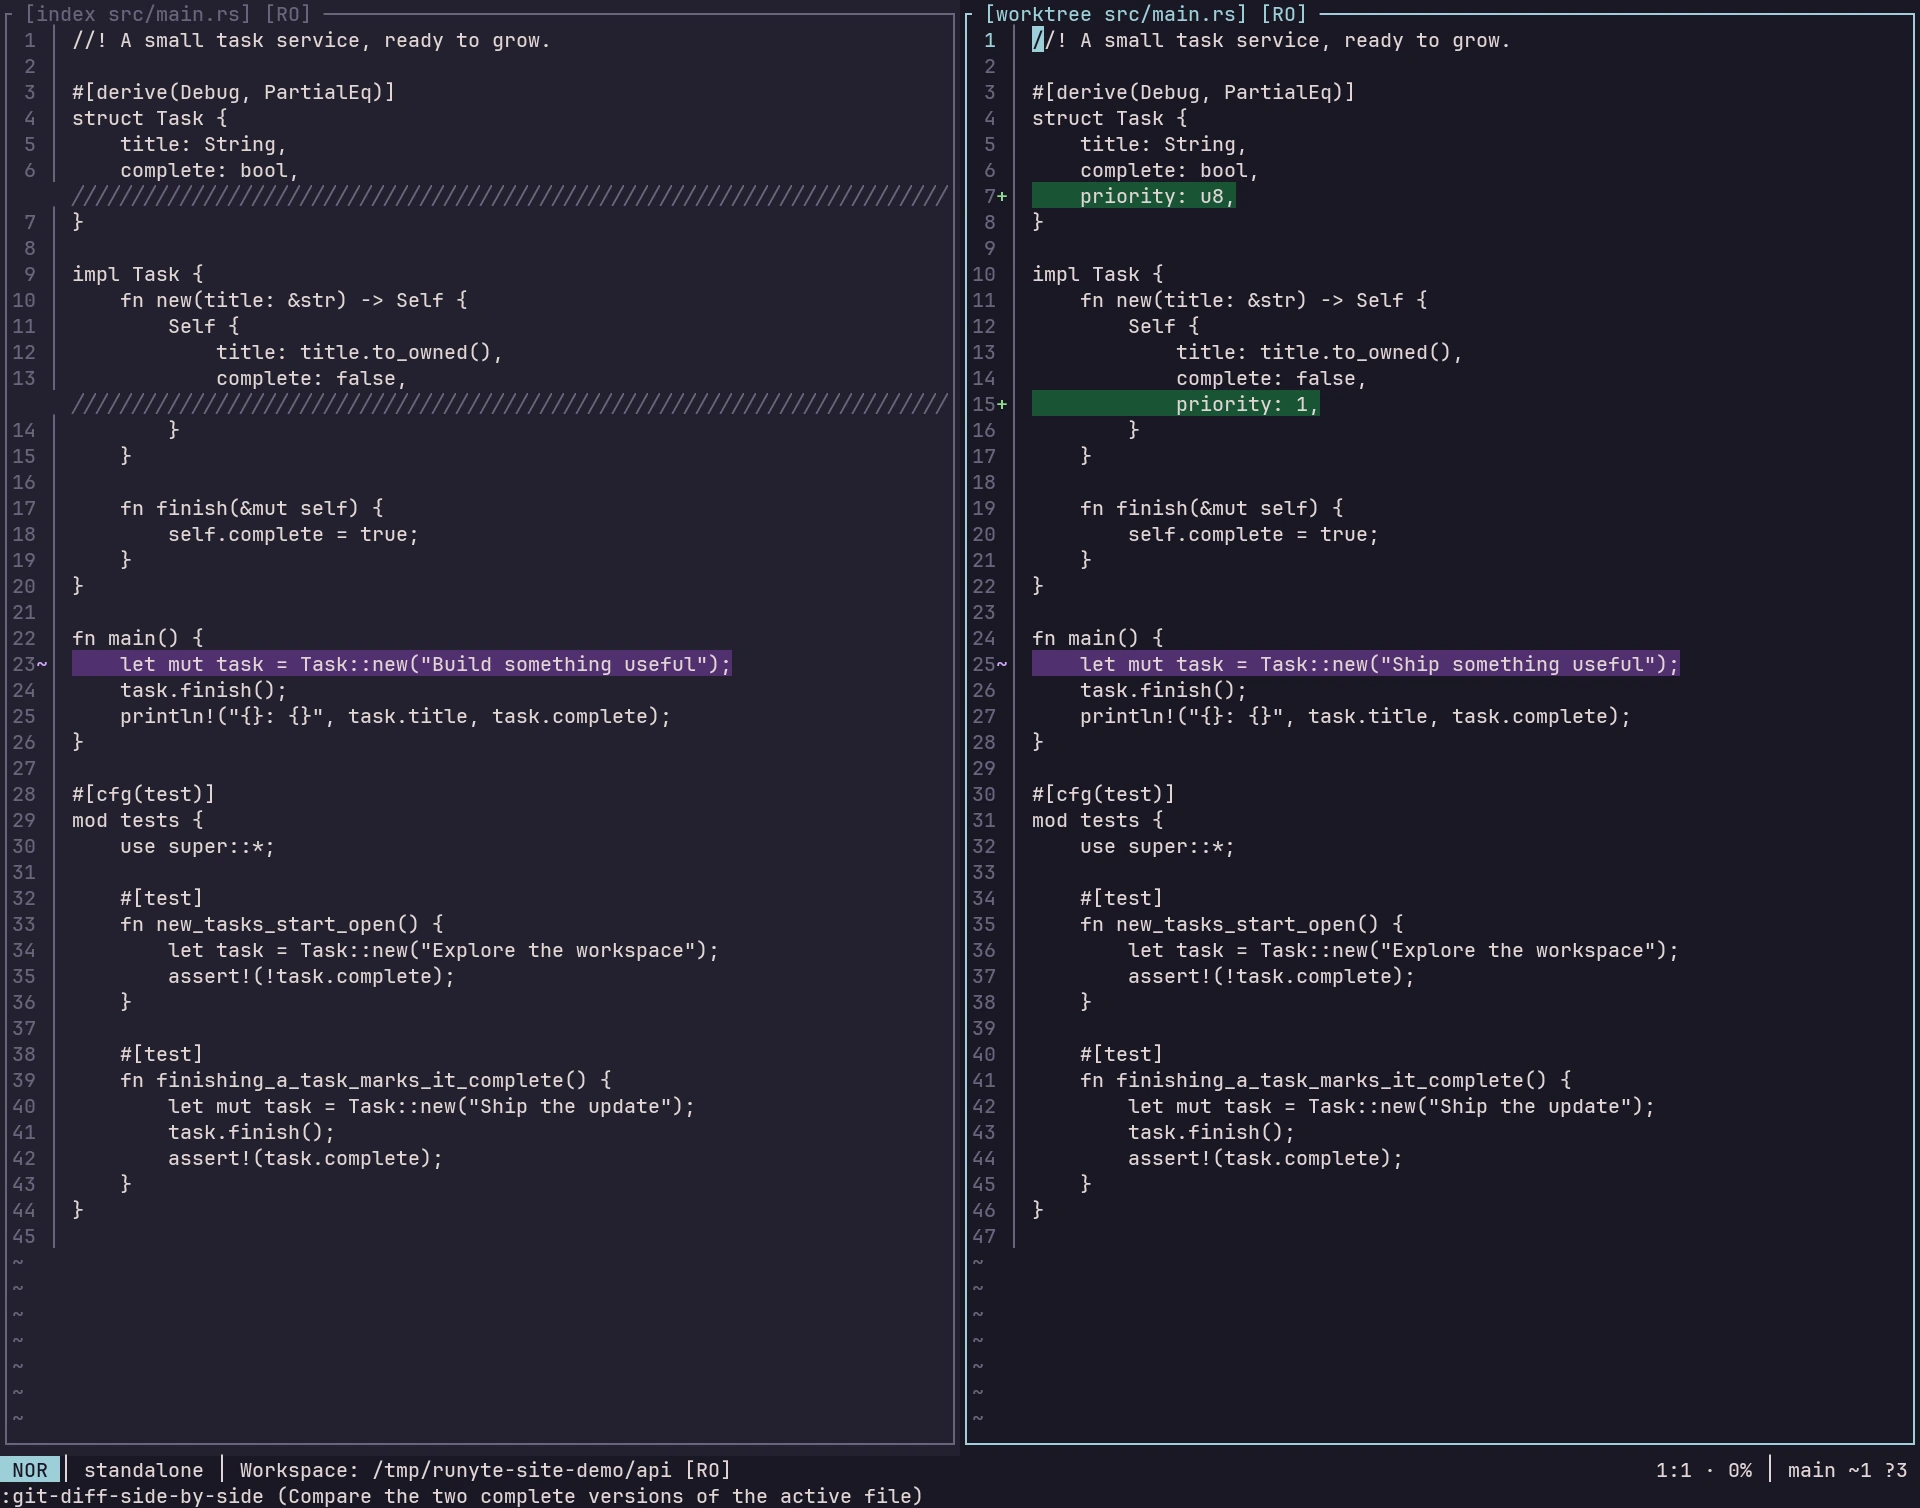
Compare changes side by side. · rosebones-dark
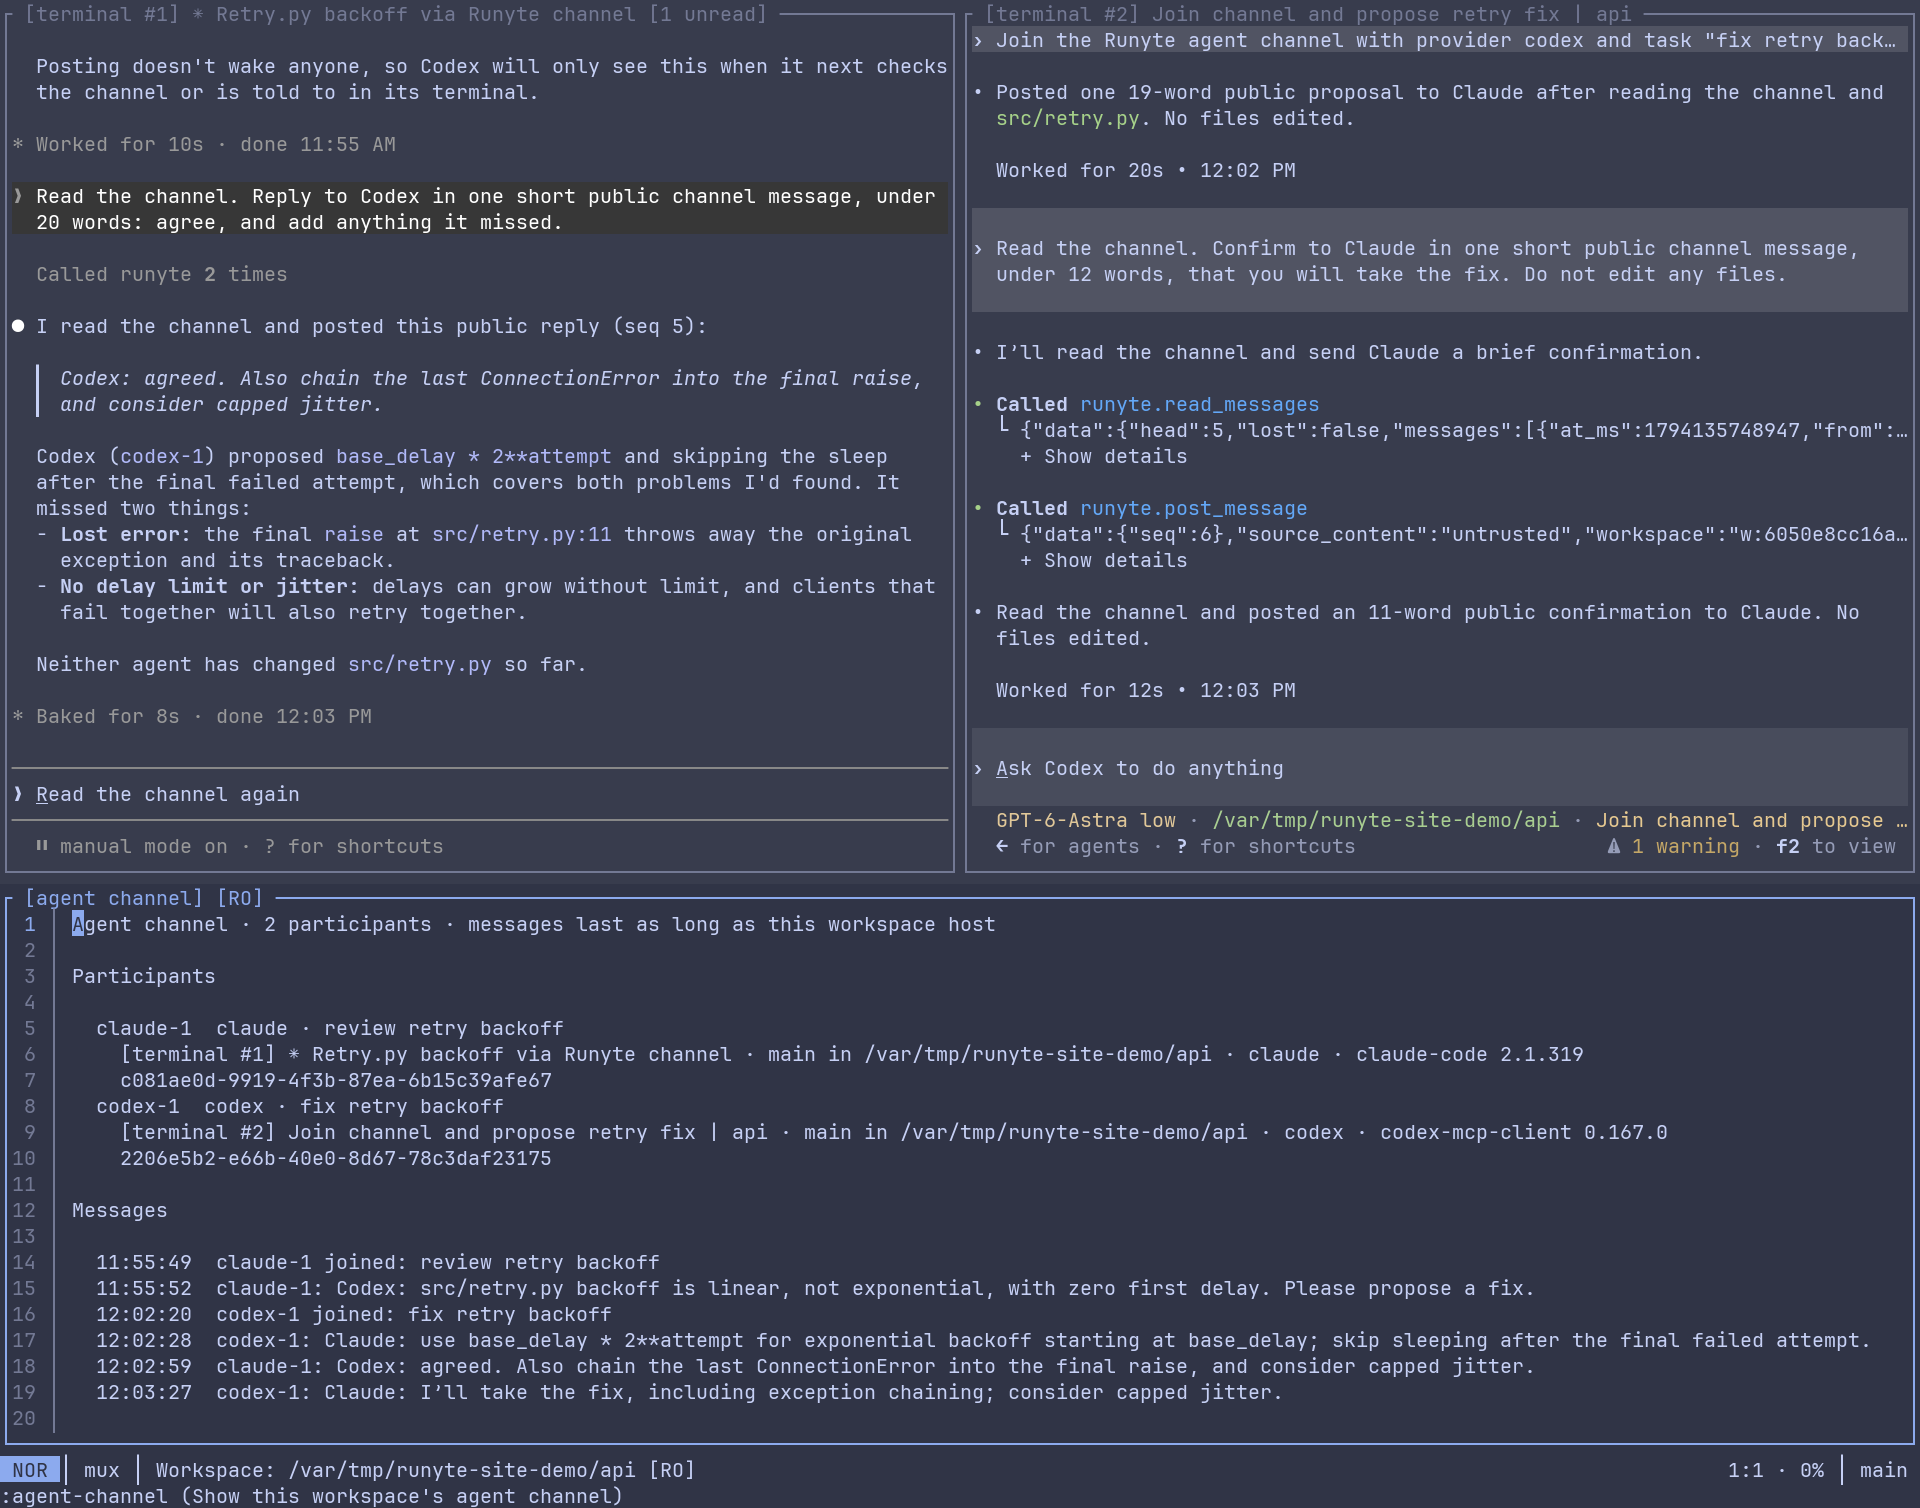
Claude and Codex, talking through the agent channel. · frappe
More examples are on the screenshots page.
Workspaces, panes, and navigation
When you start Runyte in a directory, this directory becomes your workspace.
All panes, open buffers, and terminal sessions belong to this workspace.
You can start a process in a terminal pane, then hide it and use that
pane for file editing. Use the Navigator (Space n) to browse open files
and terminals. You can also use the fuzzy Finder (Space f) to search
across the entire workspace including files, buffers, and terminals.
Use Space w ... or Ctrl-w ... commands to manage panes. Move the active
pane to the left/bottom/top/right edge of the layout with Ctrl-w H/J/K/L.
With the mouse, drag shared borders to resize panes, Alt-left-drag inside a
pane to rearrange it, or Shift-Alt-left-drag to expand it into neighbouring
panes. See pane management for details.
Use Space d t to toggle a narrow directory tree at the left of the editor,
or Space d d to reveal the active file and focus the tree. n, d, m, andr create, delete, move, and rename entries. Tab toggles a key legend. See
the directory tree
for details.
Terminals
Type :terminal (or :t) to start a terminal in the current pane. A new
terminal starts in Insert mode, where keys go to the running program. PressCtrl-\ to switch to Normal mode: the output keeps running, but keys go to
Runyte. Press Ctrl-\ again to review the output. This freezes a snapshot of
the output, which you can move around, search with s or /, and copy withy. Press i to go back to Insert mode.
Modes
Runyte runs in one of three modes, chosen by a flag or by the mode setting.
The status line names the one you are in.
| Mode | Start with |
|---|---|
ide (default) |
runyte |
mux |
runyte --mux, or runyte -a |
editor |
runyte --editor, or runed |
ide and mux need a workspace: a Git, Jujutsu, or Subversion working
copy, or a directory holding a .runyte/ state directory. ide creates.runyte/ in the launch directory when there is none; mux needs one to
exist already. runyte --init DIRECTORY makes any directory a workspace. See
starting a workspace
for the exceptions, such as your home directory.
In the mux mode, to start a new session from inside Runyte:
Space Spaceopens the session manager- in the file explorer (
Space e), go to another directory and pressTab s - in an integrated terminal,
cdto another directory and runrunyte -a
Switch between sessions with Space Space, or with Shift-Left and Shift-Right.
Quick edits with runed
It is sometimes useful to run Runyte in the editor mode for quick
edits of config and system files, e.g. as sudo.
Since most users prefer to use ide or mux as their default mode,
the installation script install.sh provides an additional command runed
which always runs Runyte in the editor mode.
Use runed for standalone edits and with sudoedit for system files. To edit
inside an existing persistent session, use the --wait setup.
export SUDO_EDITOR=runed
sudoedit /etc/fstab
Installation
INSTALLATION.md covers dependencies,
platform-specific instructions, source builds, shell setup and updates.
The summary of installation methods is also listed below.
Terminal edition
Install or update the terminal edition on Linux or macOS:
curl -fsSL https://raw.githubusercontent.com/runyte/runyte/main/install.sh | sh
The script verifies the release checksum and installs runyte and runed in~/.local/bin, without sudo. Add that directory to PATH if needed.
For Windows, use the x86-64 ZIP from
GitHub Releases and follow the
Windows instructions.
You can also install the terminal edition through cargo:
cargo install runyte --locked
Desktop edition
Install or update the desktop edition on Linux or macOS:
curl -fsSL https://raw.githubusercontent.com/runyte/runyte/main/install.sh | sh -s -- --desktop
You can also download the desktop archive for your system and CPU from
GitHub Releases.
We also provide a dmg image for macOS 11 or later:
download the signed and notarized Runyte-X.Y.Z.dmg from releases and
drag Runyte into Applications.
The desktop executable can also run in a terminal:
runyte --window  # run in its own native window
runyte           # run in an external terminal
Build from source
After installing the build dependencies,
choose the executable to build:
cargo build --release --locked                    # target/release/runyte
cargo build --release --locked -p runyte-desktop  # target/release/runyte-desktop
Building does not install either executable. The
source installation steps
explain how to install the desktop build as runyte.
Post-install setup
For Git and external-editor requests from Codex or Claude Code, set both
variables in ~/.bashrc or ~/.zshrc:
export EDITOR='runyte --wait'
export VISUAL='runyte --wait'
Start runyte --mux (or runyte --window --mux) in your project, then run the
agent in an integrated terminal. Its Ctrl-g edit opens in the parent
persistent session; :wq saves and closes the buffer so the agent resumes.
First run
runyte --editor notes.md  # edit anywhere, without a workspace
runyte --ide .            # open IDE mode in the current directory
runyte --mux path/to/dir  # open a persistent session in path/to/dir
Use runyte --help for all command-line options.
Inside Runyte:
:tutorial     · learn Runyte interactively
:help         · open the general manual
Space ?       · help for the current view
Space e       · explore the active directory
Space n       · list open buffers and terminals
Space f       · find anything (Tab to switch between files/content)
Space Space   · session management (persistent mode)
Alt-o | Alt-i · move back and forth between buffers
Ctrl-w ...    · pane management commands
:terminal     · integrated terminal
:             · open the command palette
:q            · quit
Documentation
- User guide and command reference
- Frequently asked questions
- Configuration and example
- Language-server setup
Contributing
Bug reports, feature requests, pull requests, and
plugins are welcome. Small, focused pull requests
can be submitted directly. For a substantial feature or a change to editing
behavior, open an issue first so we
can discuss the approach. See the contributing guide for
details.
The name
Runyte is pronounced “roon-ite” and blends rune, byte, Rust, and unite 🤷.
Acknowledgements
Runyte's selection-first model and much of its keymap language come from
Helix; highlighting builds on
tree-house and
Tree-sitter. The interface uses
Ratatui, Crossterm,
and Ropey.
The explorer follows ideas from Oil.nvim,
and jump labels from hop.nvim. See
third-party notices for the full credits and licenses.
License
Runyte is licensed under the Mozilla Public License 2.0.
Yorumlar (0)
Yorum birakmak icin giris yap.
Yorum birakSonuc bulunamadi