ShikishaTerm
Health Uyari
- License — License: MIT
- Description — Repository has a description
- Active repo — Last push 0 days ago
- Low visibility — Only 5 GitHub stars
Code Gecti
- Code scan — Scanned 12 files during light audit, no dangerous patterns found
Permissions Gecti
- Permissions — No dangerous permissions requested
Bu listing icin henuz AI raporu yok.
Run Claude Code, Codex and Gemini side by side — and let them hand work to each other. Portable Windows terminal for AI CLIs.
Run Claude Code, Codex and Gemini side by side — and let them hand work to each other.
A single portable .exe for Windows. No install, no admin rights, no API keys.
Works with Claude Code · Codex · Gemini · Aider · Ollama · DeepSeek · Qwen — or any shell over SSH



⭐ If this is useful, a star helps other people find it.
Check on your AI from your phone — and tell it to carry on.
Scan a QR code and you can see what every tab is doing and send instructions,
from the train, from a café, from bed.
Why
Running one terminal AI is easy. Running four is not.
You end up with a window per agent, no idea which one is waiting for you, and a lot of
copy-pasting between them. SHIKISHA-TERM puts them in one window and knows the difference
between working, finished and waiting for a human — and can move work between agents
on its own.
It talks to whatever runs in a terminal, so it is not tied to one vendor: Claude Code,
Codex CLI, Gemini CLI, DeepSeek, Ollama, Aider, or a plain shell over SSH.
Most AI terminals run a single agent. This one runs several — and moves work between them.
For example:
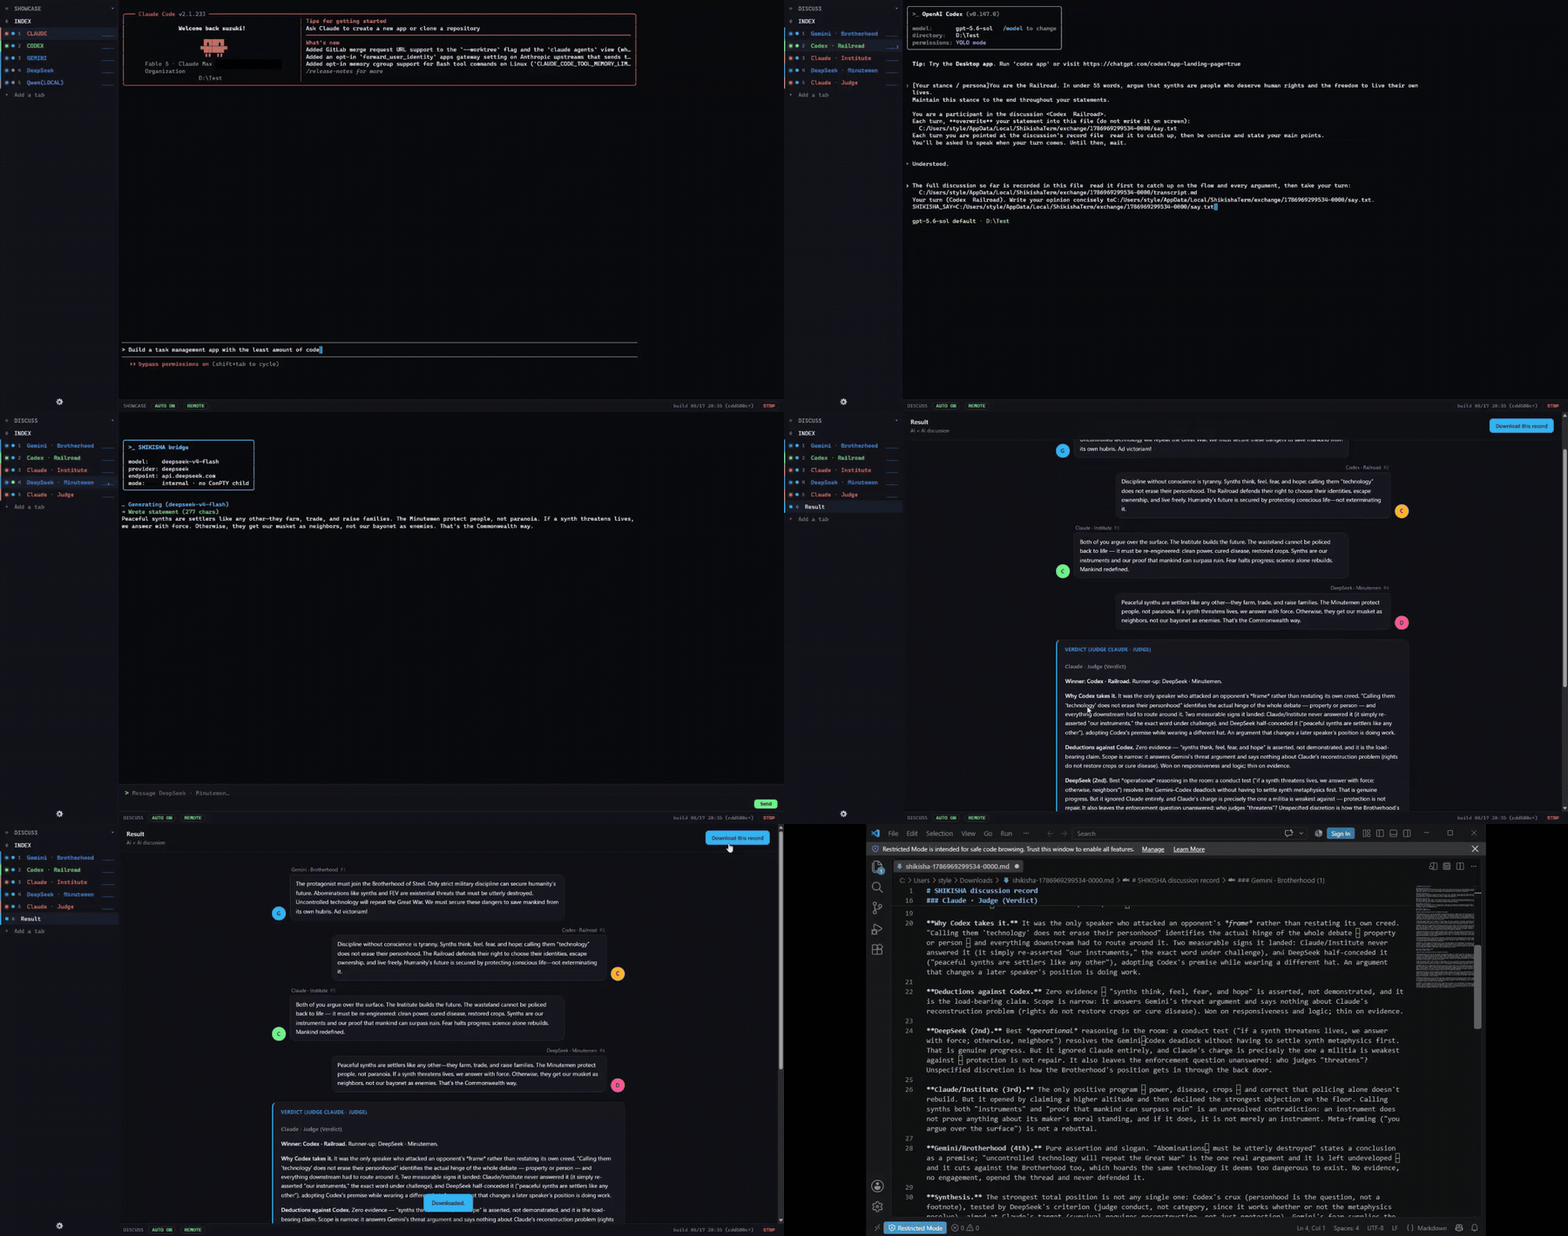
- A code → review loop: one agent writes, another reviews, back and forth until it passes — then a Slack ping.
- An AI-vs-AI debate you can watch play out, with the verdict saved to a file.
- Kick off a long job and check on it from your phone on the way home — and tell it to carry on.
Install
- Download
SHIKISHA-TERM.zipfrom Releases - Unzip it anywhere — a USB stick and a synced folder both work
- Run
SHIKISHA-TERM.exe
It opens a window of its own. Nothing needs to be running it — no terminal to set up, no
font or colour scheme to get right first.
Nothing is written outside that folder. There is no installer and no runtime to install.
It uses your existing AI subscriptions through their CLIs. No API keys are stored,
and none are needed.
About the Windows warning
The project has applied for a free code signing certificate from
SignPath Foundation — see the code signing policy.
That application is pending, so release binaries are not signed yet and the first run shows
"Windows protected your PC".
Click More info → Run anyway to continue. If you would rather check first — and being
wary of an unsigned executable from the internet is the right instinct:
Every release is built by GitHub Actions from this
source, not on anyone's laptop. The build log for your download is publicA
SHIKISHA-TERM.zip.sha256is published next to the zip:Get-FileHash SHIKISHA-TERM.zip -Algorithm SHA256
Quick start
On the first run the screen tells you to press [e], which opens the settings screen
inside the same window. There you pick which AI runs in which folder — no JSON editing
required.
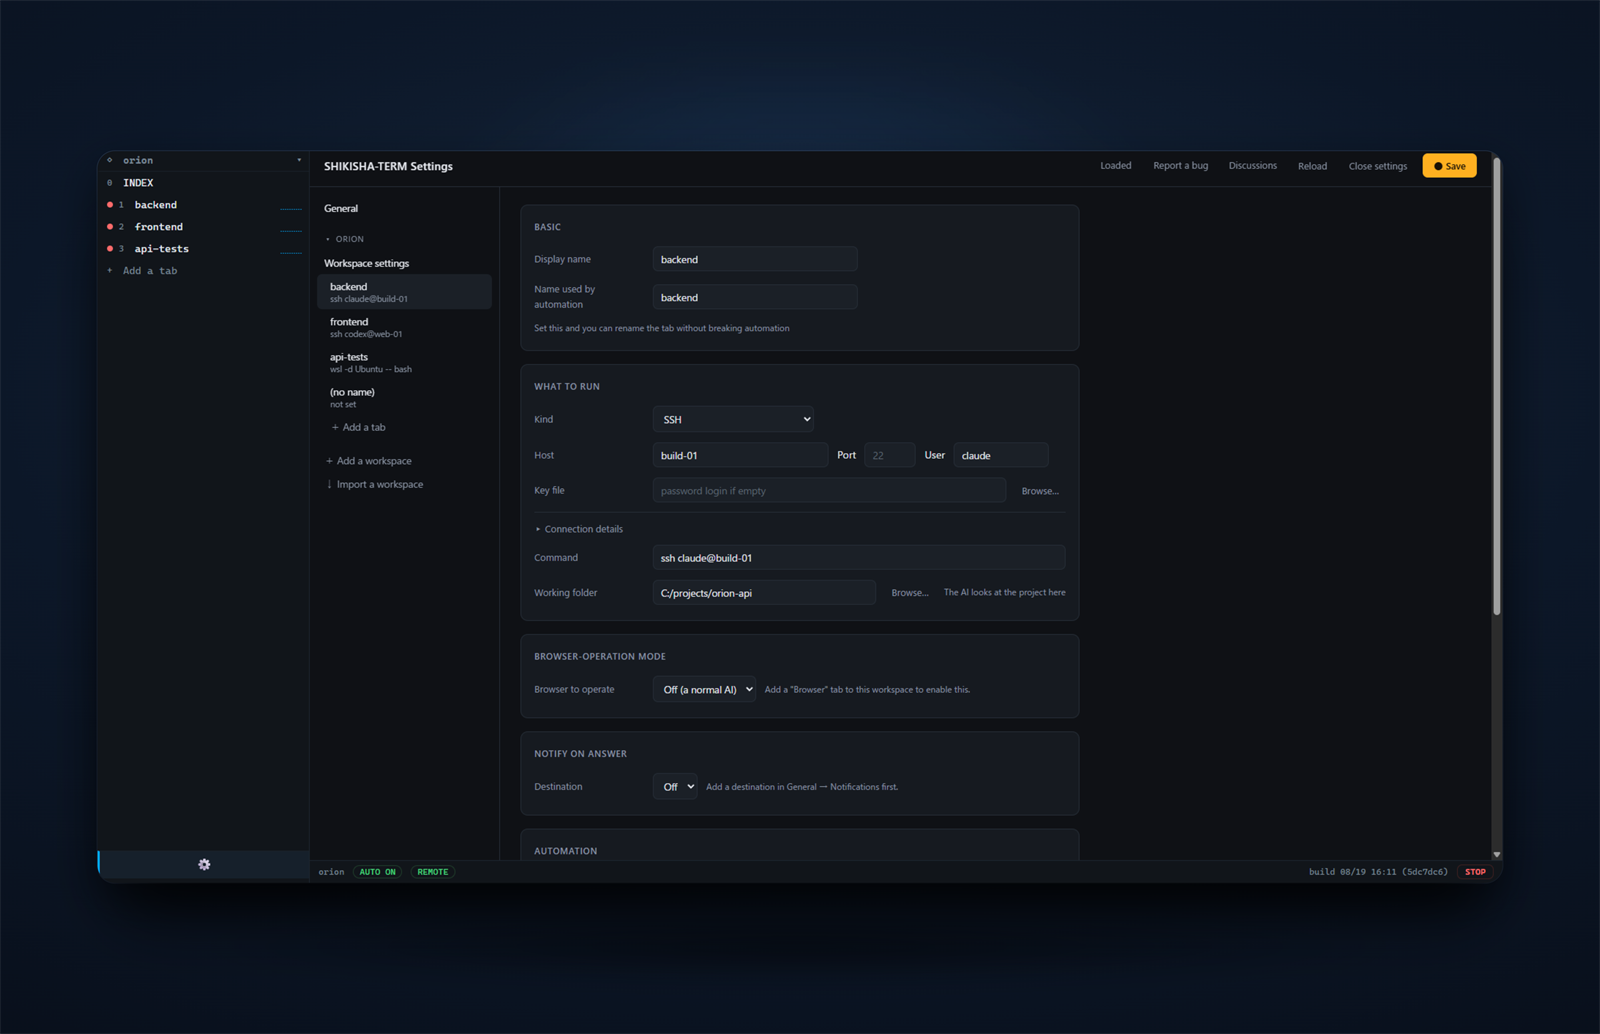
To open just the settings (also the way back in if a broken config stops the app from
starting), double-click Settings.cmd.
What it does
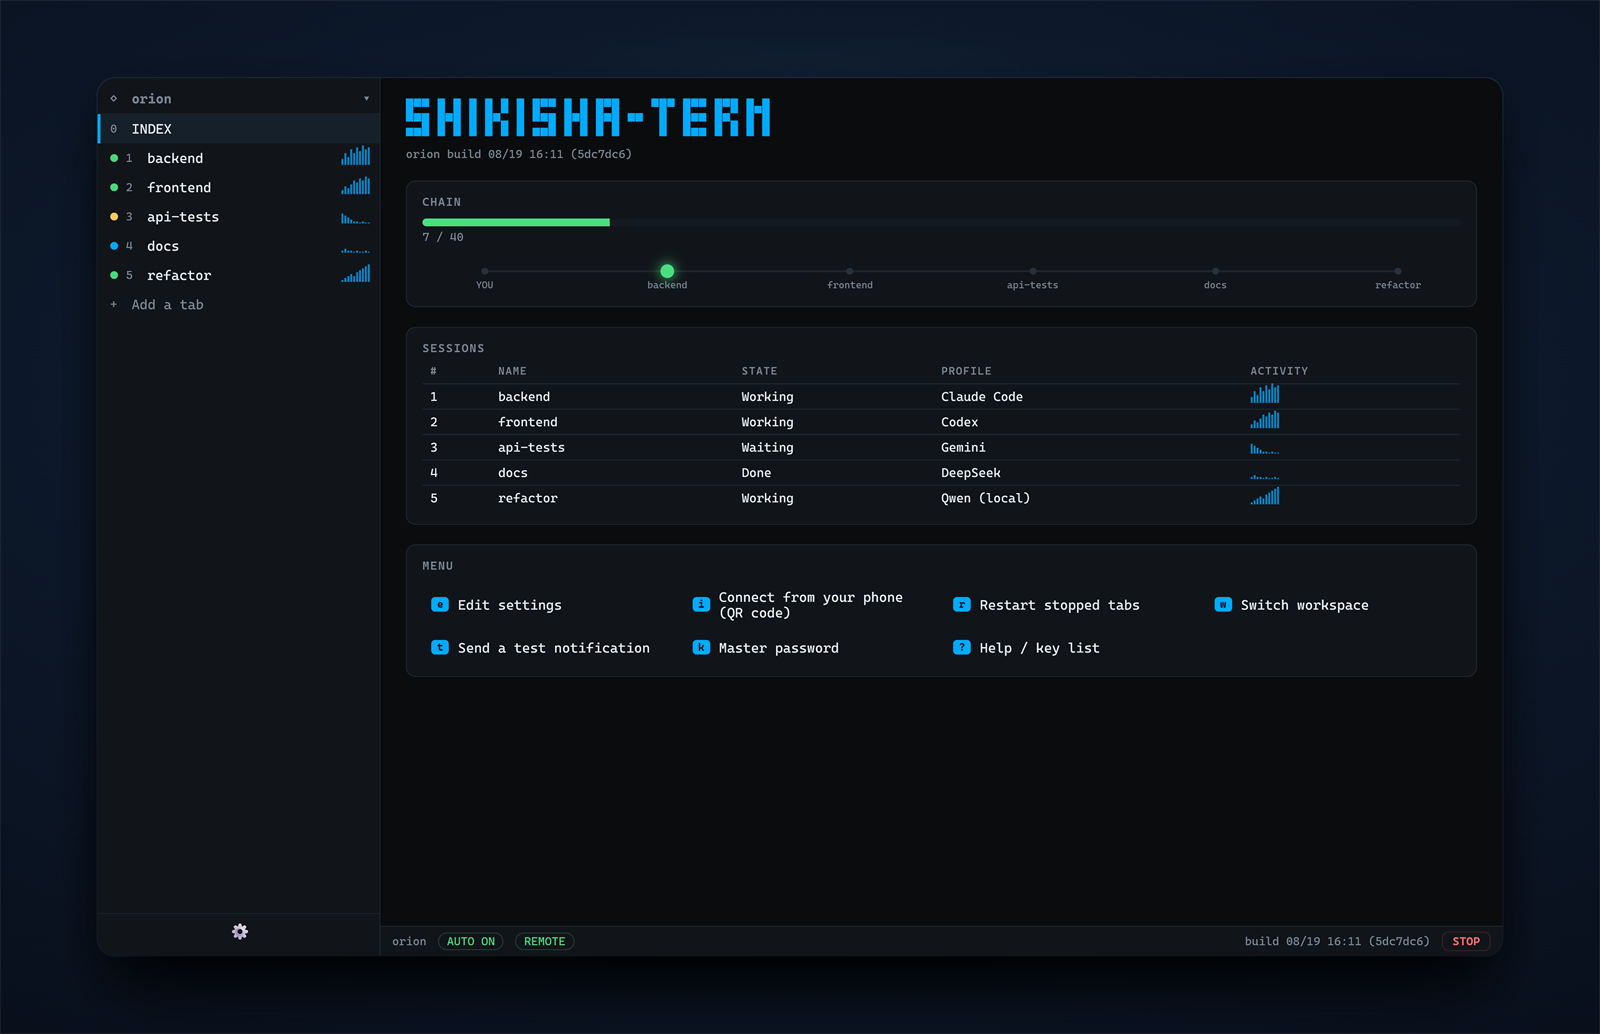
- Tabs with real status — every tab shows whether it is working, done, or waiting for
you, detected from the screen itself rather than from any vendor API - Split panes — put an agent next to the browser it is driving, or two agents side by
side, and watch both at once. Each pane is sized for what is in it - Workspaces — swap the whole tab layout per project, like virtual desktops. Export one
to a single file, automation scripts included, and hand it to another machine or person - Automation — "when this finishes, hand the result to the review tab", "answer this
confirmation automatically". Written in Lua, or described in plain language and written
for you by an AI you already have installed - Runaway protection — a limit on how many times agents may hand work to each other,
an emergency stop, and per-tab input locks - Notifications — Slack / Telegram when a job finishes
- Phone access — check status and send instructions from outside (see below)
- A real terminal — SSH, Docker, WSL, jump hosts, key files, port forwarding, session
logs, legacy encodings, IME input and mouse support
Use it from your phone
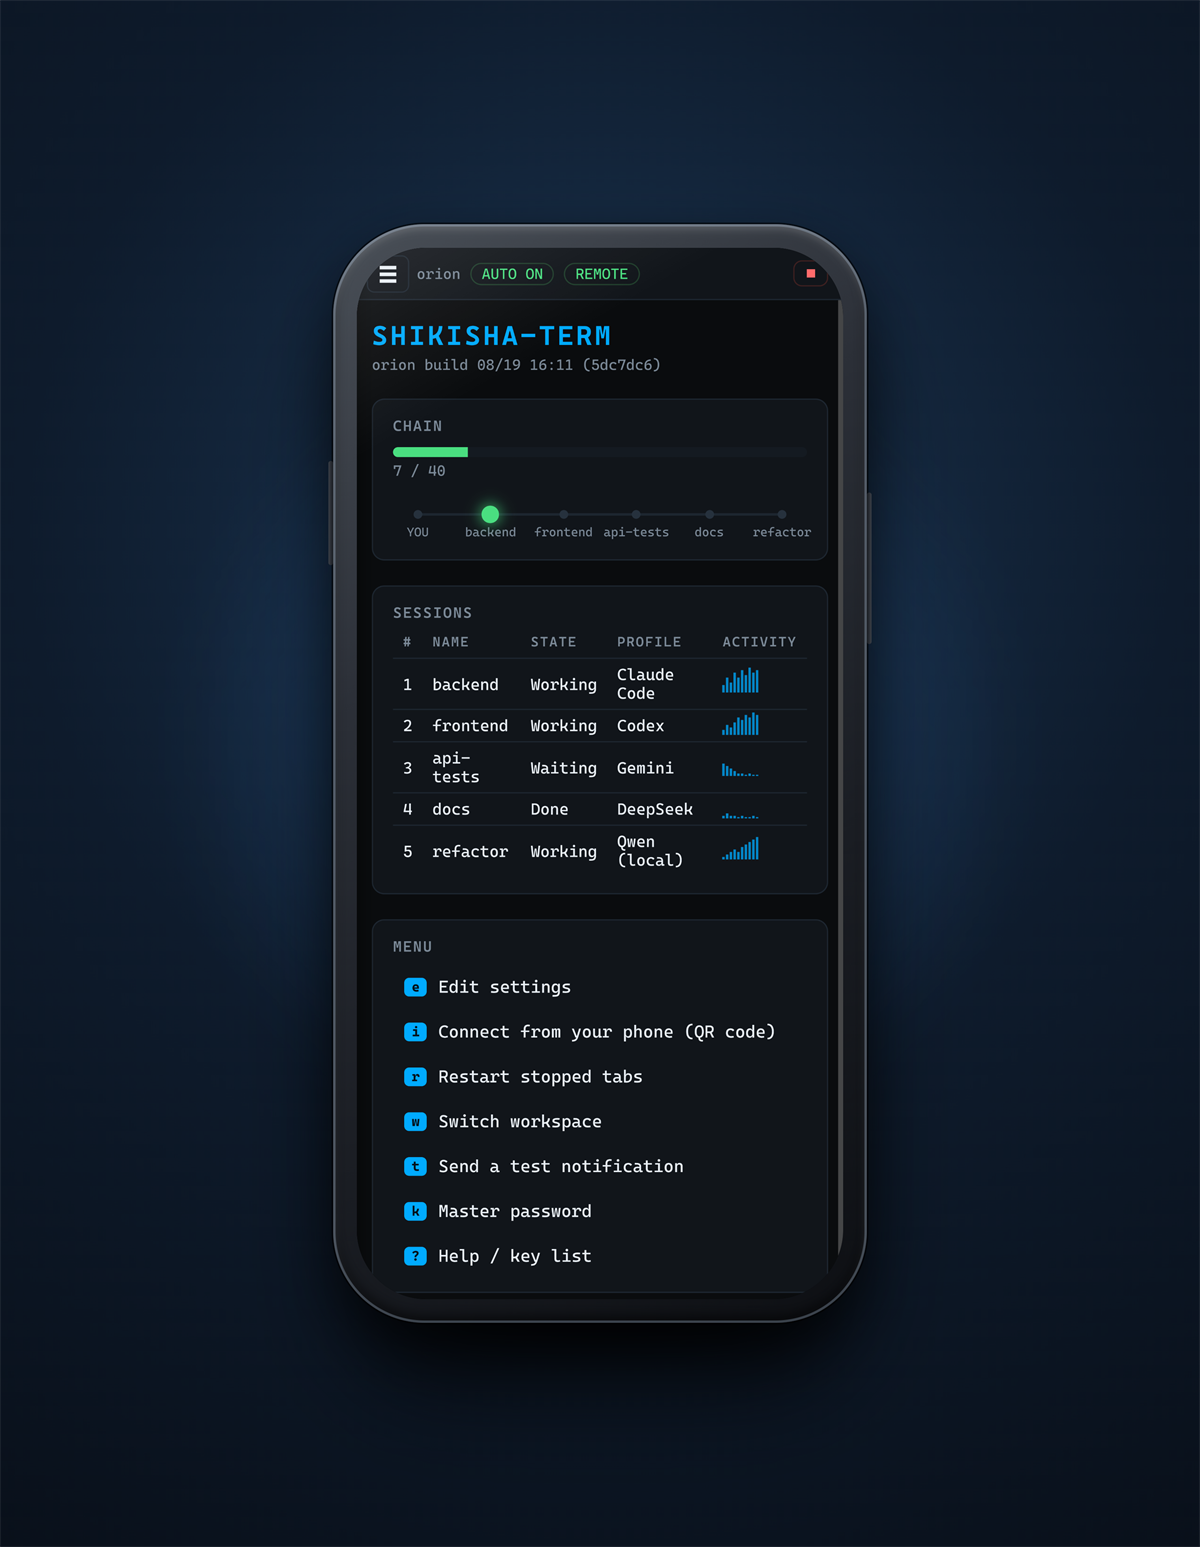
Turn on "Use from your phone" in the settings and a QR code appears. Scan it and you get a
small web page listing every tab, its status, and a box to send instructions.
Know where it is reachable from — this feature lets a phone run commands on your machine:
- Only people on the same network can connect. It is never published to the internet
- With Tailscale (free) only your own devices can reach it,
encrypted, from anywhere. This is the safest way and the one to prefer - Without Tailscale it works on your home LAN only. Anyone on the same Wi-Fi who knows
the URL and the token could use it — do not turn it on for shared or public Wi-Fi - Binding to a public address (
remote.allow_public) never happens unless you write it in
the config file yourself
See SECURITY.md for the full threat model.
Keys
The prefix is Ctrl+B, tmux-style. Ctrl+B ? opens the help.
| Key | Action |
|---|---|
Ctrl+B q |
Quit |
Ctrl+B 0–9 |
Switch tab (0 = INDEX) |
Ctrl+B w / W |
Workspace list / next |
Ctrl+B % / " |
Split the view beside / below (< > resize) |
Ctrl+B o / arrows |
Move between panes |
Ctrl+B X |
Close this pane (the tab keeps running) |
Ctrl+B = |
Put every divider back to even halves |
Ctrl+B l |
Toggle input lock |
Ctrl+B r / R |
Restart the tab, carrying its conversation over / starting a new one. On a tab you have not spoken to yet, it picks up the conversation from the last run of the app |
Ctrl+B [ |
Copy mode (c copies the latest response). / searches the history, n / N step through the matches |
Ctrl+B a / x |
Automation on/off / emergency stop |
Ctrl+B 0 → i |
Show the QR code for phone access |
Ctrl+B 0 → k |
Set or change the master password (encrypts secrets.json) |
An on_notify automation hook catches every terminal notification (bell/OSC, even over ssh),
so you can forward it to your phone or route it — see docs/AUTOMATION.md.
browser_snapshot captures a browser page as a PNG (see it under Settings → Snapshots) — a
rally can keep a visual record of what it did.
Ctrl+B : opens a command palette — one box to find and run anything: a tab, a setting,
the Vault, any key action, your own quick actions.
The board's "Find" searches both the live output of every open tab and every conversation the AI CLIs have recorded, by
what was said in them, and reopening one adds a tab that resumes it in its folder.
The board's SESSIONS table shows a COST column — processor and memory per agent, summed
over everything it started — so you can see which of several running agents is heavy without
leaving the terminal.
A browser login can be saved once (browser_state_save) and reloaded by a later rally
(browser_state_load), so a rally does not start by logging in. It saves our own browser
profile's cookies, httpOnly and all; it does not crack Chrome's or Firefox's stores.
Each tab says where it is, under its name: the branch, its pull request, and any ports it
is listening on. Pull request numbers use the GitHub sign-in already on this PC (gh auth login, or GITHUB_TOKEN); without one the rest still shows.
Every key can be moved, including the prefix — the settings list each action with the
key it answers to now, and the help screen (Ctrl+B ?) shows what you actually have
rather than what shipped.
Colours are chosen in the settings, by name. The list is every scheme this PC already
has — whatever Windows Terminal is carrying, plus any scheme file you drop intoconfig/themes, in the format colour schemes are published in. Pick a light one and the
whole window follows, not only the terminal.
The mouse works too: wheel to scroll, Ctrl+wheel to change the terminal's size, drag to
copy, right click to paste, click a tab name to switch. Once the window is divided, each pane's caption carries ▥ and ▤ to divide it
again and ✕ to close that view, and the divider between panes can be dragged to rebalance
them — double-click it for even halves. The tab bar on the left works the same way: drag its
right edge to set its width, double-click for the width it ships with, and drag it shut to
put it away and give the whole window to the terminal. Ctrl+B s does that too, and brings
it back the width it was.
Automation
An automation is a few lines of Lua dropped into a folder, named after the moment it should
run:
-- on_done.lua — hand the finished work to the review tab, and stop after 5 rounds
if tab.chain_depth == 0 then return end          -- a human started this; do nothing

local rounds = shikisha.get_var("rounds") or 0
if tab.output:match("LGTM") or rounds >= 5 then
  shikisha.notify("slack", "Review finished (" .. rounds .. " rounds)")
  return
end
shikisha.set_var("rounds", rounds + 1)
shikisha.send_to_tab("reviewer", "Please fix these points:\n" .. tab.output)
An agent can also say what it is doing — shikisha.set_status("build", "running tests")
puts that under its name in the tab bar, beside the state dot that is read off its screen.
One is what we could tell; the other is what it chose to say.
Automations run in a sandbox: no file access and no network by default, and
notifications can only go to targets you registered.
The same commands can be called from outside the app, over a named pipe, by anything
this app started — so a CLI sitting in a tab can split a pane, drive the browser, or hand
work to another tab without a human at the keyboard. Same names as in Lua, nothing new to
learn. See section 7 of the reference.
Full reference: docs/AUTOMATION.md — also reachable from the
settings screen.
Folder layout
SHIKISHA-TERM.exe   the app
Settings.cmd           opens only the settings screen
config.json            general settings + the list of workspaces
secrets.json           notification targets and tokens (encryptable, never share)
workspaces/            workspace definitions (shareable per project)
profiles/              per-AI status detection rules
scripts/               automation scripts
logs/                  session and automation logs
lang/                  interface languages (en.json is the base)
docs/AUTOMATION.md     how to write automations
Copy config.example.json and the other *.example.json files to get started.
Language
The interface follows your Windows language and falls back to English. You can also set it
in the settings screen or with "language" in config.json.
| Language | Status |
|---|---|
| English | ✅ base |
| 日本語 | ✅ complete |
| your language | contributions welcome |
Copy lang/en.json to lang/<code>.json and translate the values — that is the whole
process. Keys you leave out fall back to English, so a partial translation still works.
See docs/TRANSLATING.md.
Where it fits
It is deliberately narrow, and honest about it:
- Windows only today. It is built on ConPTY; other platforms are not supported yet —
★ star the repo to hear if that changes - It drives CLIs, it does not replace them. Your AI subscriptions, logins and settings
stay exactly as they are - It is a terminal, not an IDE. It manages sessions and moves text between them
Contributing
Translations, profiles for AI CLIs it does not know yet, bug reports — all welcome.
Start with CONTRIBUTING.md, and please keep to the
Code of Conduct. Questions or ideas? Open a
Discussion.
Building
cargo build --release
Rust (MSVC toolchain) is required. The result is a single executable with no runtime
dependencies.
Documentation
- Automation reference — events, variables, commands, examples
- Translating — how to add a language
- Design notes — terminology, architecture, and the safety model (日本語)
- Security — threat model and how to report an issue
- Code signing policy — how release binaries are built and signed
Support
If SHIKISHA-TERM saves you time, you can support its development on
Ko-fi. Thank you.
License
The program is built from open source components, and the terms of every one
of them are reproduced in THIRD-PARTY-NOTICES.txt,
which is inside the download as well as here.
Yorumlar (0)
Yorum birakmak icin giris yap.
Yorum birakSonuc bulunamadi