pcb-claude-plugin
Health Warn
- License — License: MIT
- Description — Repository has a description
- Active repo — Last push 0 days ago
- Low visibility — Only 5 GitHub stars
Code Pass
- Code scan — Scanned 12 files during light audit, no dangerous patterns found
Permissions Pass
- Permissions — No dangerous permissions requested
No AI report is available for this listing yet.
Claude Code plugin: from a circuit idea to a manufacturable KiCad PCB
PCB Design for Claude Code
Describe a circuit board in plain English. Get a manufacturable KiCad project.
Requirements → parts → schematic → placement → autorouting → checks → Gerbers, BOM and pick-and-place,
with Claude as your electrical engineer.





Getting started ·
How it works ·
CLI reference ·
Troubleshooting ·
Changelog
/pcb:design a USB-C powered ESP32-C3 board with an RGB status LED, reset and boot buttons, and a 4-pin sensor header
Claude asks a few questions (size, power, connectors, how you'll build it, anything noise-sensitive),
picks real parts, follows each chip's datasheet, validates every pin, builds the schematic and board
in KiCad, looks at its own renders to fix the layout, routes it, runs electrical and noise checks,
and hands you files a fab house can build.
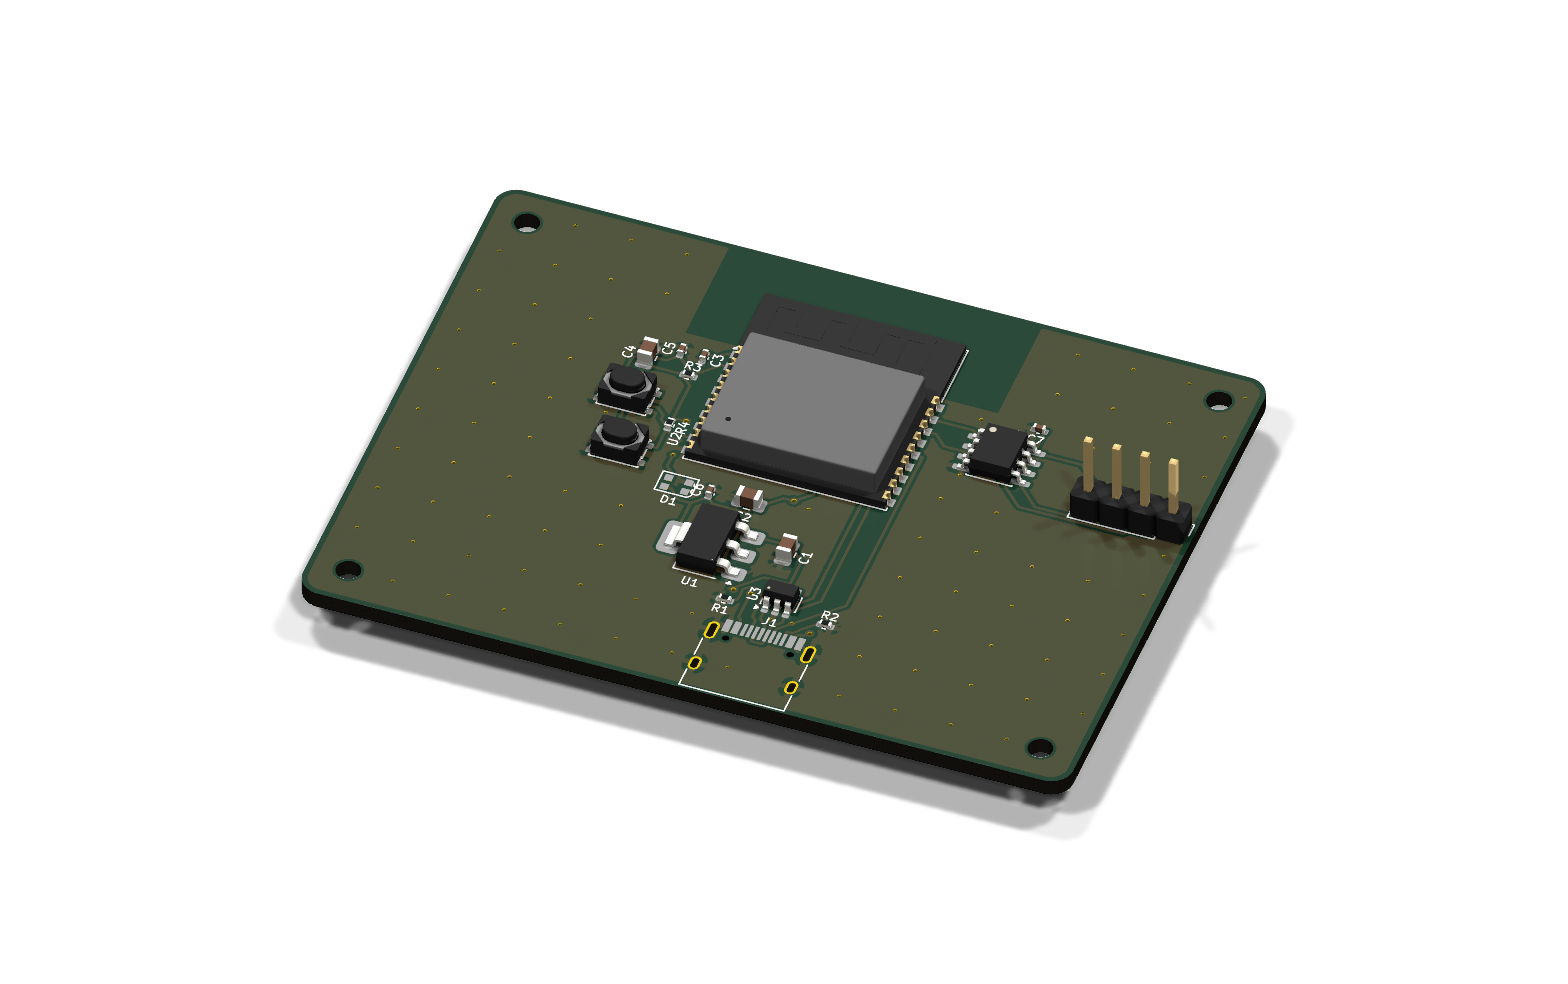
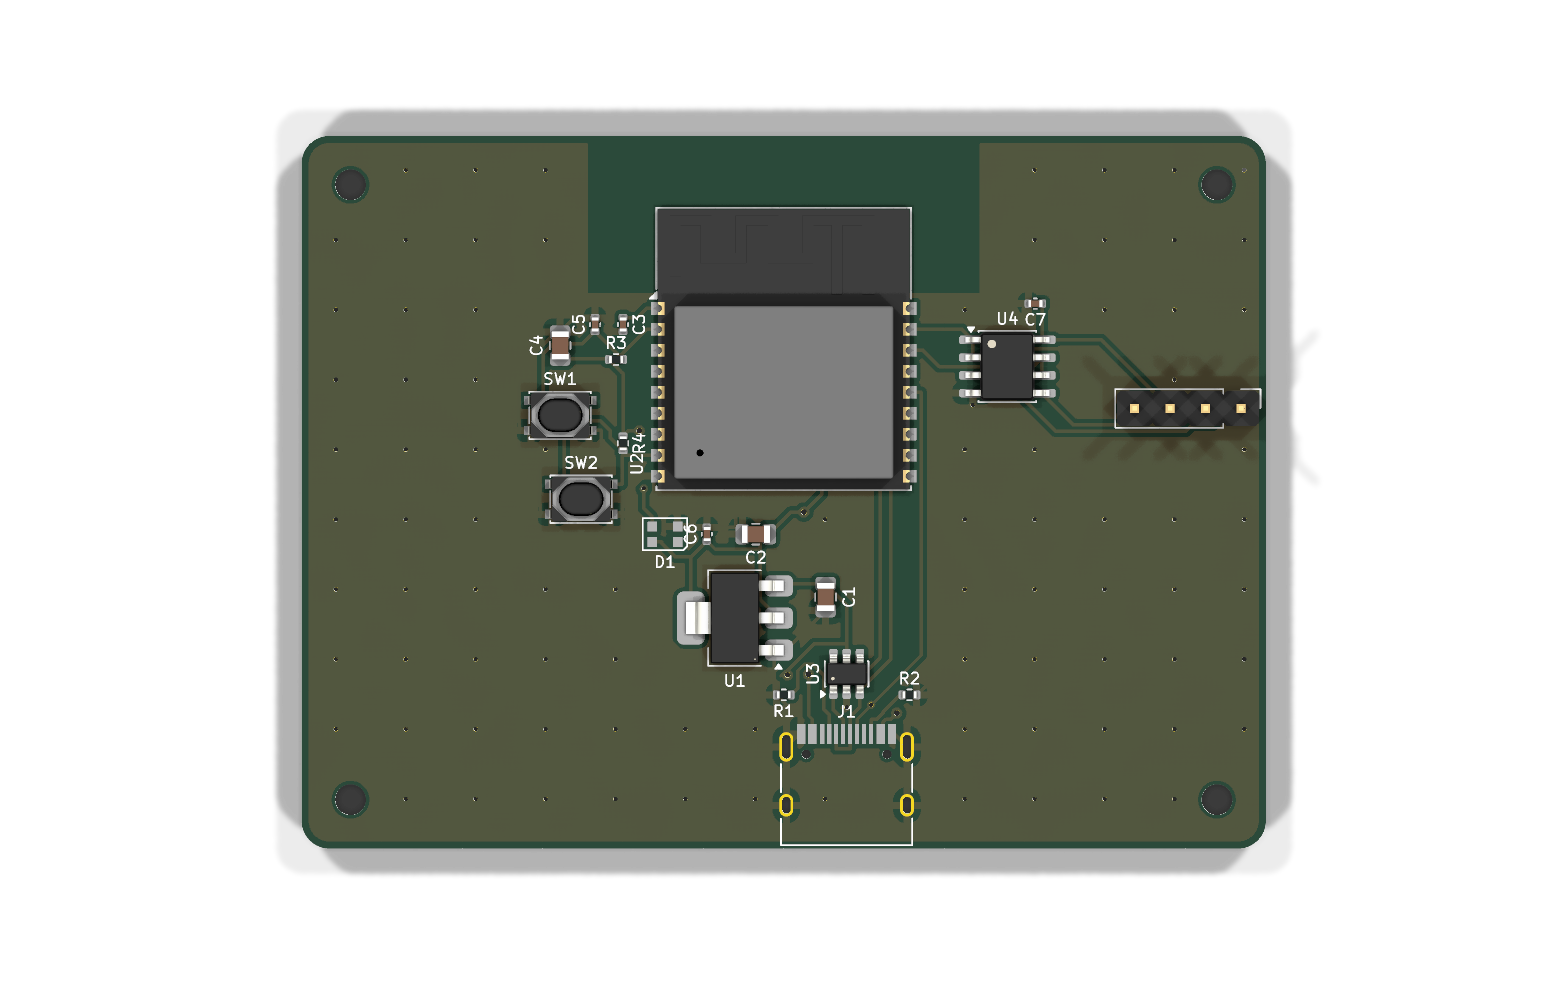 ESP32-C3 sensor node: USB-C, LDO, ESD, buttons, RGB LED, dual op-amp. 0 DRC errors · antenna keep-out respected · decoupling ≤ 2 mm from every supply pin |
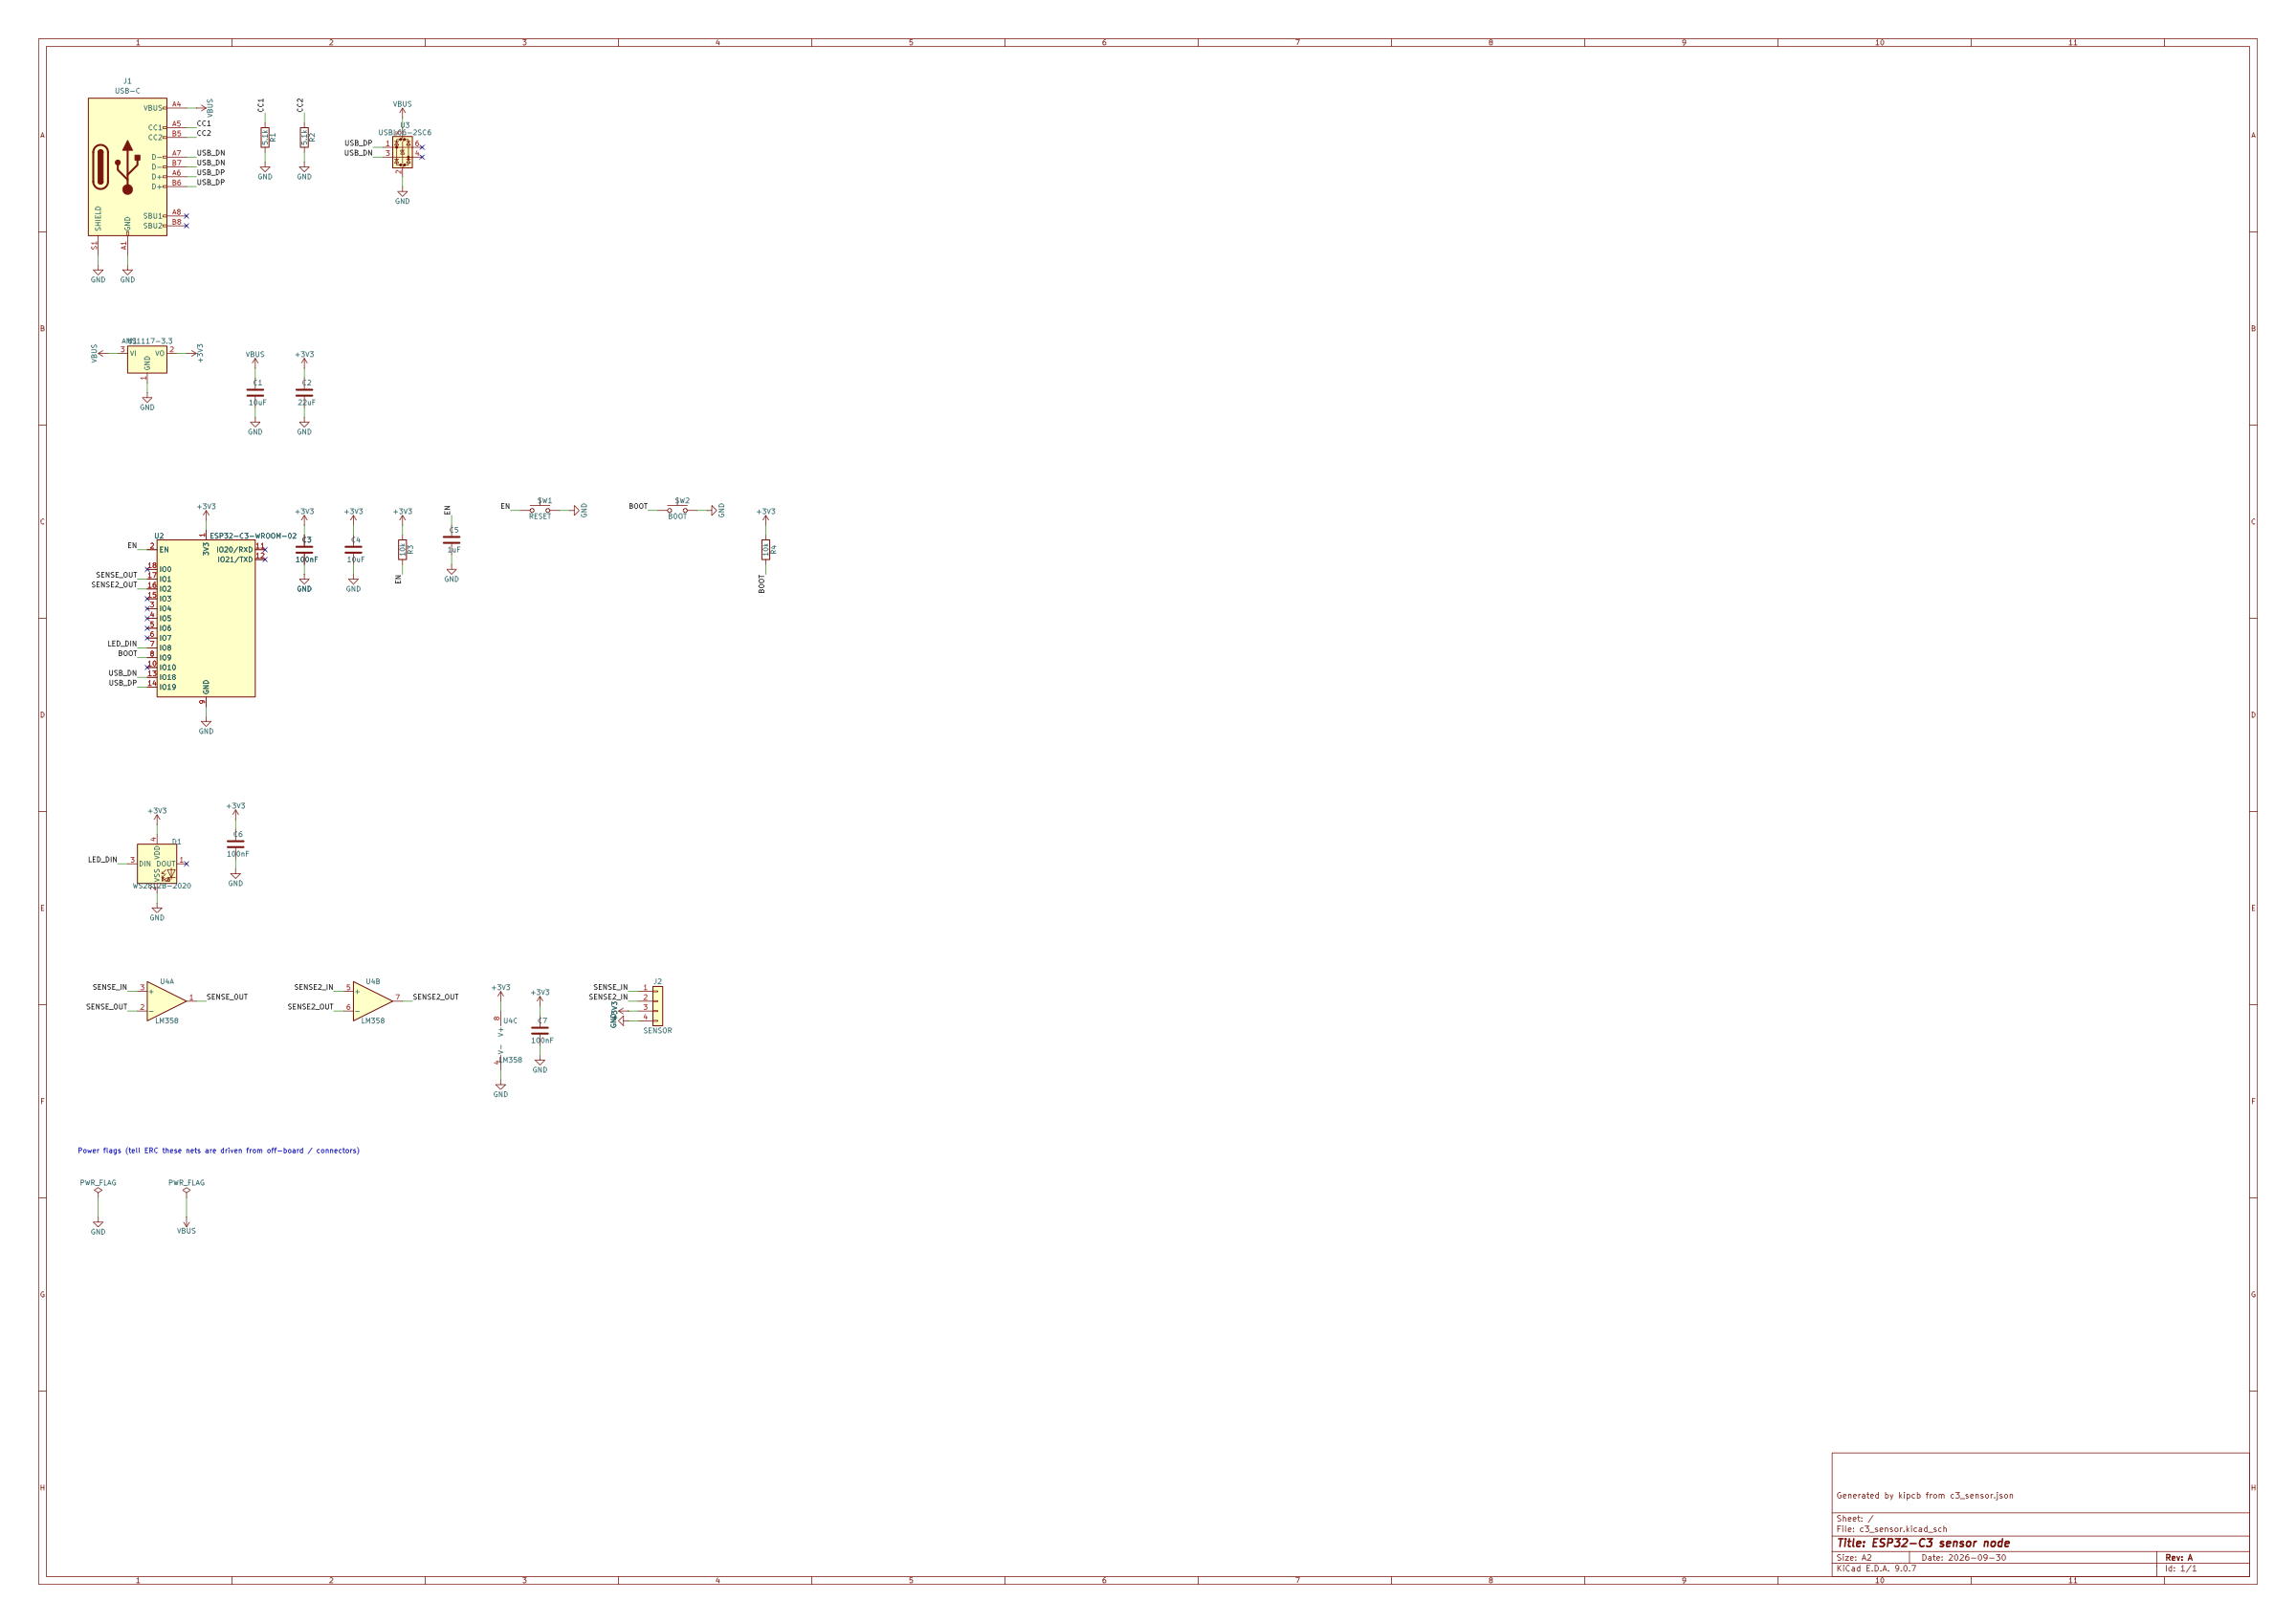 Generated schematic: grouped by function, labelled nets, standard power symbols, ERC-clean, editable in KiCad |
What you get
| Command | What it does |
|---|---|
/pcb:design [idea] |
The full workflow: requirements, part selection, schematic, placement, routing, checks and manufacturing files |
/pcb:review [project] |
Reviews any KiCad project: ERC, DRC, noise checks, a netlist checklist and renders, as a prioritized list of fixes |
/pcb:fab [project] |
Gerbers and drill zip, JLCPCB-format BOM and pick-and-place file, plus an ordering checklist |
pcb:circuit-reviewer |
A subagent that gives an independent second opinion on the circuit against datasheets |
kipcb |
The engine behind it all; also usable on its own (reference) |
Every design is a normal KiCad 9 project (.kicad_pro, .kicad_sch, .kicad_pcb) that you can open and edit at any point.
Highlights
- Asks before it designs: board size, power budget, connector edges, build method and noise sensitivity are pinned down first, not guessed.
- Prebuilt, verified building blocks: USB-C power or data, 3.3 V regulators, a LiPo charger, ESP32-C3/S3 and ATmega328P cores, LEDs, buttons, I²C, Qwiic, a MOSFET load switch and more, each one line in a design. No part research, pin lookups or datasheet reading for standard circuitry, and the parts you use are remembered for next time.
- Real parts, verified pins: every symbol and footprint comes from KiCad's libraries; every pin is checked, and unused pins must be marked deliberately.
- Placement that follows the rules of thumb: connectors flush to edges facing out, decoupling caps first and right at their pins, room for ICs to fan out, noisy parts kept away from sensitive ones.
- Routing that finishes: Freerouting with several strategies, a completion pass, ground pours on both layers and stitching vias.
- Electrical checks before layout: 3.3 V / 5 V logic-level mismatches, rail current budgets, and regulators that would overheat.
- Noise checks: decoupling distance, ground-plane integrity, crosstalk, crystal and switching-regulator layout, differential pairs, supply track width.
- Right-sized boards: auto-sized boards shrink to fit their parts while keeping room to route.
- Gets smarter with use: routing strategy, board sizing and footprint clearances improve with every board you route, and
kipcb refshows how open-source designs wire each chip (how). A knowledge base built from hundreds of real boards ships with the plugin. Everything stays on your machine.
Installation
Works the same on macOS and Windows 10/11. Only step 1 differs; every
step after it is the same command on both. Run them in Terminal (macOS) or
PowerShell (Windows).
1. Requirements
You need Claude Code, KiCad 9 and Java 21+ (for the autorouter).
| macOS (Terminal, with Homebrew) | Windows (PowerShell) |
|---|---|
|
KiCad 9: Java: |
Git for Windows (Claude Code on Windows runs commands in Git Bash): KiCad 9: Java: |
Install Claude Code the usual way for your
system (desktop app or terminal). Nothing else is needed: the plugin runs on
the Python that comes with KiCad.
2. Add the marketplace
claude plugin marketplace add virajrungta/pcb-claude-plugin
3. Install the plugin
claude plugin install pcb@pcb-claude-plugin
Or, inside Claude Code, run /plugin install pcb --marketplace virajrungta/pcb-claude-plugin instead of steps 2 and 3. That opens a short setup form (below).
4. Set your defaults (optional)
Inside Claude Code, open the settings form with /plugin configure pcb@pcb-claude-plugin. From a terminal, pass them when installing instead:
claude plugin install pcb@pcb-claude-plugin --config fab_house=JLCPCB --config layers=2
| Setting | Options | What it changes |
|---|---|---|
| Default PCB manufacturer | JLCPCB · PCBWay · OSH Park · Other | BOM / pick-and-place format and the design rules Claude aims for |
| How boards get built | Assembled by the manufacturer · Hand soldering | Part sizes (0402/0603 vs 0805+) and stocked-part preference |
| Default layer count | 2 · 4 | Starting layer count for new boards |
| Learn from my boards | on · off | Whether kipcb remembers what worked (stored only on your computer) |
| Show design progress in the status bar | on · off | Live progress bar at the bottom of Claude Code while a board is designed |
5. Check the setup
Start a new Claude Code session. The plugin welcomes you and checks KiCad, Java and the autorouter, and only speaks up again if something is missing. To confirm it's installed:
claude plugin list
For a full toolchain check, ask Claude in that session: "run kipcb doctor"
(the kipcb tool is available inside Claude Code sessions, not in a plain
terminal).
6. Design your first board
/pcb:design a 30 x 20 mm USB-C LED blinker with an ATtiny85 and an ISP header
In the Code tab, click + next to the prompt box → Plugins → Add plugin, add the
marketplace virajrungta/pcb-claude-plugin, select PCB Design, and choose a scope.
The getting started guide walks through a first board end to end.
7. Progress in your status bar (optional)
While a board is being designed, Claude reports progress after each step:
PCB progress ■■■■■□□□□ 5/9 · ▶ Routing (~1 min)
It's also pinned in Claude Code's status bar, where it updates live. That's
automatic, through the install option Show design progress in the status
bar (on by default). It never replaces a status line you already have, it's
empty when no design is in progress, and turning the option off removes it.
Updating
A new version ships every week (see the changelog and releases). Third-party plugins don't update on their own unless you turn auto-update on, so update when a new version is out:
1. Refresh the marketplace
claude plugin marketplace update pcb-claude-plugin
2. Update the plugin
claude plugin update pcb@pcb-claude-plugin
3. Check the version
claude plugin list
Then restart Claude Code; the next session tells you which version you're on and links to what's new.
Inside Claude Code: /plugin → Installed → PCB Design → Update now.
Auto-update: /plugin → Marketplaces → pcb-claude-plugin → Enable auto-update; new versions then download in the background.
Uninstall
claude plugin uninstall pcb@pcb-claude-plugin
Your designs and local learning data stay on disk (see below).
Where files live
| macOS | Windows | |
|---|---|---|
| Your boards | the folder you design in (hardware/<name>/) |
the folder you design in (hardware\<name>\) |
| Settings, learning, progress | ~/.local/share/kipcb |
%LOCALAPPDATA%\kipcb |
| Downloads and indexes (Freerouting, library index) | ~/.cache/kipcb |
%LOCALAPPDATA%\kipcb\cache |
| KiCad (found automatically) | /Applications/KiCad |
C:\Program Files\KiCad\9.0 |
| Open a board in KiCad | open hardware/<name>/<name>.kicad_pro |
start "" hardware\<name>\<name>.kicad_pro |
Examples
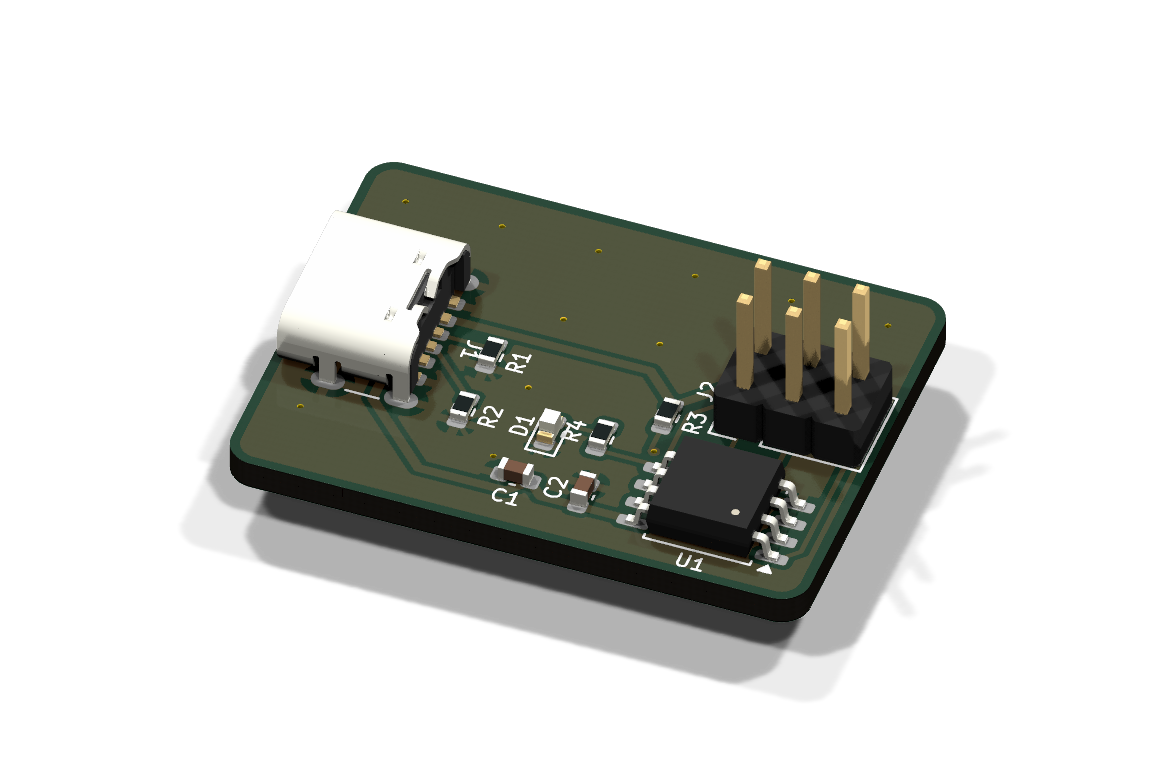 usb_blinker.json: 30 × 22 mm, ATtiny85, USB-C power, ISP header.
c3_blocks.json builds a 21-part ESP32-C3 board from four blocks in about 30 lines.
|
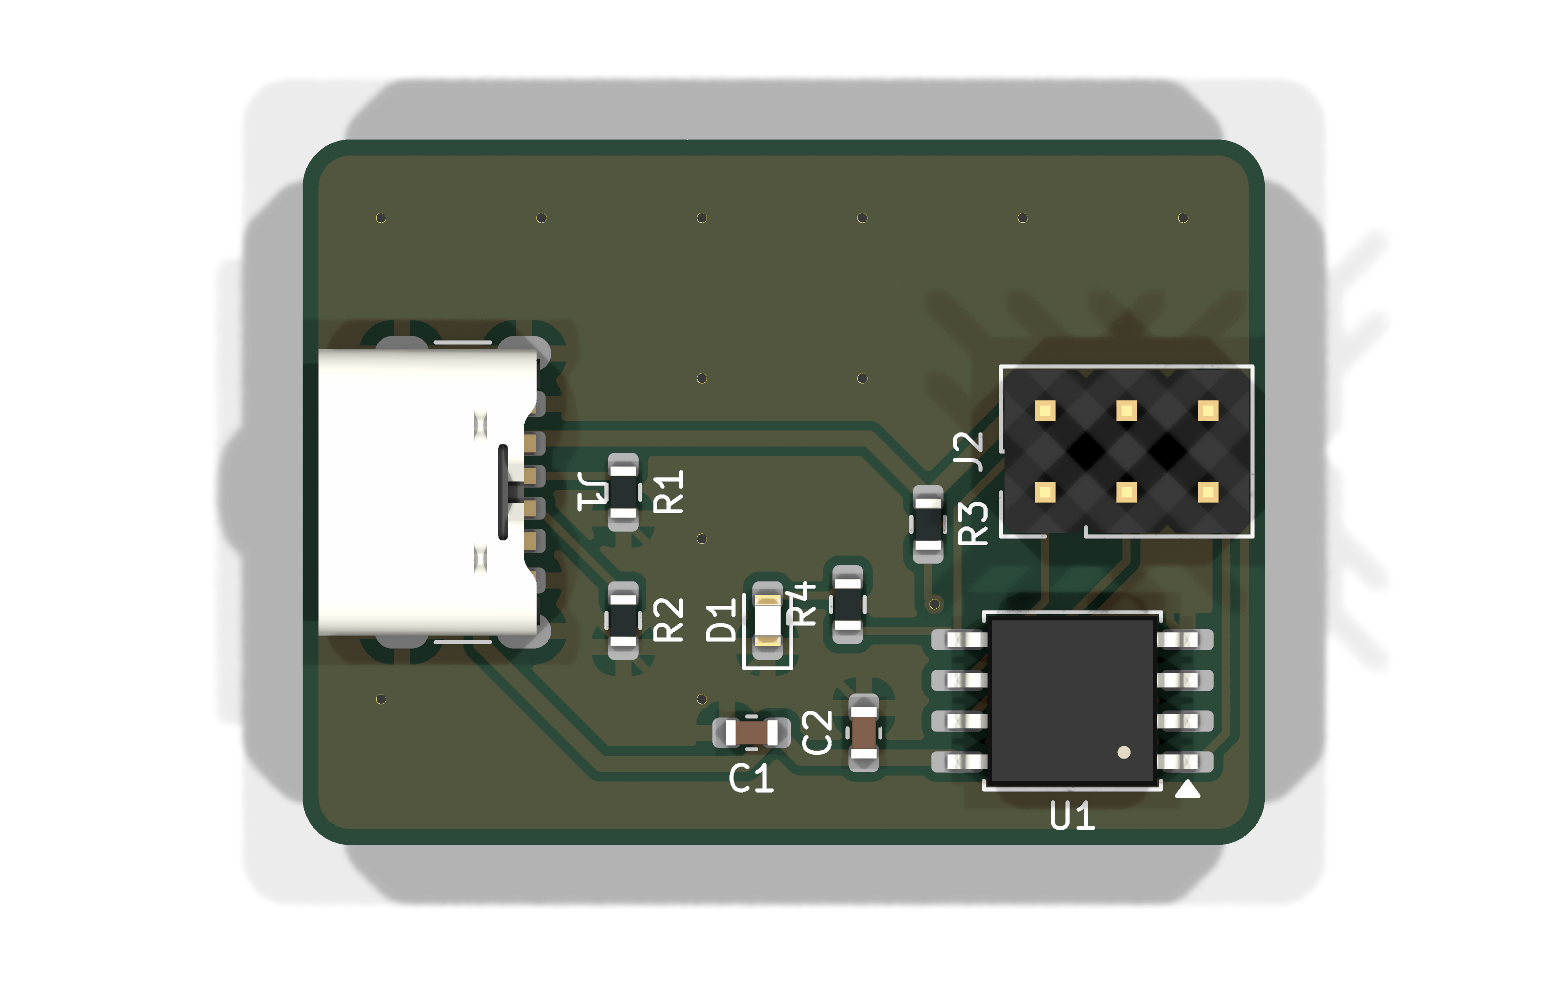 Routed on the top layer so the bottom stays a solid ground plane |
Build one yourself from a clone. One command runs the whole pipeline (about 20 seconds) and ends with a report:
bin/kipcb run examples/c3_sensor.json
READY TO ORDER: ESP32-C3 sensor node
Project   …/examples/c3_sensor/c3_sensor.kicad_pro
Board     58 x 43 mm, 2 layers, 20 parts, 14 nets
Checks    ERC ok, DRC ok, parity ok, noise 13 pass / 3 warn / 0 fail
Power     U1 (AMS1117-3.3) 5V->3.3V at 363 mA dissipates 0.62 W; SOT-223 handles about 1.0 W
Fab       fab/c3_sensor-gerbers.zip, fab/c3_sensor-bom.csv, fab/c3_sensor-cpl.csv
Previews  previews/review.png, previews/schematic.png
Time      check 0s, build 10s, route 7s, fab 2s (total 19s)
Every project folder has the same layout: the KiCad files, fab/ (send these to the manufacturer), previews/ (images and PDFs), reports/ (REPORT.md and check results).
Documentation
| Guide | For |
|---|---|
| Getting started | Installing, your first board, opening it in KiCad, ordering |
| How it works | The pipeline, placement, routing, checks and learning |
| CLI reference | Every kipcb command, the output layout, environment variables |
| Design spec format | The JSON spec: parts, nets, placement hints, custom parts |
| Circuit patterns | Proven sub-circuits and values Claude follows |
| Layout and noise guidelines | Placement hints, routing and noise-check criteria |
| Manufacturing | Fab rules, JLCPCB assembly and the ordering checklist |
| Troubleshooting | Common problems and fixes |
Requirements
| Claude Code | Desktop app, CLI or IDE extension |
| KiCad 9 | Provides kicad-cli, pcbnew and the part libraries |
| Java 21+ | For the Freerouting autorouter (downloaded with kipcb setup-router) |
| OS | macOS, Windows 10/11 or Linux |
Limits
Autorouted boards are functional, not optimal. Switching-regulator layout, RF, controlled-impedance and
high-speed signals (USB 480 Mb/s, Ethernet, DDR) need human review or hand routing in KiCad. The plugin
flags these rather than hiding them. Always review a design before ordering boards.
Contributing
Issues and pull requests are welcome. See CONTRIBUTING.md for the development setup, tests and release process.
License
MIT © Viraj Rungta
Reviews (0)
Sign in to leave a review.
Leave a reviewNo results found